Google Analytics is a free web analytics service offered by Google that tracks and reports website traffic. It's one of the most widely used web analytics services on the Internet and is used by millions of website owners and digital marketers to measure the performance of their online assets.
Capturing customer data through your website is an essential part of any successful digital marketing strategy. This information can help you understand who your target audience is, what they are interested in, and what they need.
Floating bars are becoming increasingly popular as a way to collect website leads. By using a floating bar on your website, you can engage with visitors in real time and gather information about their needs and preferences.
Connecting your floating bar with Google Analytics is a smart move for any business. By doing so, you can see the impact that your floating bar is having on your website's performance and track key metrics like customer engagement, leads generated, and conversion rates. This information can help you make data-driven decisions about how to improve your floating bar and website, leading to higher conversion rates and increased sales.
Choose the most reliable and high-quality floating bar solution for your Google Analytics.
Why Serviceform Floating bar is the best for Google Analytics
- No need to worry about coding, making it an easy and hassle-free solution.
- Make your floating bar truly yours with easy customisation options to match your brand.
- Boost your lead generation by a whopping 40% with Serviceform's Floating bar.
- Floating bar responds contextually, offering a unique and tailored user experience.
- Serviceform’s unique Dynamic floating bar pulls real-time information from multiple pages and products, making it a cost-effective solution for lead generation.
- Keep an eye on your website and floating bar's performance with built-in analytics, at no extra cost.
- Get inspiration from our growing library of 500+ tested and proven templates, available for you to use for free.
Step 1. Create your Serviceform account
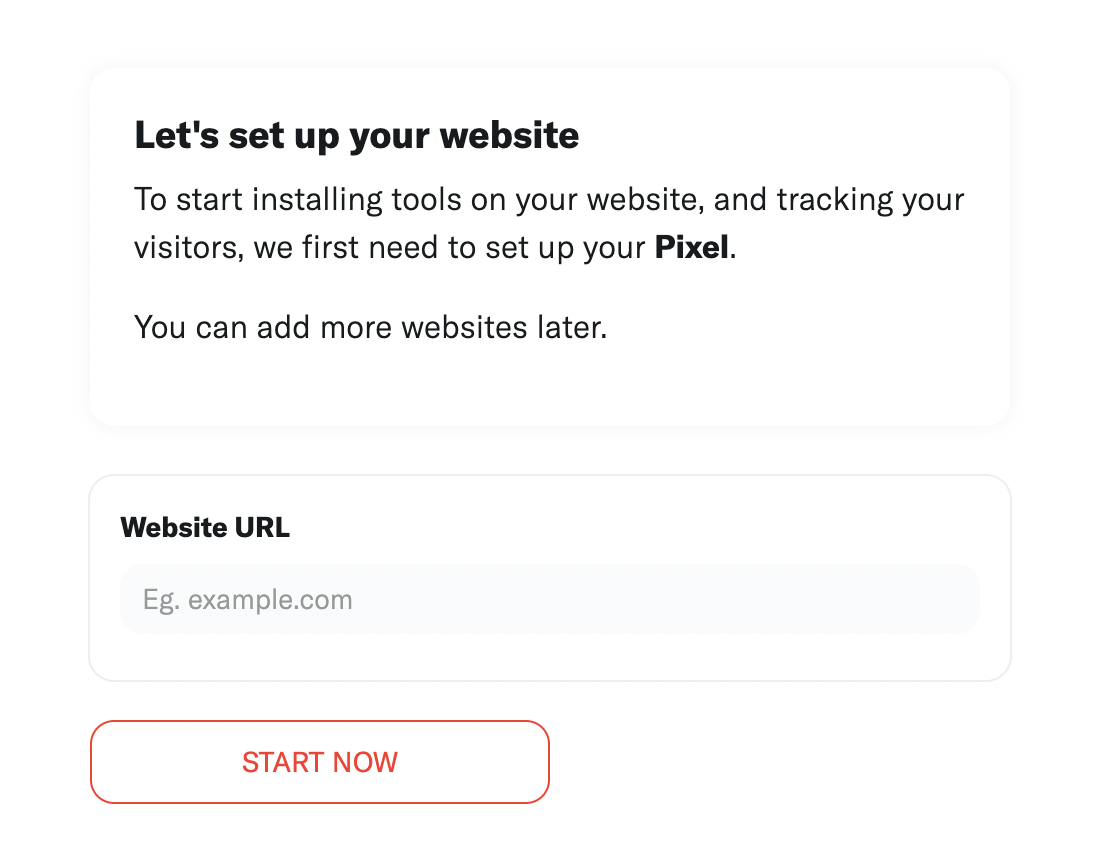
Start by creating your free Serviceform account. After that, you can generate your Serviceform pixel in the box below. To start, type your website URL and select "START NOW".
Step 2. Install the free floating bar on your website
Using HTML
If you're a tech-savvy person or have a developer in your team, it's easy to add a Serviceform Floating bar to your website using HTML.
To start, click on the website you’ve set up on your Serviceform account and select settings.
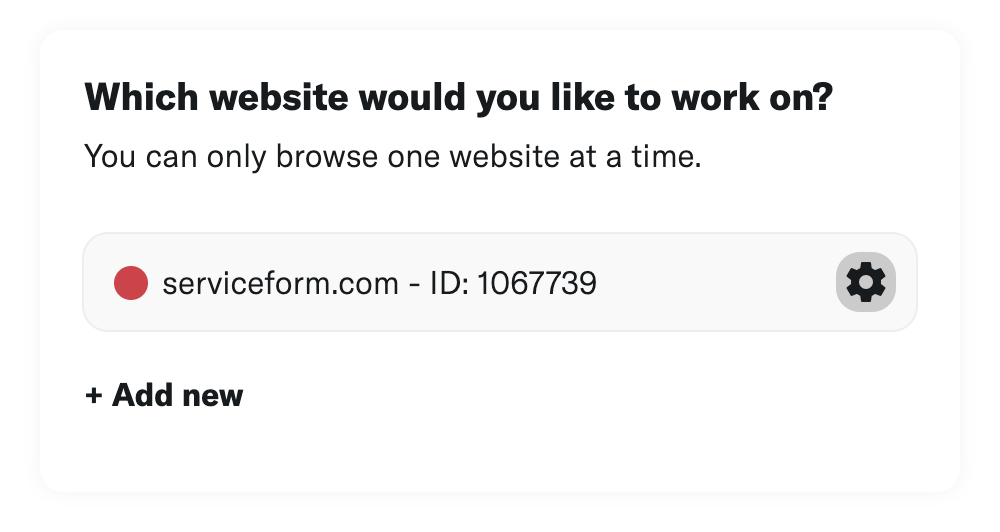
Then, copy the pixel code and paste it on the header tag section of your website.

Voila! Your website just got a lot cooler with Serviceform’s Floating bar.
Using Google Tag Manager
No worries if HTML isn't your thing. Installing the Serviceform pixel onto your website using Google Tag Manager is easy.
Simply choose the option to install via Google Tag Manager in your Serviceform account, then copy your unique pixel code.
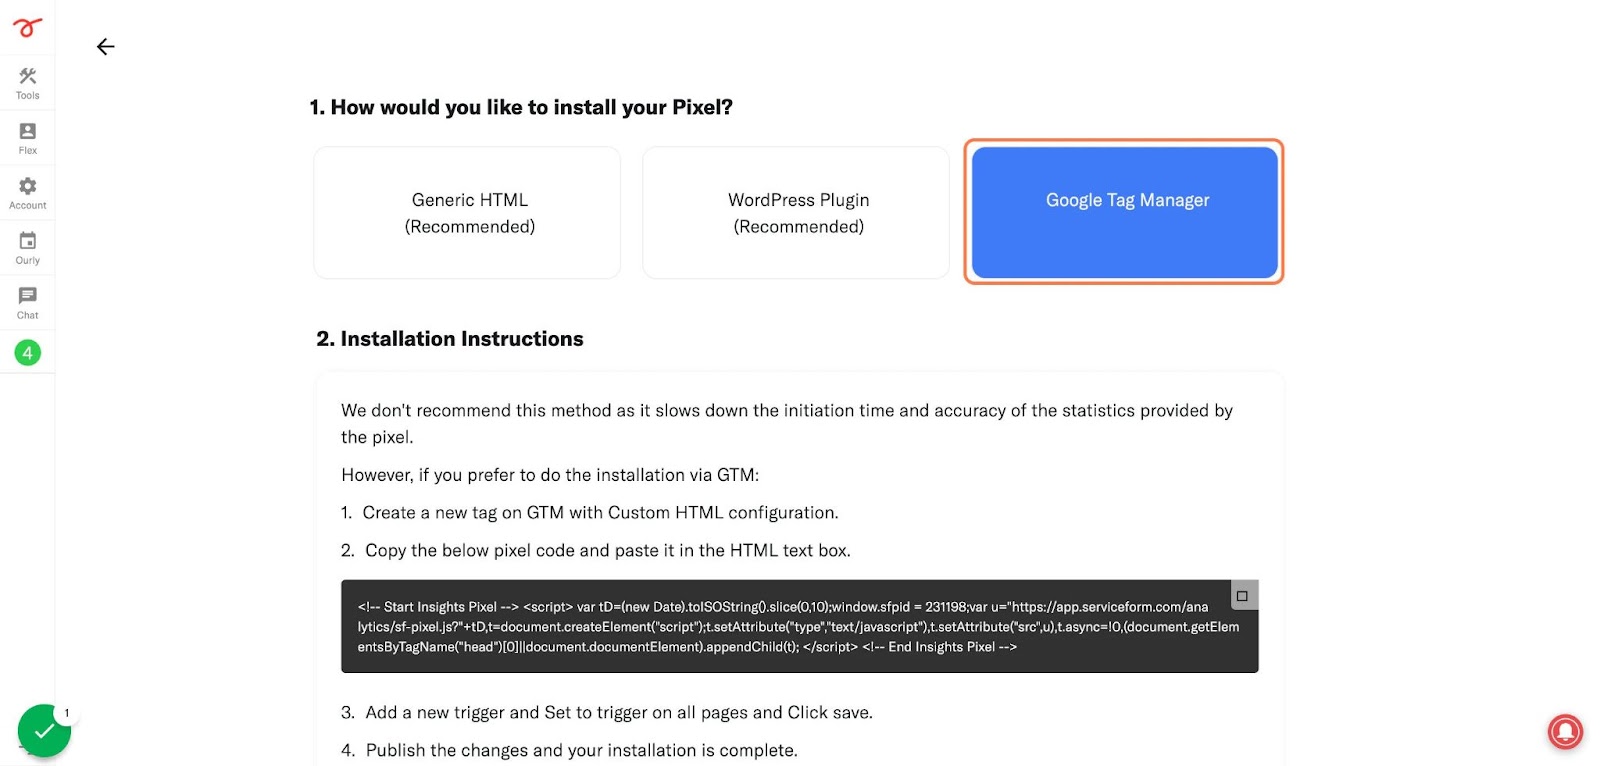
Next, head over to your Google Tag Manager account and create a new tag. Then name your tag.
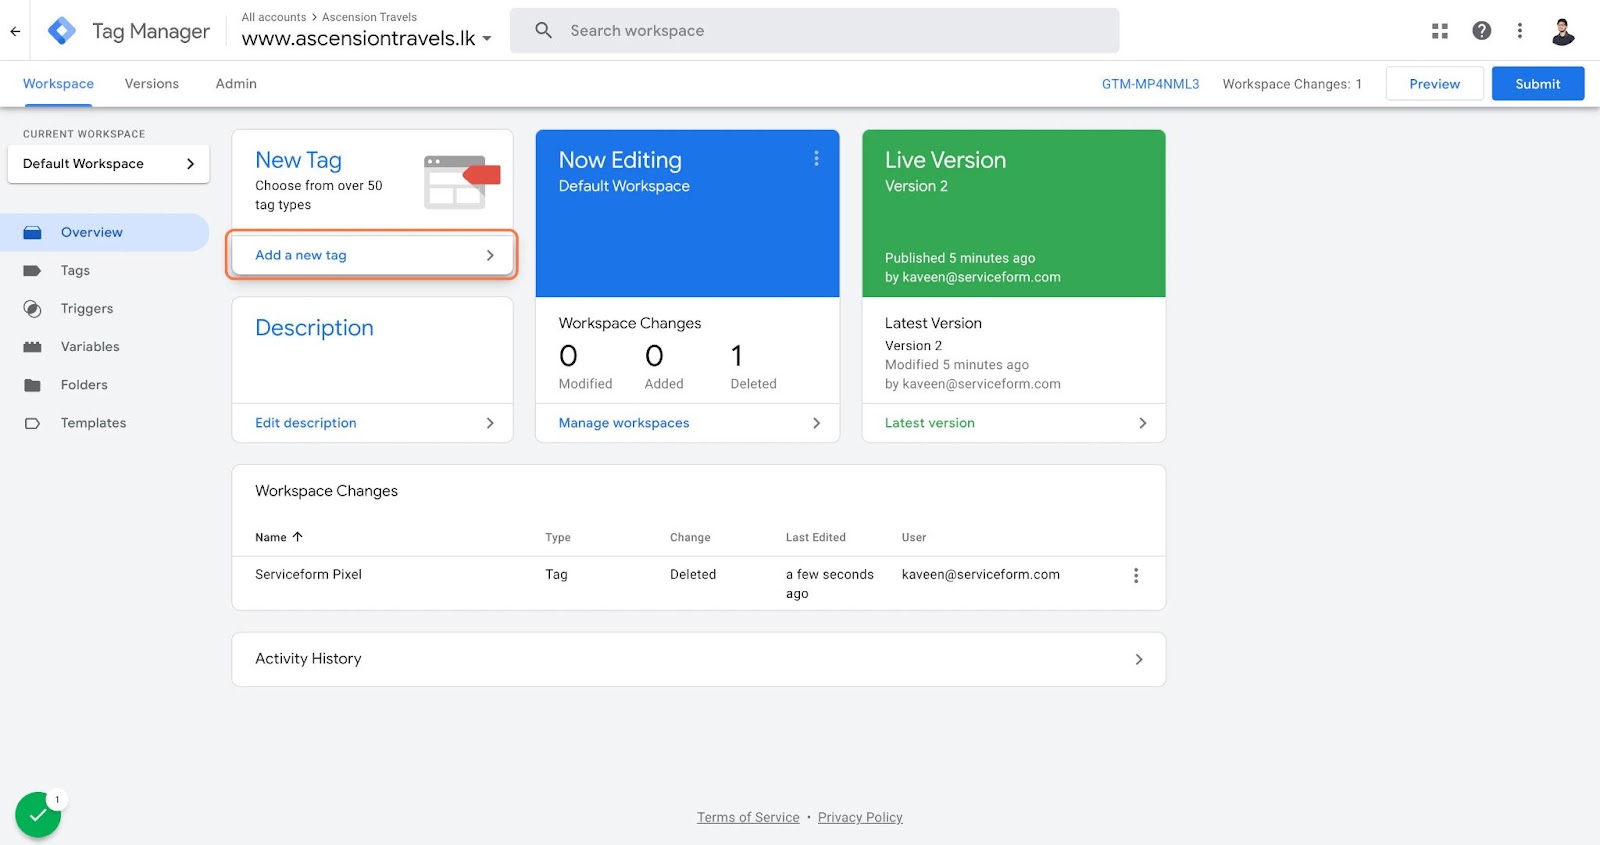
Once you've named your tag, head to the tag configuration and choose custom HTML from the drop-down menu. Then, simply paste the Serviceform pixel code you copied earlier into the code area.
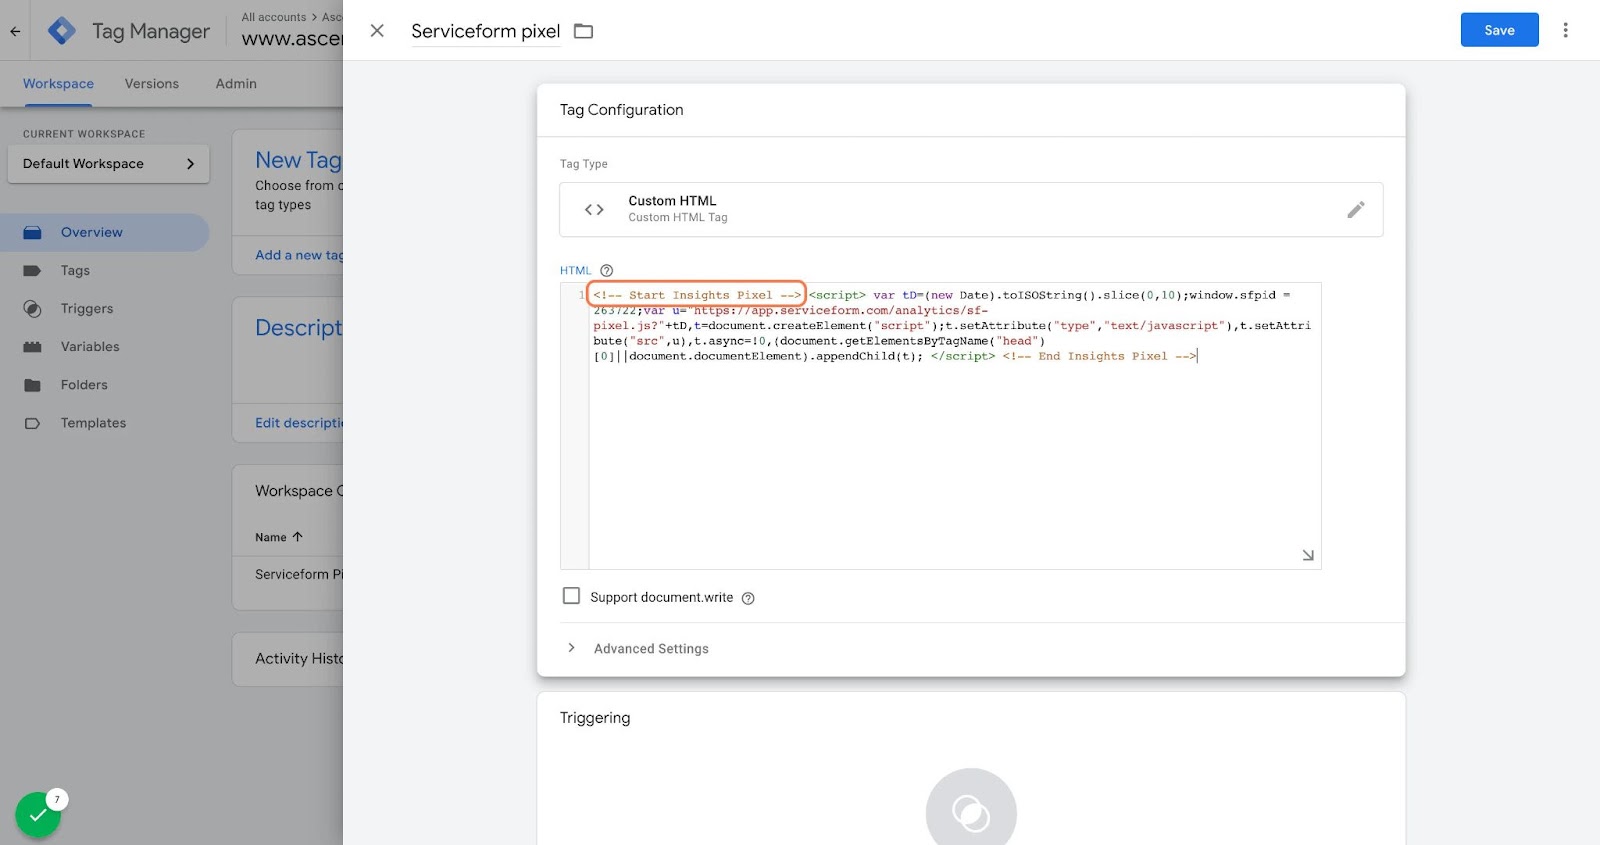
Then click on ‘triggering’ and select ‘all pages.’ Then save your work and press submit. In the submission configuration screen, type ‘Adding Serviceform pixel’ into the ‘Version name’ area, and you’re all set.
Step 3. Test if your Serviceform pixel is live
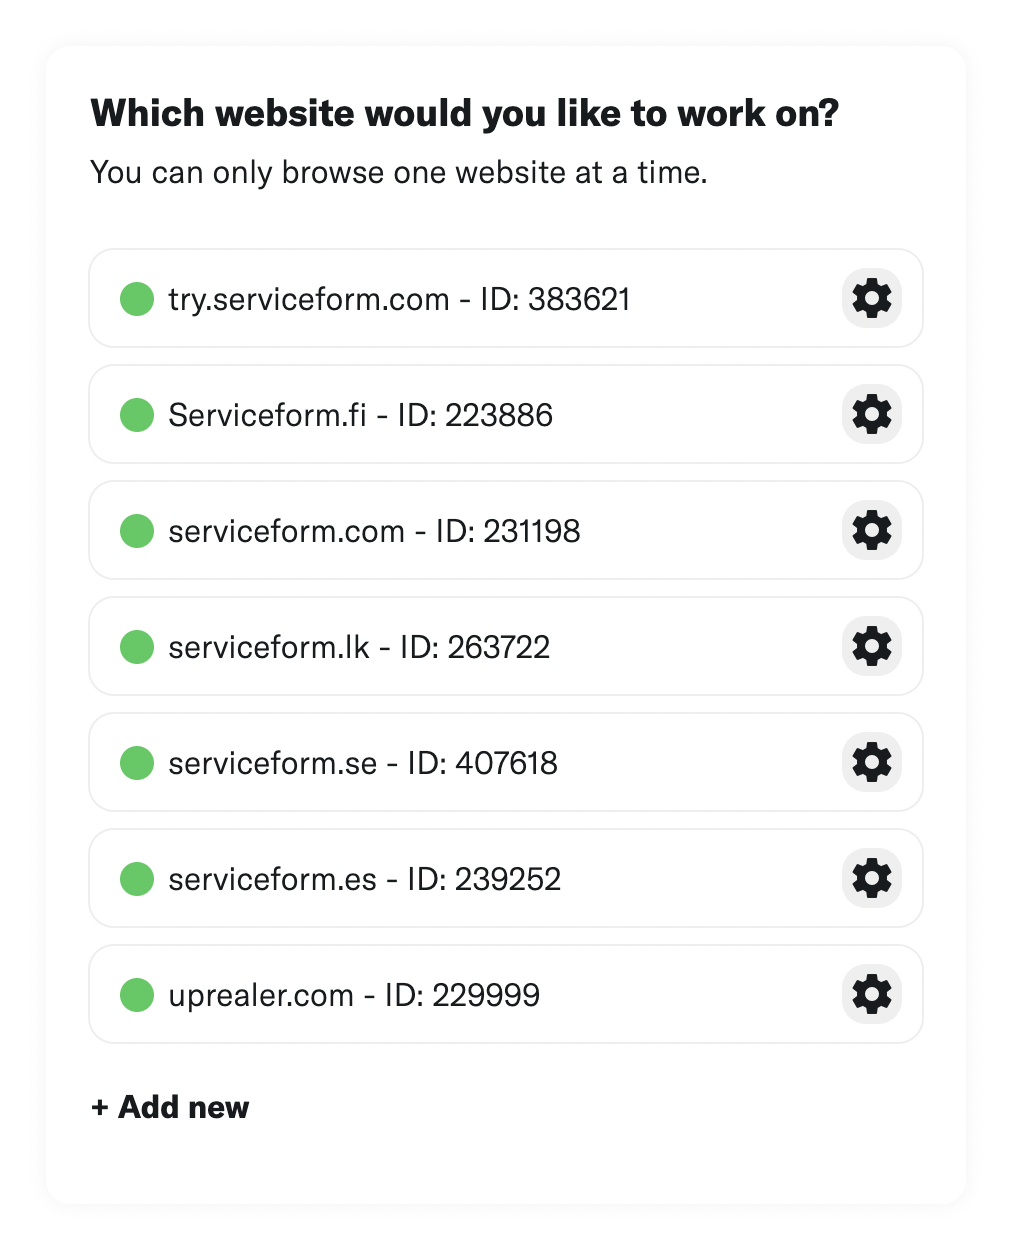
You can check if your pixel is active by looking at the top right corner of your dashboard.
If you see a green circle, that means it's active and ready to go. But if you see a red circle, it means it's not active yet. No worries, just give it a quick check and get it up and running in no time.
Step 4. Connect your floating bar with Google Analytics
Bringing your Serviceform Floating bar and Google Analytics together has never been a smoother ride. With just a few clicks, you'll be able to send your "Chat started" and "Chat submitted" events with ease.
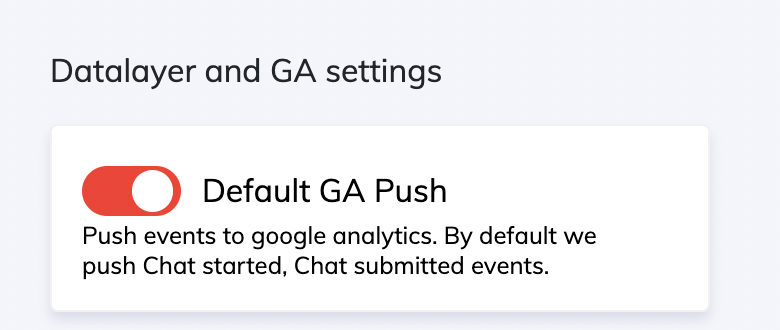
To activate this feature, go to the settings in the floating bar builder. Within the settings section, select "Data layer and Google Analytics" and turn on the toggle labelled "Default GA push."
Normally this is enabled by default.
Further, you can customise the data layer names.
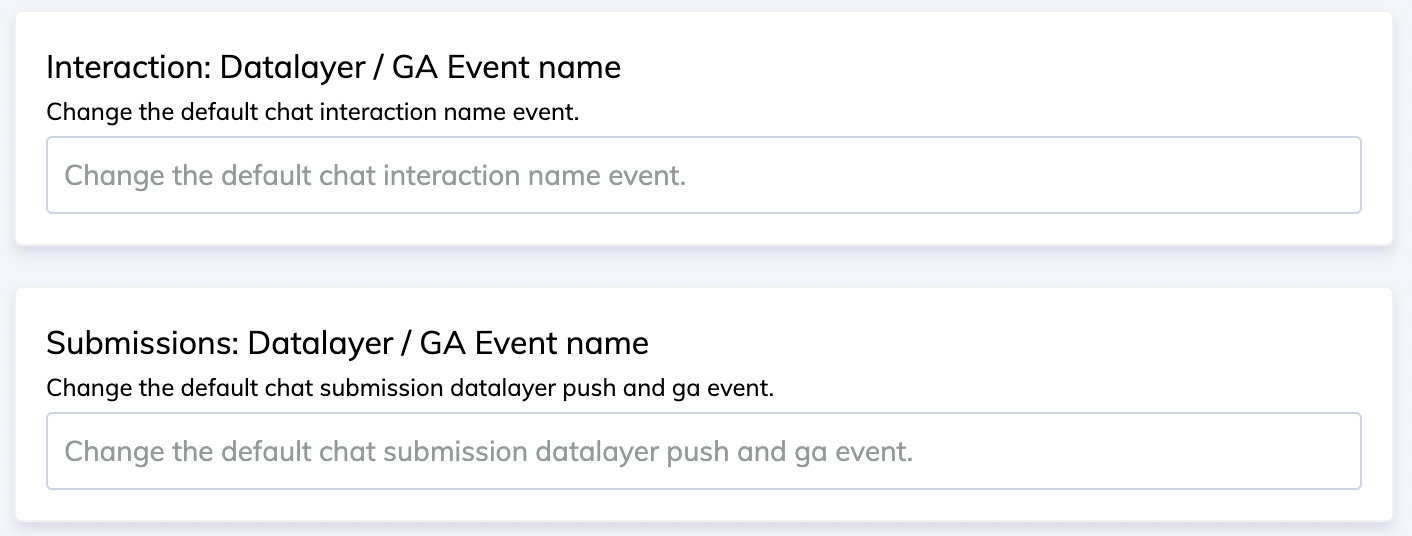
To use these in Google Tag Manager, you must add a “Trigger” and a “Tag”.
Simply set the event name to "Serviceform" and set the trigger to activate on "All Custom Events". And just like that, all of your Serviceform events will be starting this trigger, ready to be brought to life in Google Tag Manager.
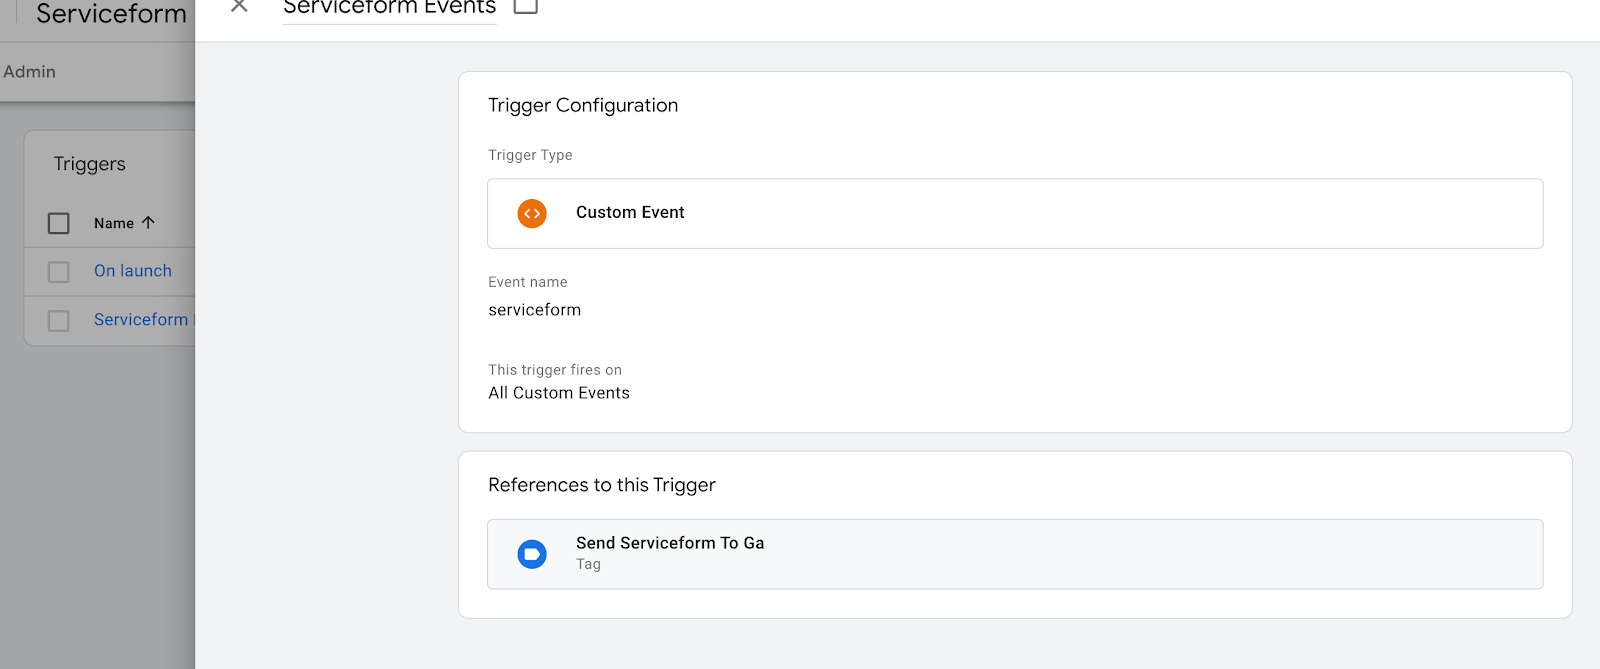
Select the "Google Analytics: GA4 Event" tag type and add your configuration tag or measurement ID (which can be found in your GA 4 admin data streams website settings).
Then, customise the event parameters to fit your specific needs. In our example, we use the dynamic event name {{DLV - chatProgress}} which can be chat started, chat complete, or redirect, based on the user's trigger.

Double-check that your data comes through to Google Analytics as wanted.
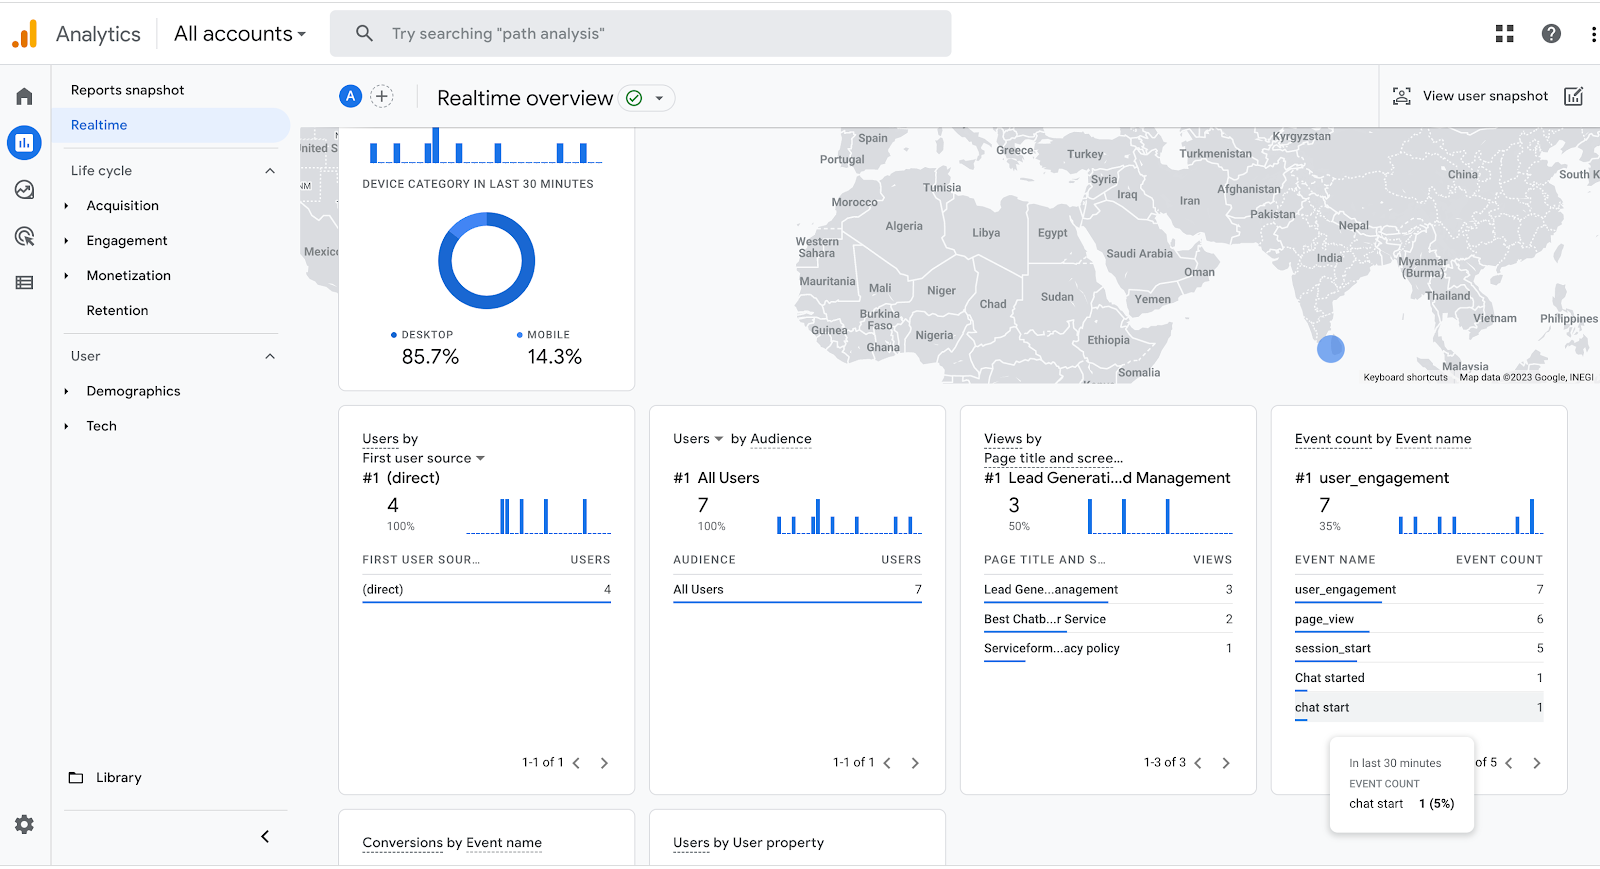
The beauty of Google Tag Manager is that you can take your Serviceform data to the next level with customisations.
For example, you could enhance your event naming by transforming it from "Event name: Serviceform {{DLV - chatProgress}}" to something more unique and distinguishable from your other events.
Great job! You're all set.
From now on, every time a customer finishes interacting with the floating bar and submits their details, this information will be automatically recorded in your Google Analytics account.


.png)


.png)


