
Webhooks are automated messages that are sent from one application to another whenever a specific event occurs. They allow for real-time communication between different tools and systems, which is essential for automating various processes.
Capturing customer data through your website is a critical component of any successful digital marketing strategy. This information helps you understand your target audience, their needs, and how they interact with your website.
A chatbot is a tool that can be added to your website to help collect customer information and increase conversions. By collecting customer information through a chatbot, you can gain valuable insights into your target audience and improve your overall marketing strategy.
By connecting your chatbot to webhooks, you can automate various processes, such as sending an email to a customer after they’ve submitted an enquiry. This saves you time and effort and ensures that you never miss an opportunity to follow up with a customer.
Choose the most reliable and high-quality chatbot solution for your Webhooks.
Why Serviceform Chatbot is the best for Webhooks
- No need to worry about coding, making it an easy and hassle-free solution.
- Make your chatbot truly yours with easy customisation options to match your brand.
- Boost your lead generation by a whopping 40% with Serviceform's Chatbot.
- Chatbot responds contextually, offering a unique and tailored user experience.
- Serviceform’s unique Dynamic chatbot pulls real-time information from multiple pages and products, making it a cost-effective solution for lead generation.
- Keep an eye on your website and chatbot's performance with built-in analytics, at no extra cost.
- Get inspiration from our growing library of 500+ tested and proven templates, available for you to use for free.
Step 1. Create your Serviceform account
Start by creating your free Serviceform account. After that, you can generate your Serviceform pixel in the box below. To start, type your website URL and select "START NOW".

Step 2. Install the free chatbot on your website
Using HTML
If you're a tech-savvy person or have a developer in your team, it's easy to add a Serviceform Chatbot to your website using HTML.
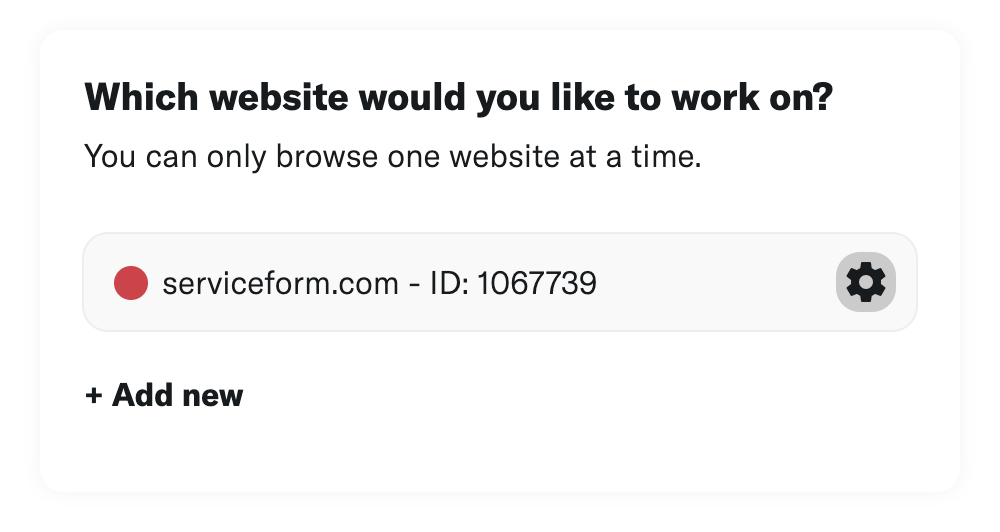
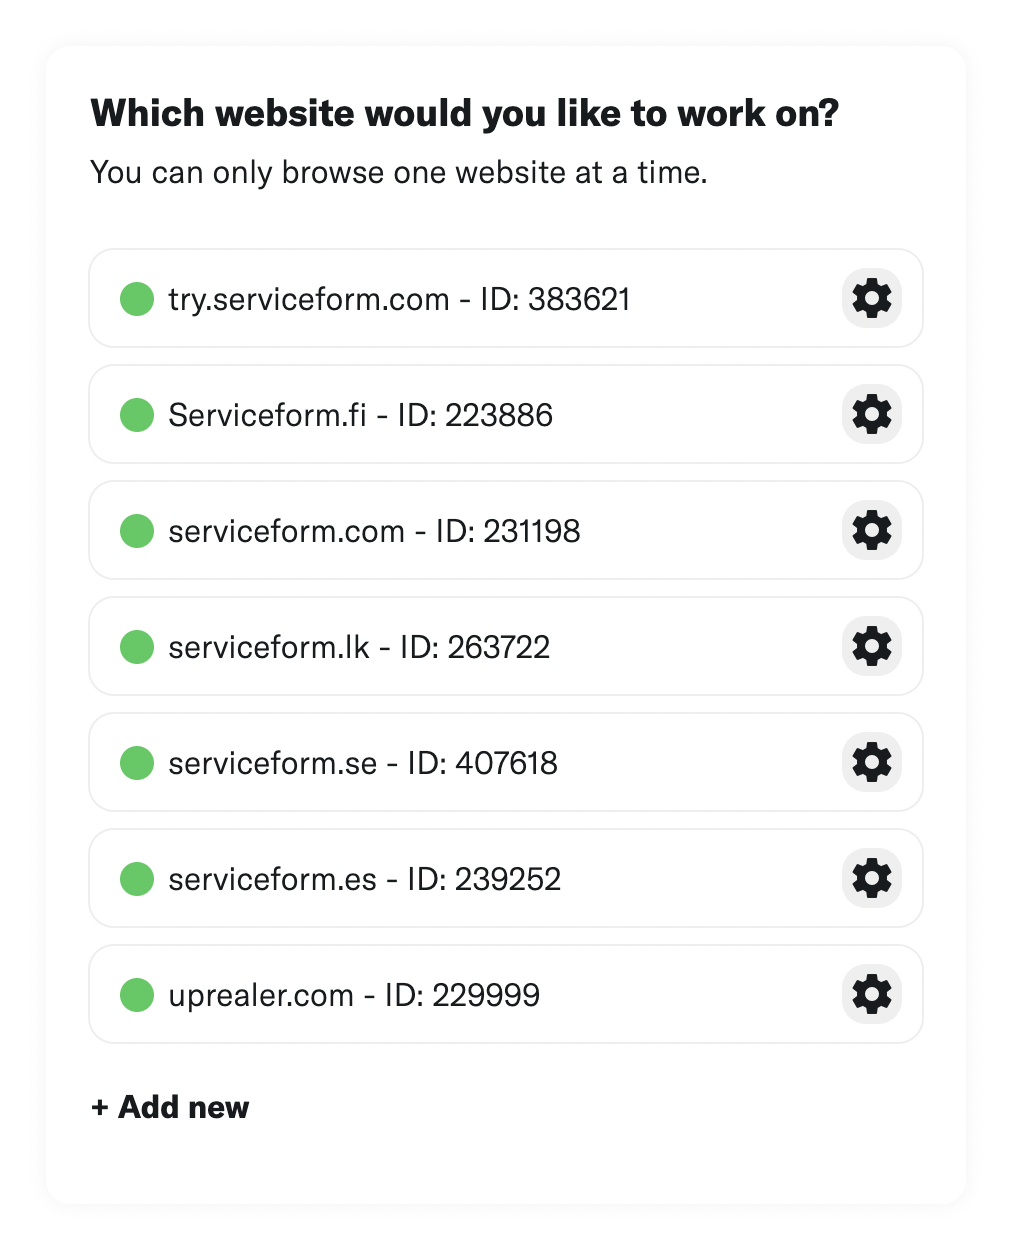
To start, click on the website you’ve set up on your Serviceform account and select settings.
Then, copy the pixel code and paste it on the header tag section of your website.
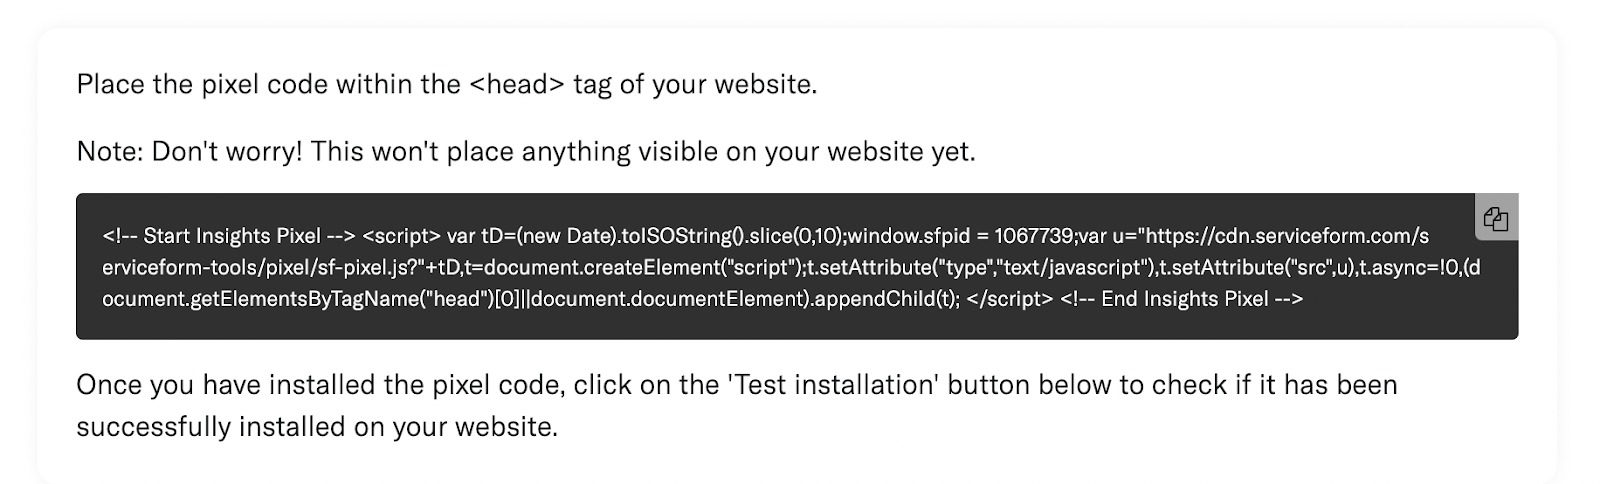
Voila! Your website just got a lot cooler with Serviceform’s Chatbot.
Using Google Tag Manager
No worries if HTML isn't your thing. Installing the Serviceform pixel onto your website using Google Tag Manager is easy.
Simply choose the option to install via Google Tag Manager in your Serviceform account, then copy your unique pixel code.
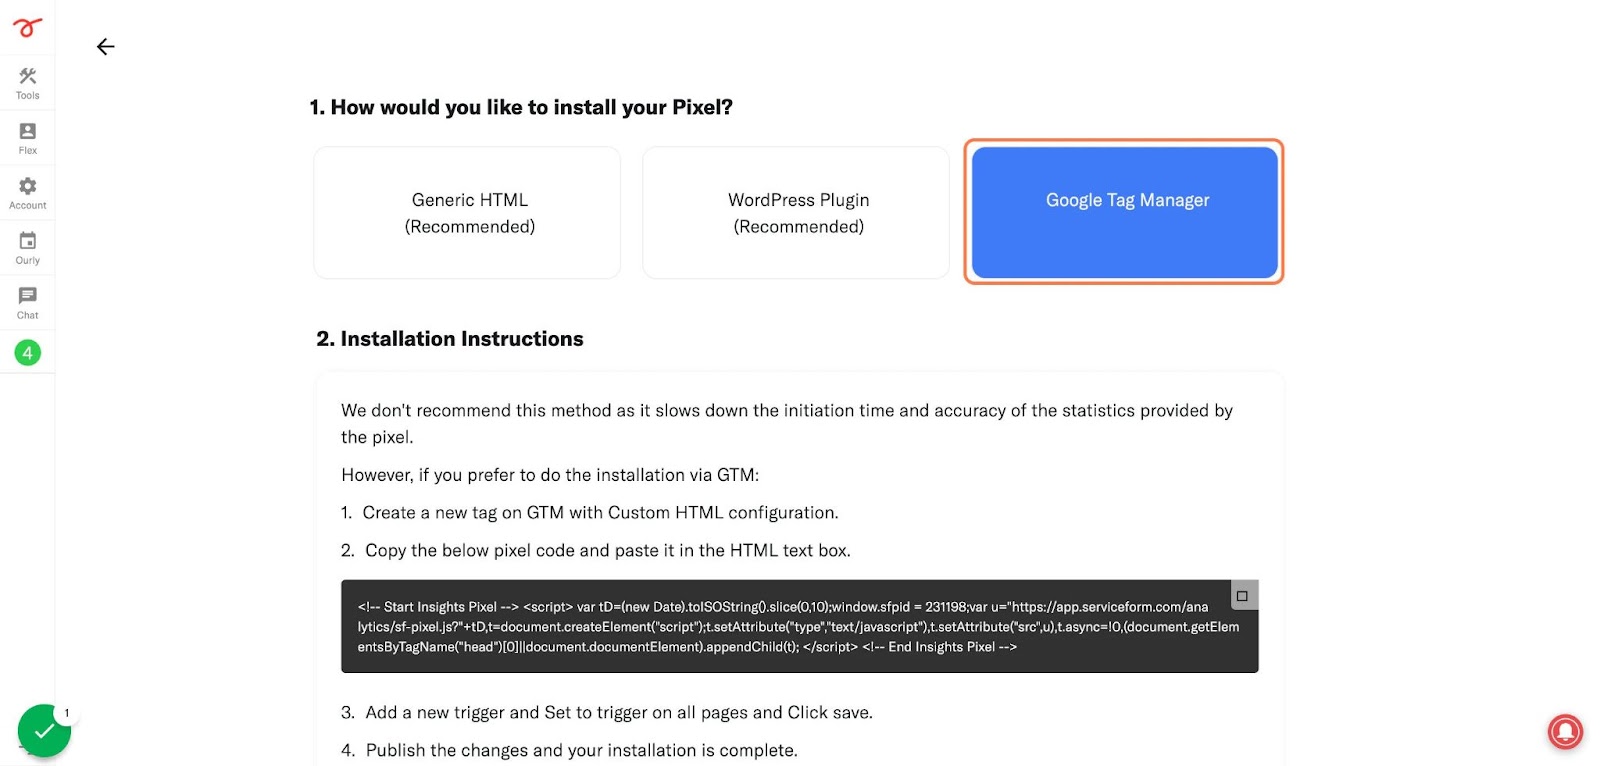
Next, head over to your Google Tag Manager account and create a new tag. Then name your tag.
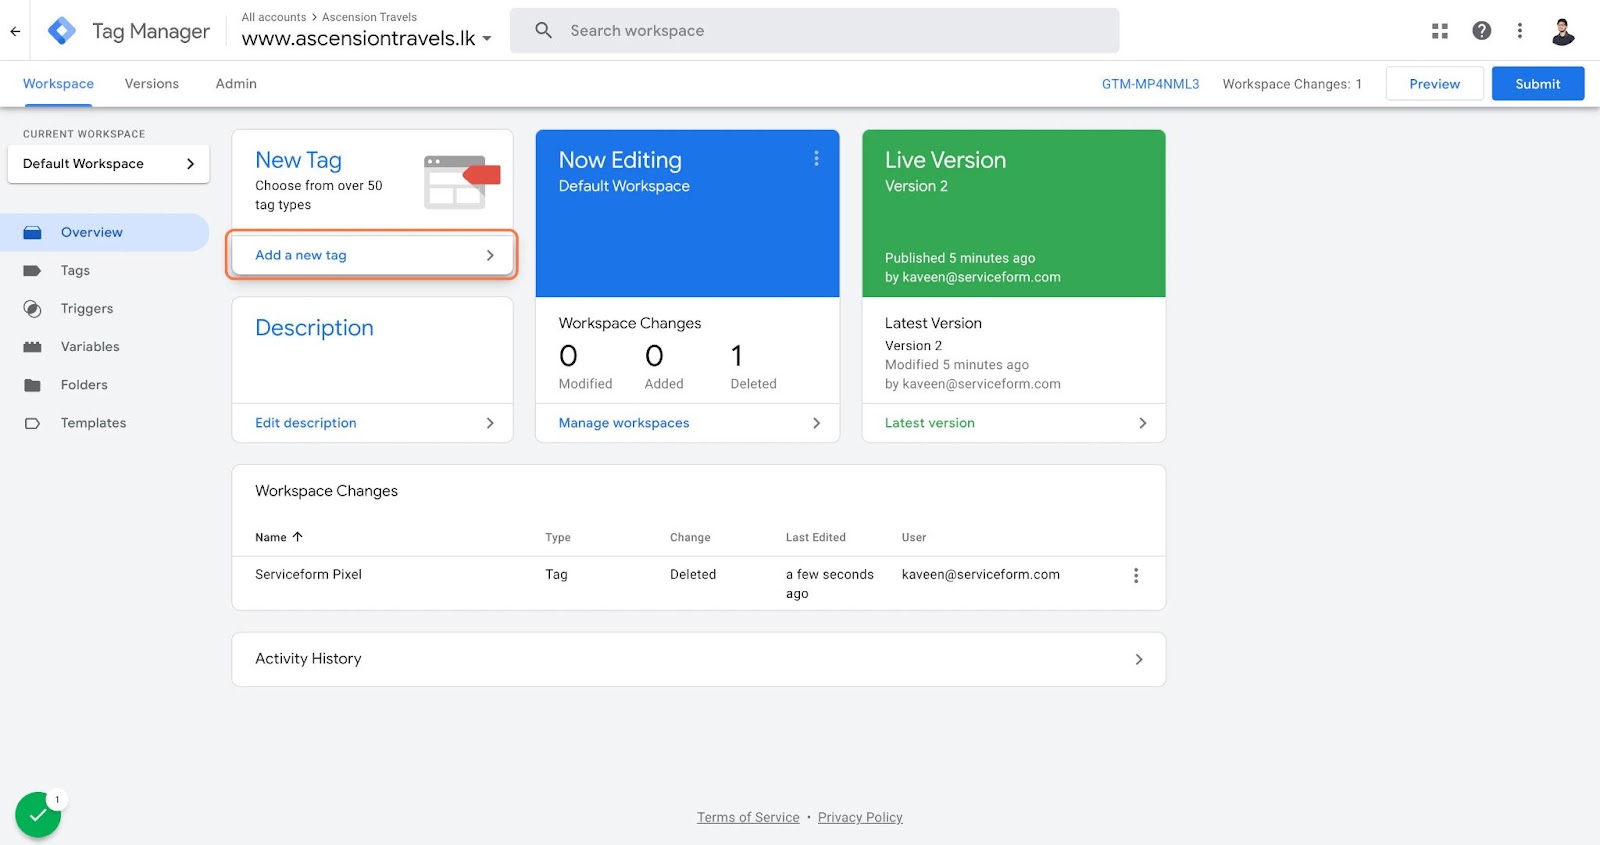
Once you've named your tag, head to the tag configuration and choose custom HTML from the drop-down menu. Then, simply paste the Serviceform pixel code you copied earlier into the code area.
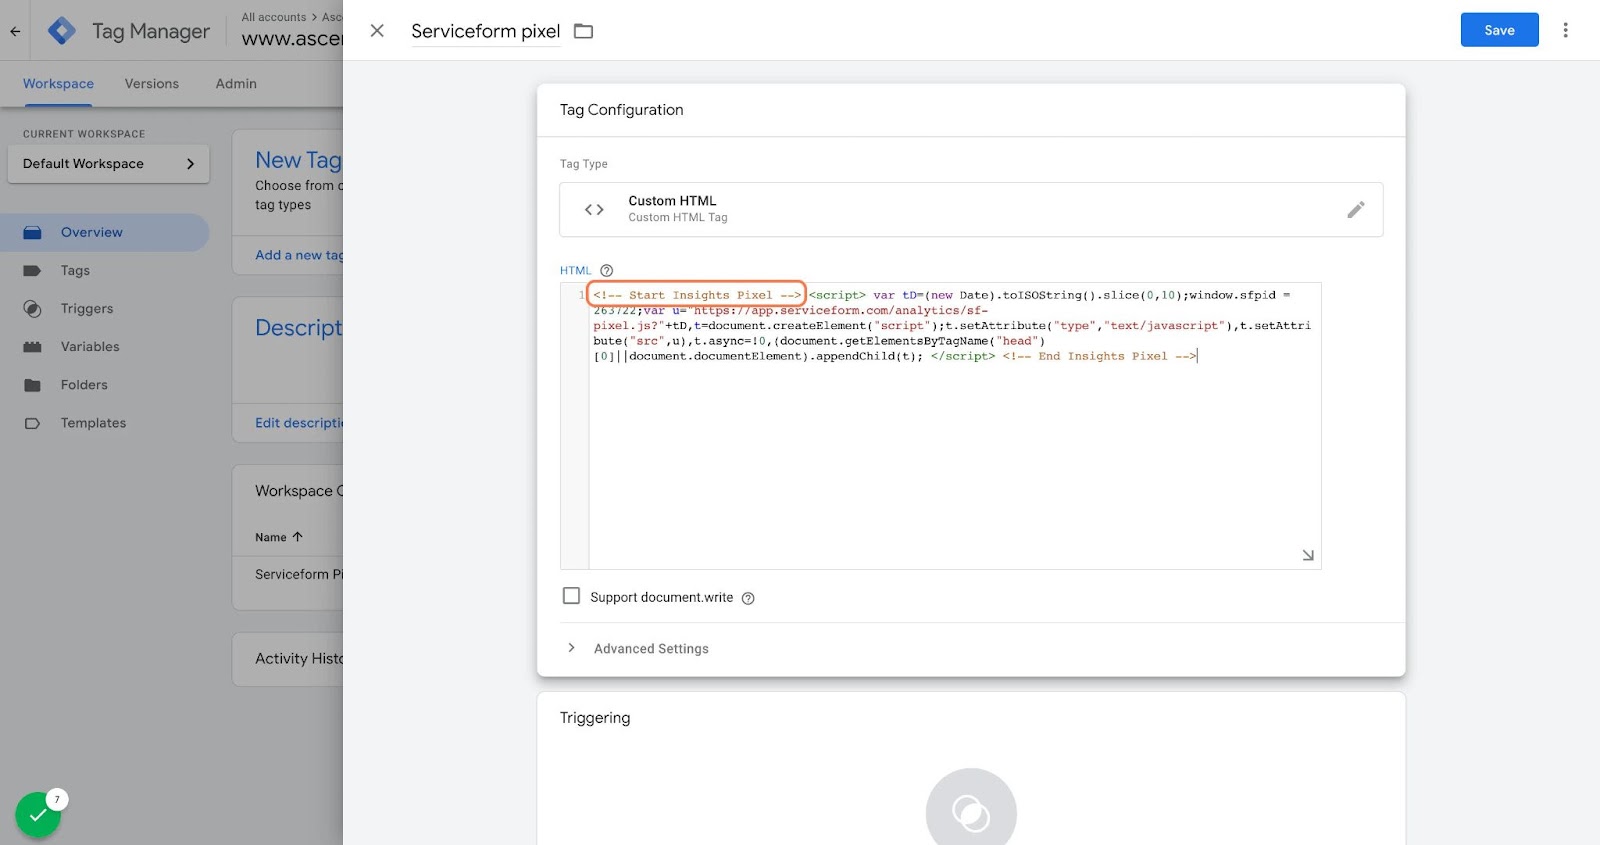
Then click on ‘triggering’ and select ‘all pages.’ Then save your work and press submit. In the submission configuration screen, type ‘Adding Serviceform pixel’ into the ‘Version name’ area, and you’re all set.
Step 3. Test if your Serviceform pixel is live
You can check if your pixel is active by looking at the top right corner of your dashboard.
If you see a green circle, that means it's active and ready to go. But if you see a red circle, it means it's not active yet. No worries, just give it a quick check and get it up and running in no time.
Step 4. Connect your chatbot with Webhooks through Zapier webhooks
Leads from any Serviceform tool can be sent to any endpoint in JSON format. All you'd need to do is to parse the data and save it in your database. You can use Zapier Webhooks to point out our webhook.
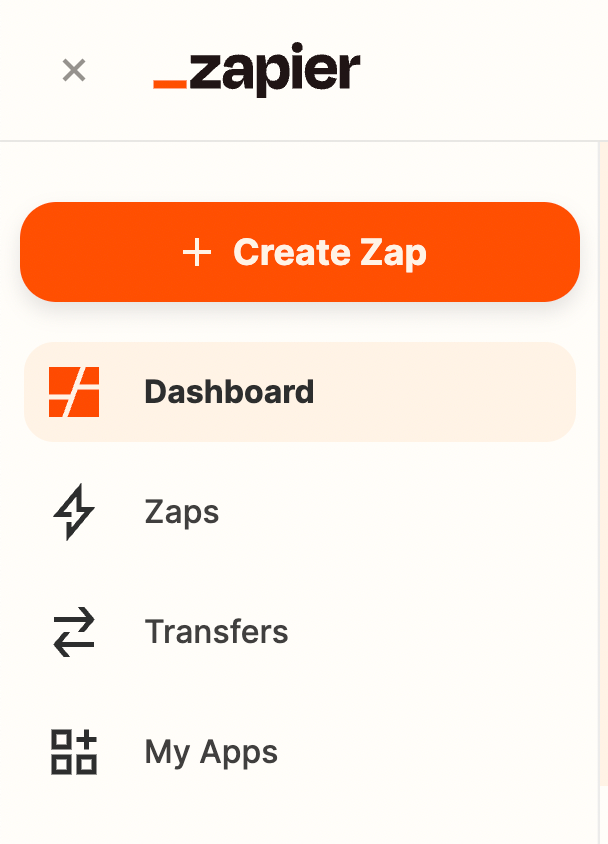
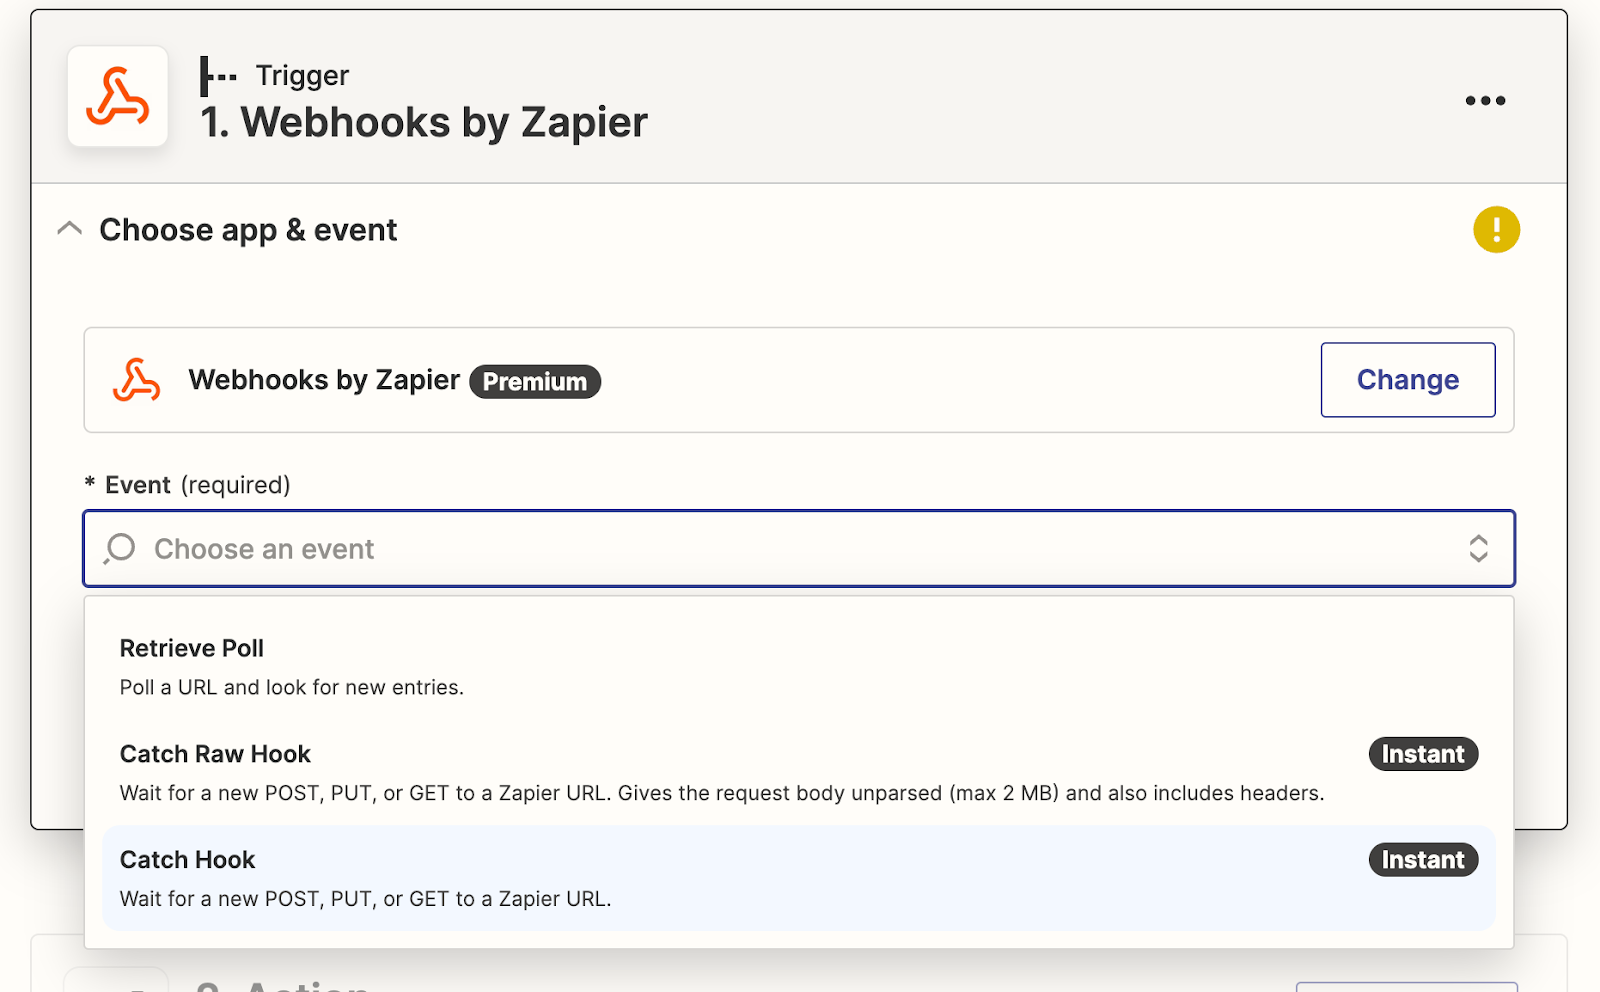
First, log in to your Zapier account and click on "Create Zap".
And then find "Webhooks by Zapier" and click on it.
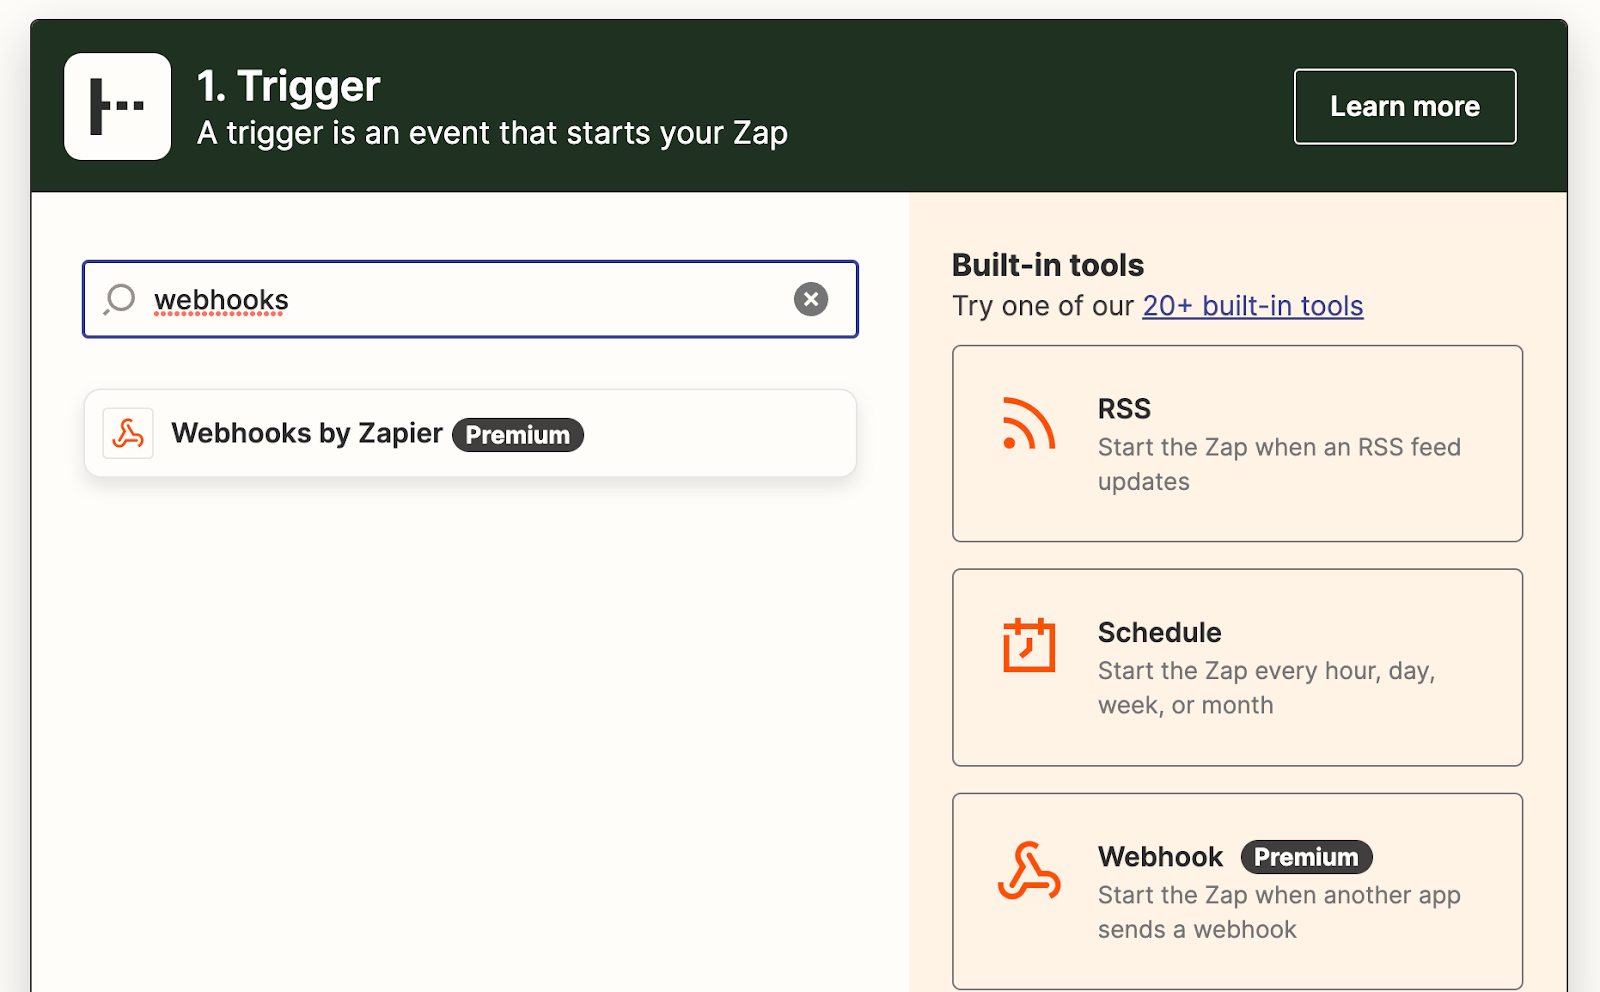
Select "Catch Hook" from the event dropdown.
Click on "Continue".

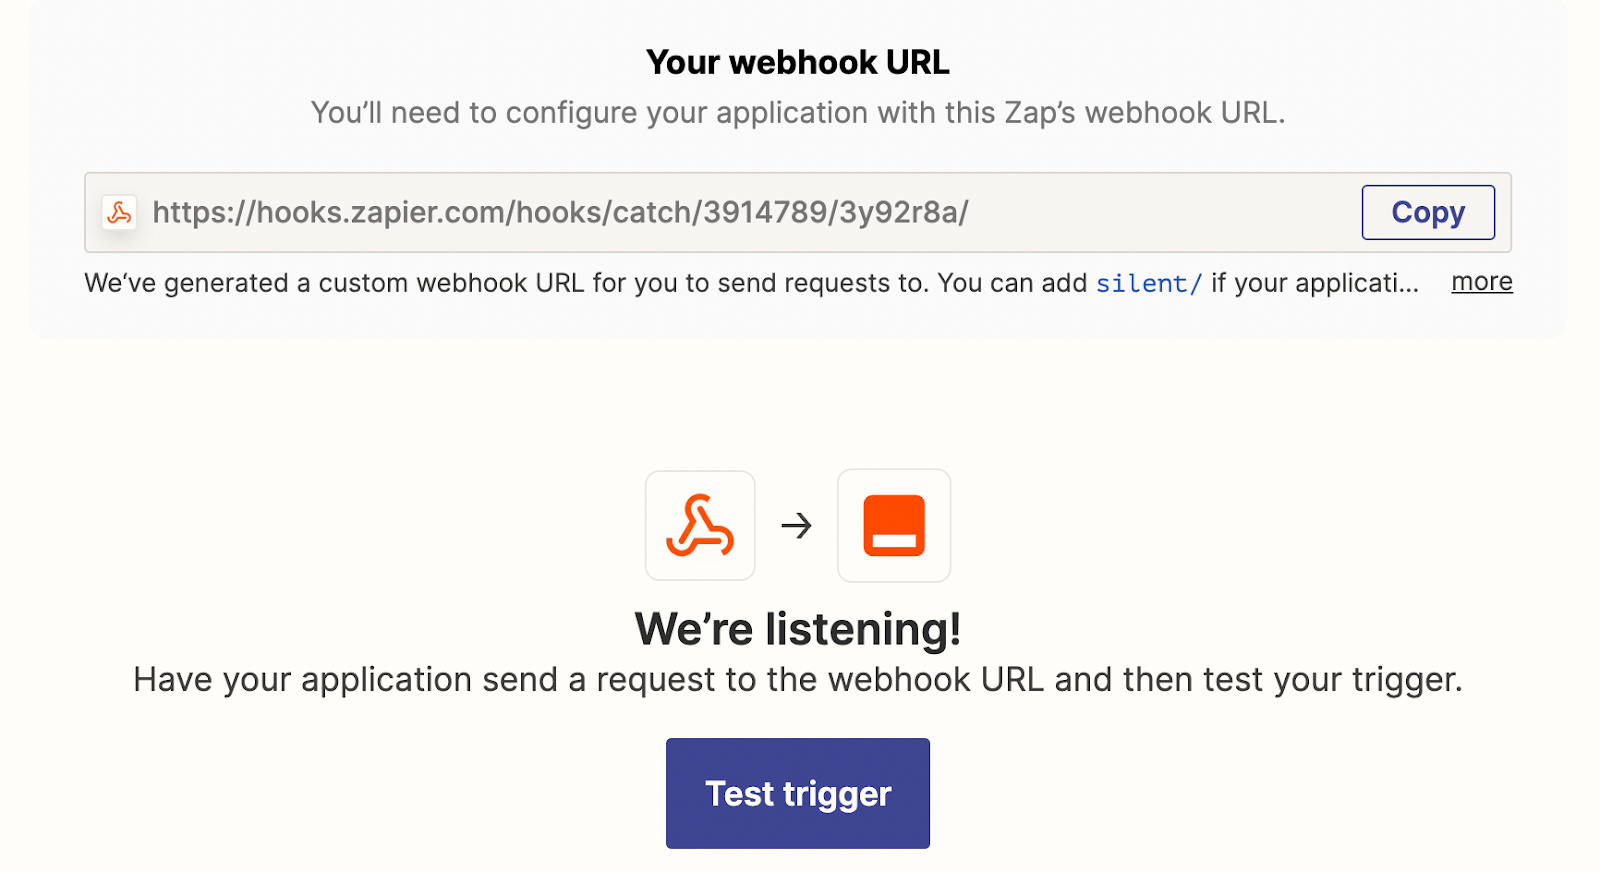
Click on "Test Trigger".
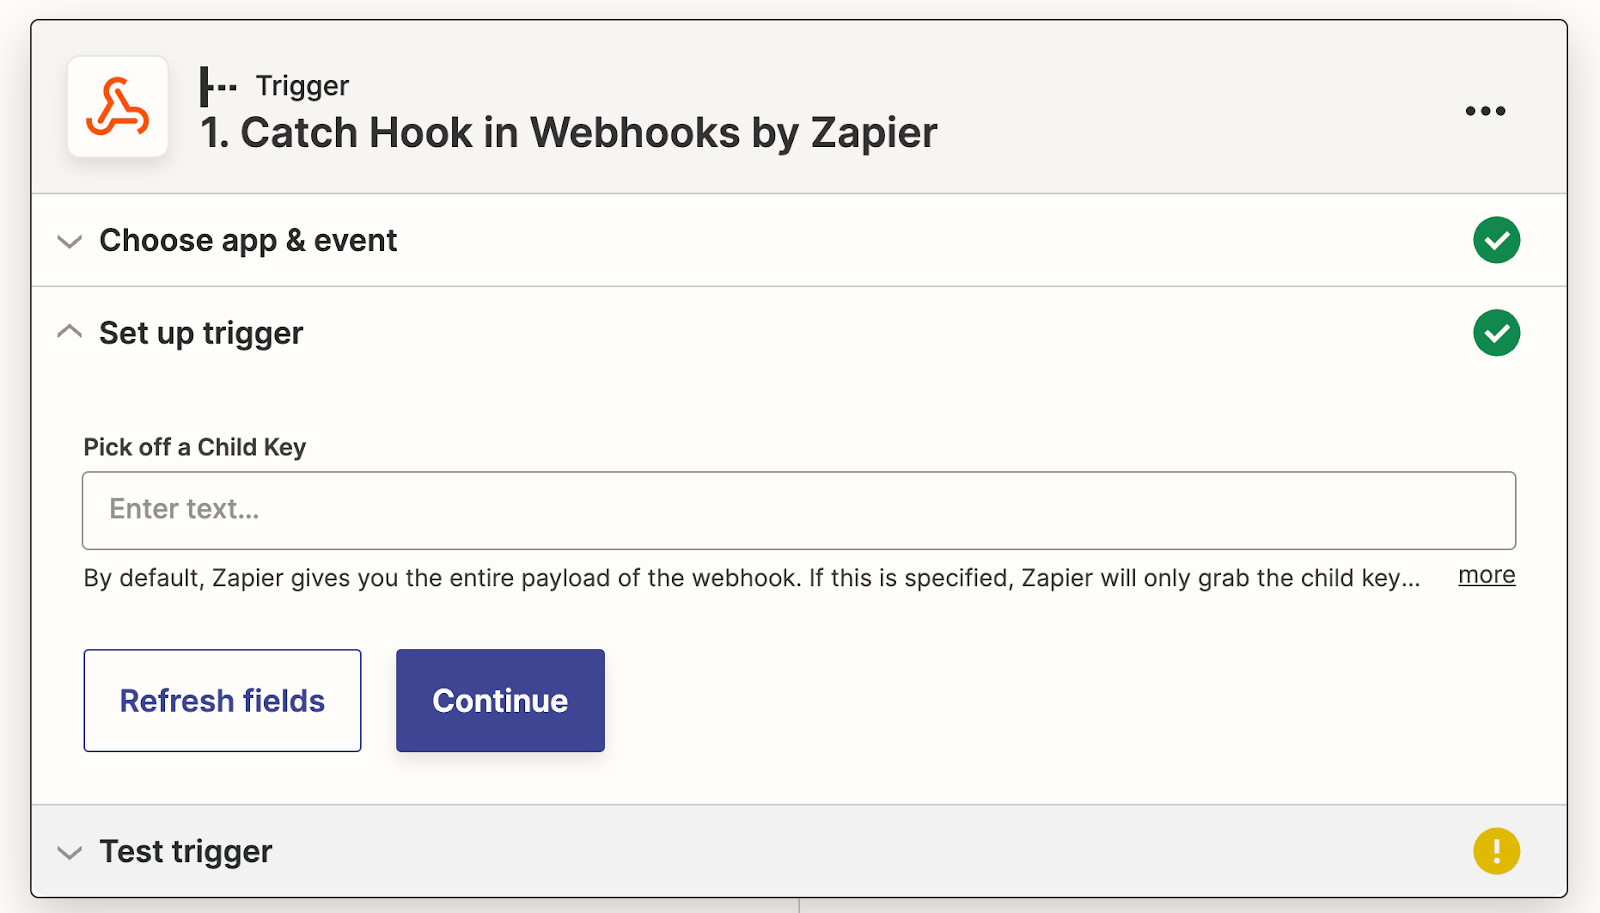
Click on "Copy" to copy the link.

Now we have the Webhook URL. You’ll need to configure your application with this Zap’s Webhook URL.
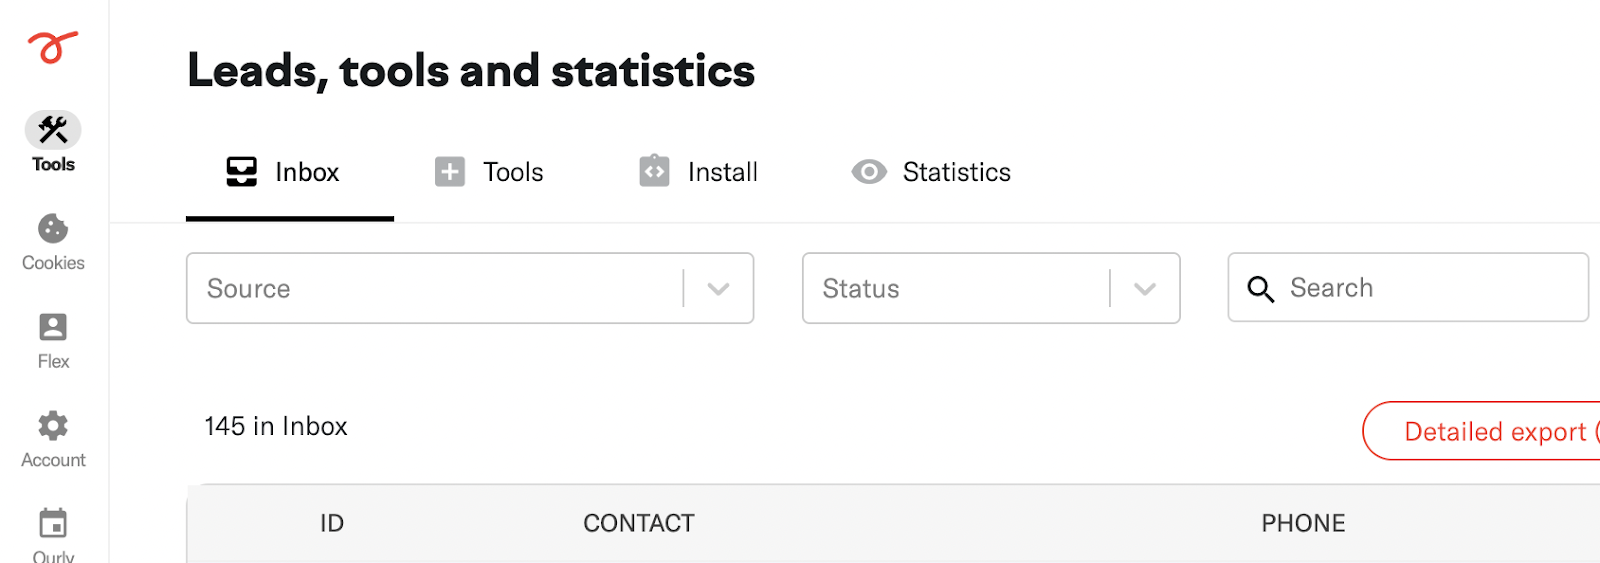
Go to your Serviceform account and click on "Tools". Select your tool from the tools.
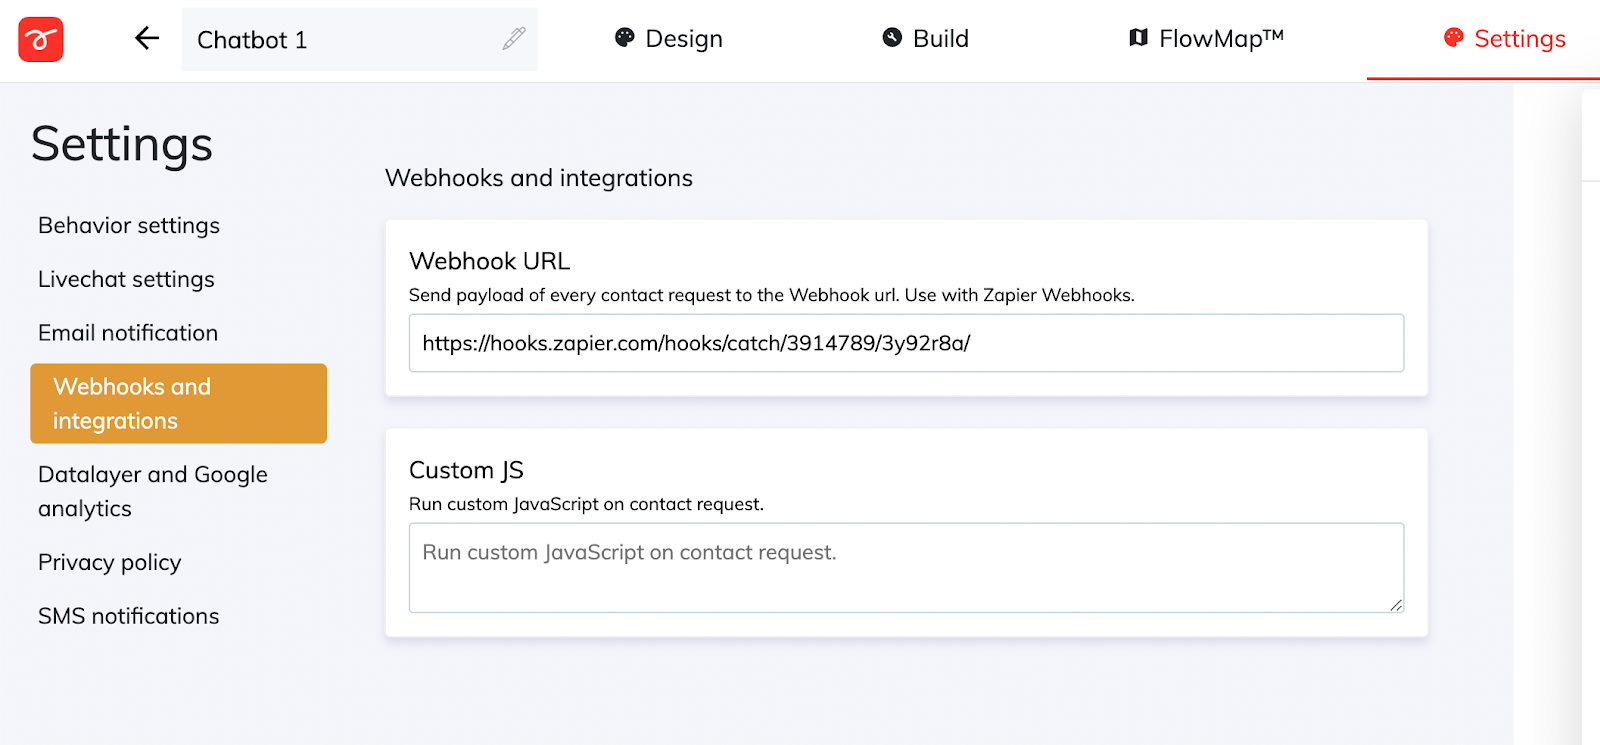
Click on "Settings" and then click on "Webhooks and integrations".

Paste the URL that you copied before and remember to click "Save".
Perfect! now we have completed the integration. Now we can run a test!
Go to your tool, open the preview link and submit a lead. Next, Go back to your Zapier account and click on "Test trigger".
And now, you will be able to see the lead in your Zapier account.
Congratulations! You're now ready to go. You can run tests, set up email notifications, and more.
Each time a customer completes a flow through the chatbot and submits their information, that data will automatically be added to your Webhooks account.


.png)


.png)


