
WooCommerce is a free and open-source e-commerce platform that is built on top of the popular content management system WordPress. With WooCommerce, users have the ability to design a complex store from scratch, extend an existing store for a client, or simply add a single product to a WordPress site.
With a growing number of customers shopping online, businesses need to be able to respond quickly and efficiently to customer queries and concerns.
Live chat is a real-time customer support tool that allows businesses to communicate directly with customers via their website. It provides customers with immediate answers to their questions and concerns, helping to improve the customer experience and increase customer satisfaction.
But don’t just settle for any live chat when you can have the best.
Why you should use Serviceform Live chat for the WooCommerce website
- Provide fast and efficient customer service through real-time live chat.
- Support multiple teams and structure of agents, and manage all chats from different websites with a single parent account.
- Track team performance with important metrics like total chats, missed chats, average wait time, and average reviews.
- Monitor your customer journey on your website and assign conversations to individual agents or teams using filter tags.
- Allow customers to easily upload files during live chat conversations.
- Integrate live chat with your shopping cart for seamless customer support during the checkout process.
- Get inspired with a library of over 500+ tested and proven templates, available for you to use for free.
Creating a WooCommerce live chat with Serviceform is simple and easy. Let's take a look at how to build a smart live chat for your WooCommerce site using Serviceform's builder.
Step 1. Create your Serviceform pixel
After you create your Serviceform account, you can generate your Serviceform pixel in the box below. To start, type your website URL and select "START NOW".

Step 2. How to install a free live chat on WooCommerce
Using WordPress Plugin
To use the WordPress Plugin for the installation, you'll need to have access to your WP account. On the WordPress Plugins menu, search for the Serviceform plugin.
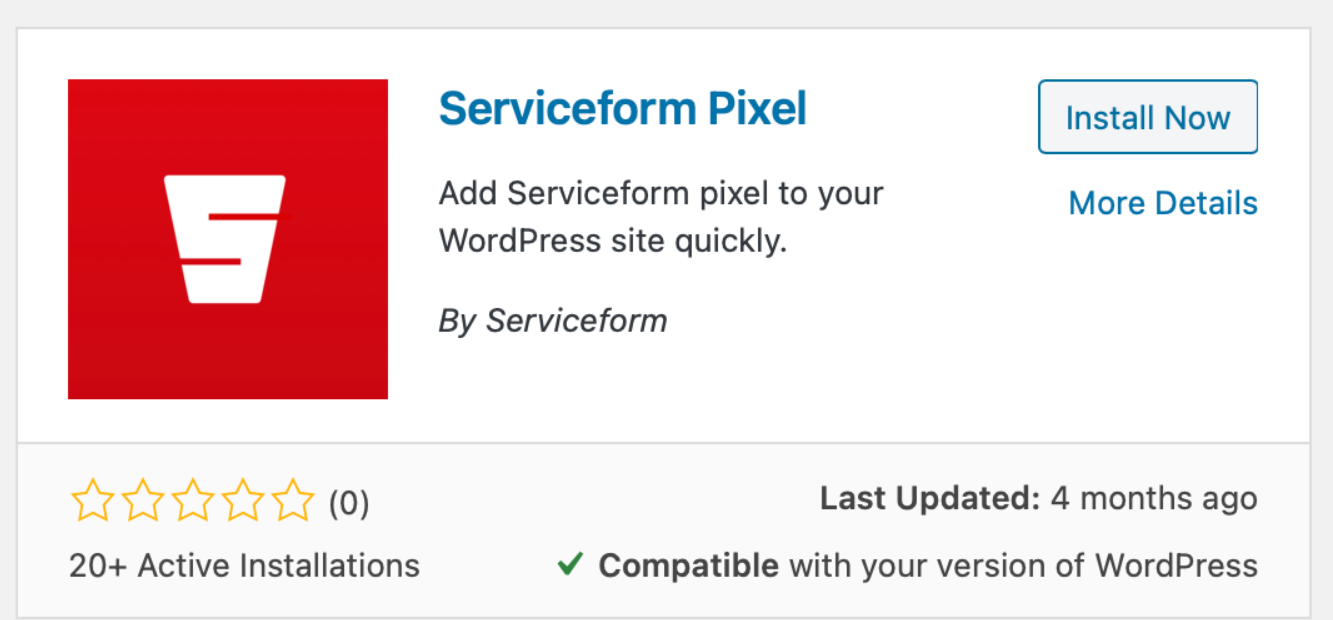
Install it and find your pixel ID from your Serviceform account. Then enter the pixel ID into the Serviceform pixel you’ve already installed.
Congratulations, you have now successfully installed Serviceform Live chats onto your WooCommerce site.
Using HTML
If you're a tech-savvy person or have a developer in your team, it's easy to add a Serviceform Live chat to your WooCommerce website using HTML.
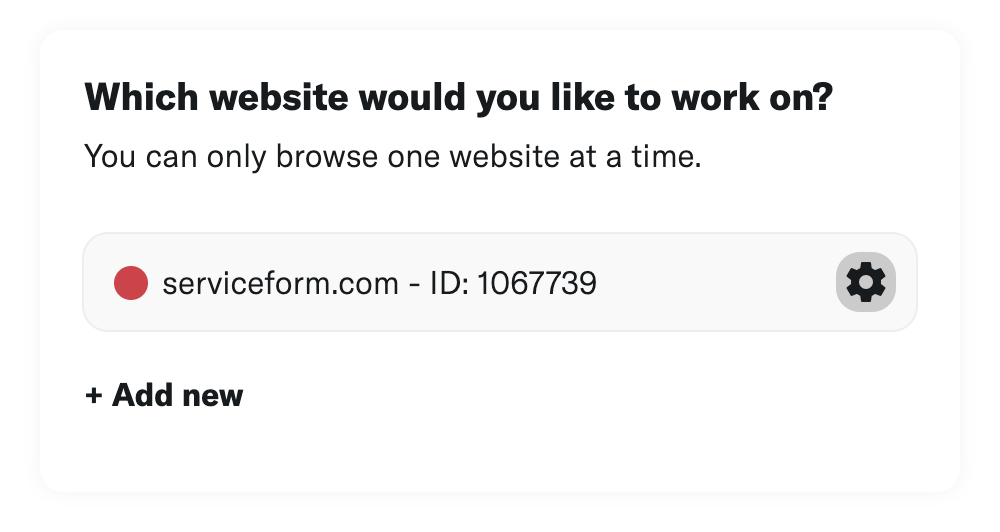
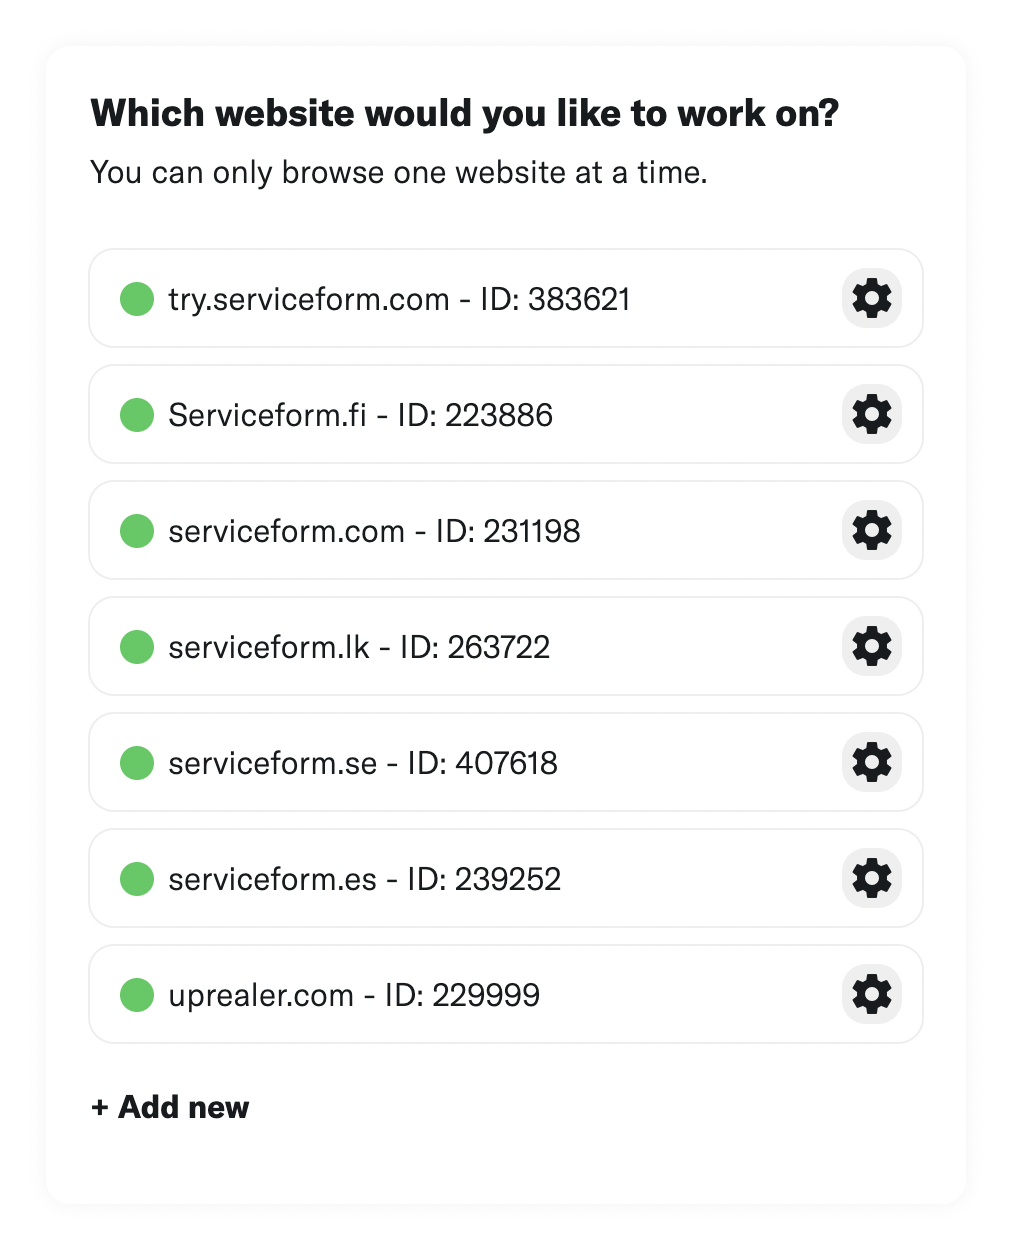
To start, click on the website you’ve set up on your Serviceform account and select settings.
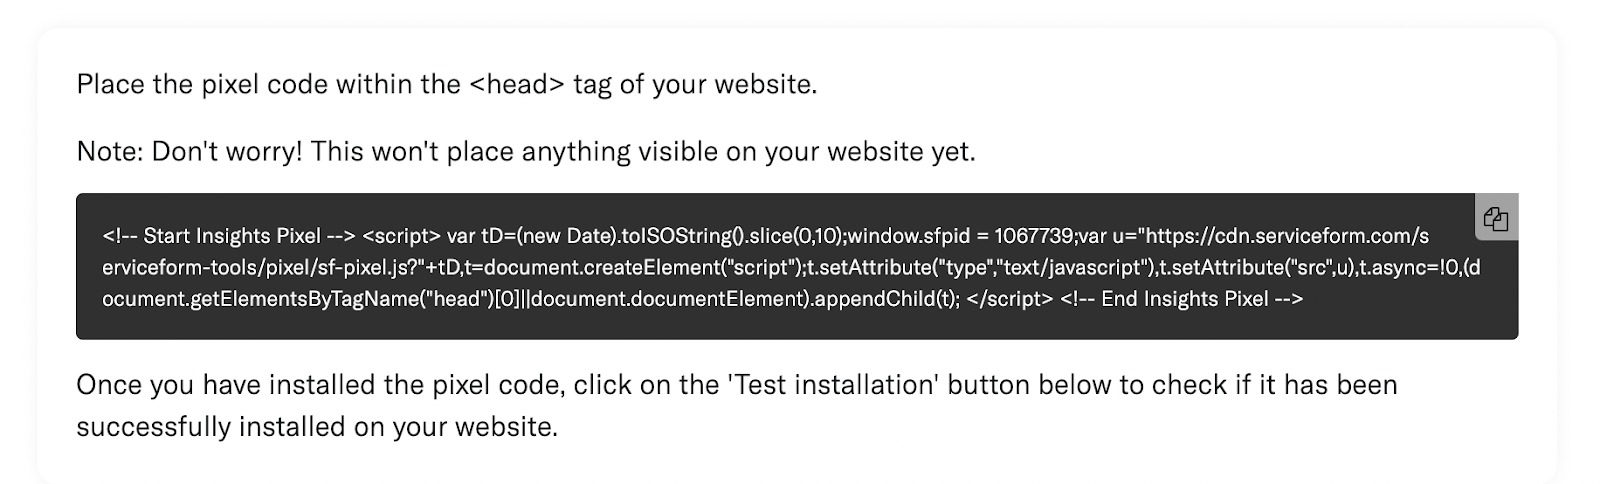
Then, copy the pixel code.
Log in to your account on go to the admin panel. Click “Settings” and from the drop-down select “Header and Footer”.
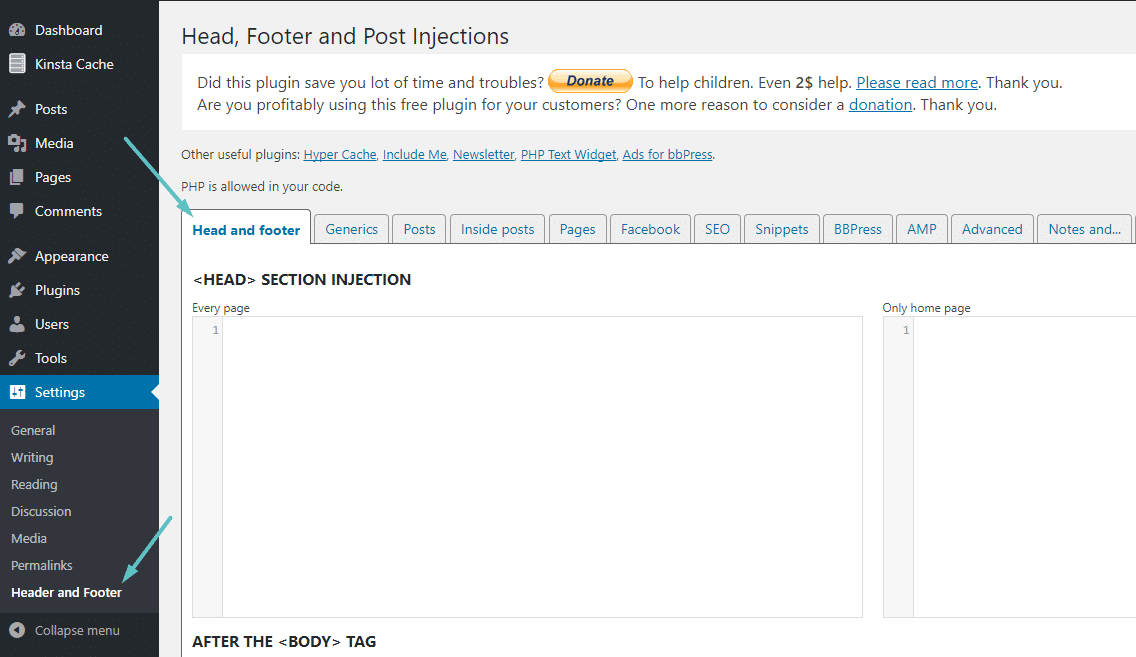
Simply paste the embed code that you’ve copied, in the Head Code section and hit "Save Changes”.
Voila! Your WooCommerce website just got a lot cooler with Serviceform’s Live chat.
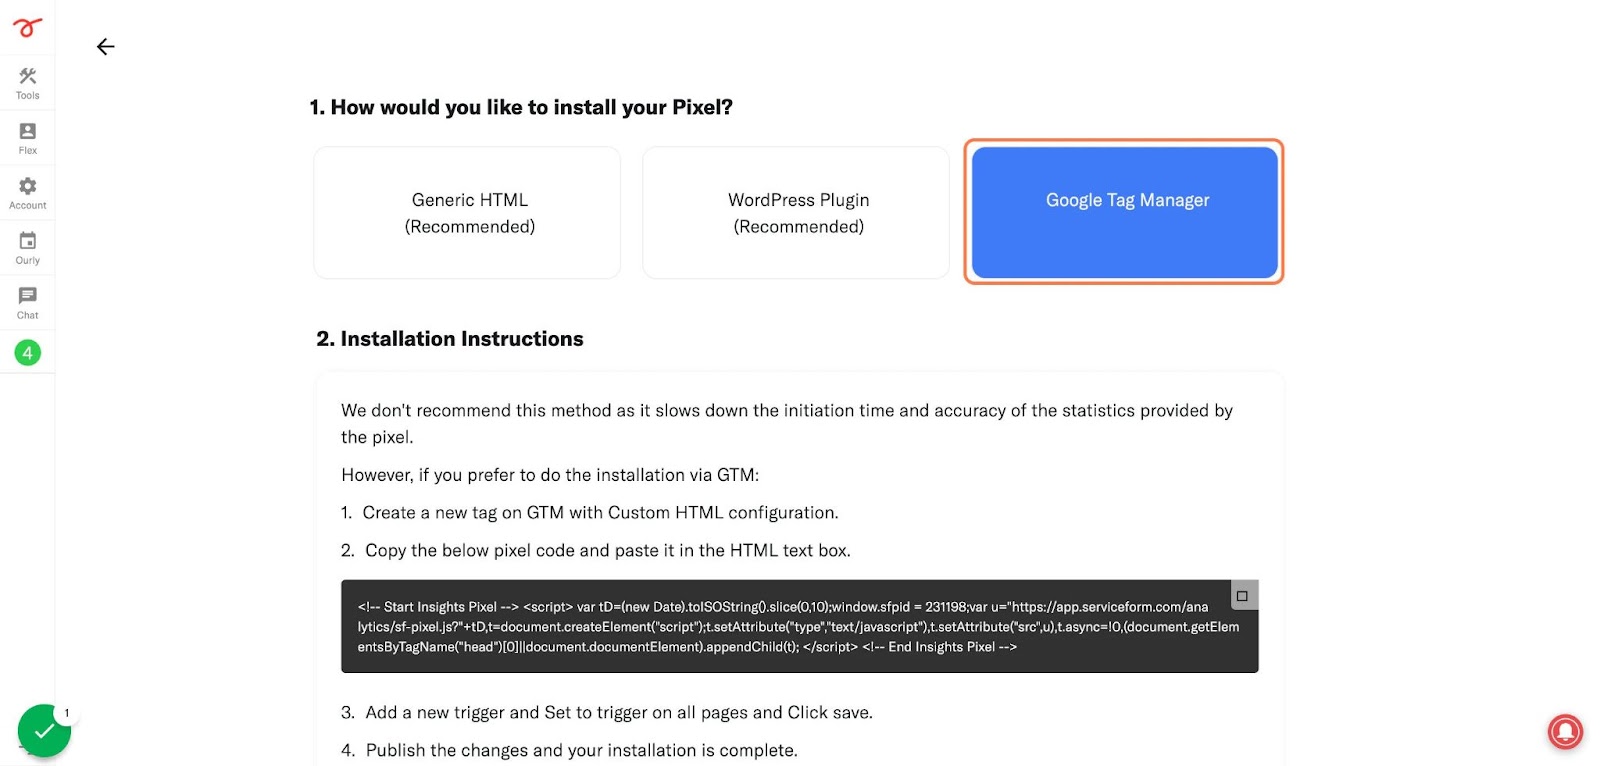
Using Google Tag Manager
No worries if HTML isn't your thing. Installing the Serviceform pixel onto your WooCommerce website using Google Tag Manager is easy.
Simply choose the option to install via Google Tag Manager in your Serviceform account, then copy your unique pixel code.
Next, head over to your Google Tag Manager account and create a new tag. Then name your tag.
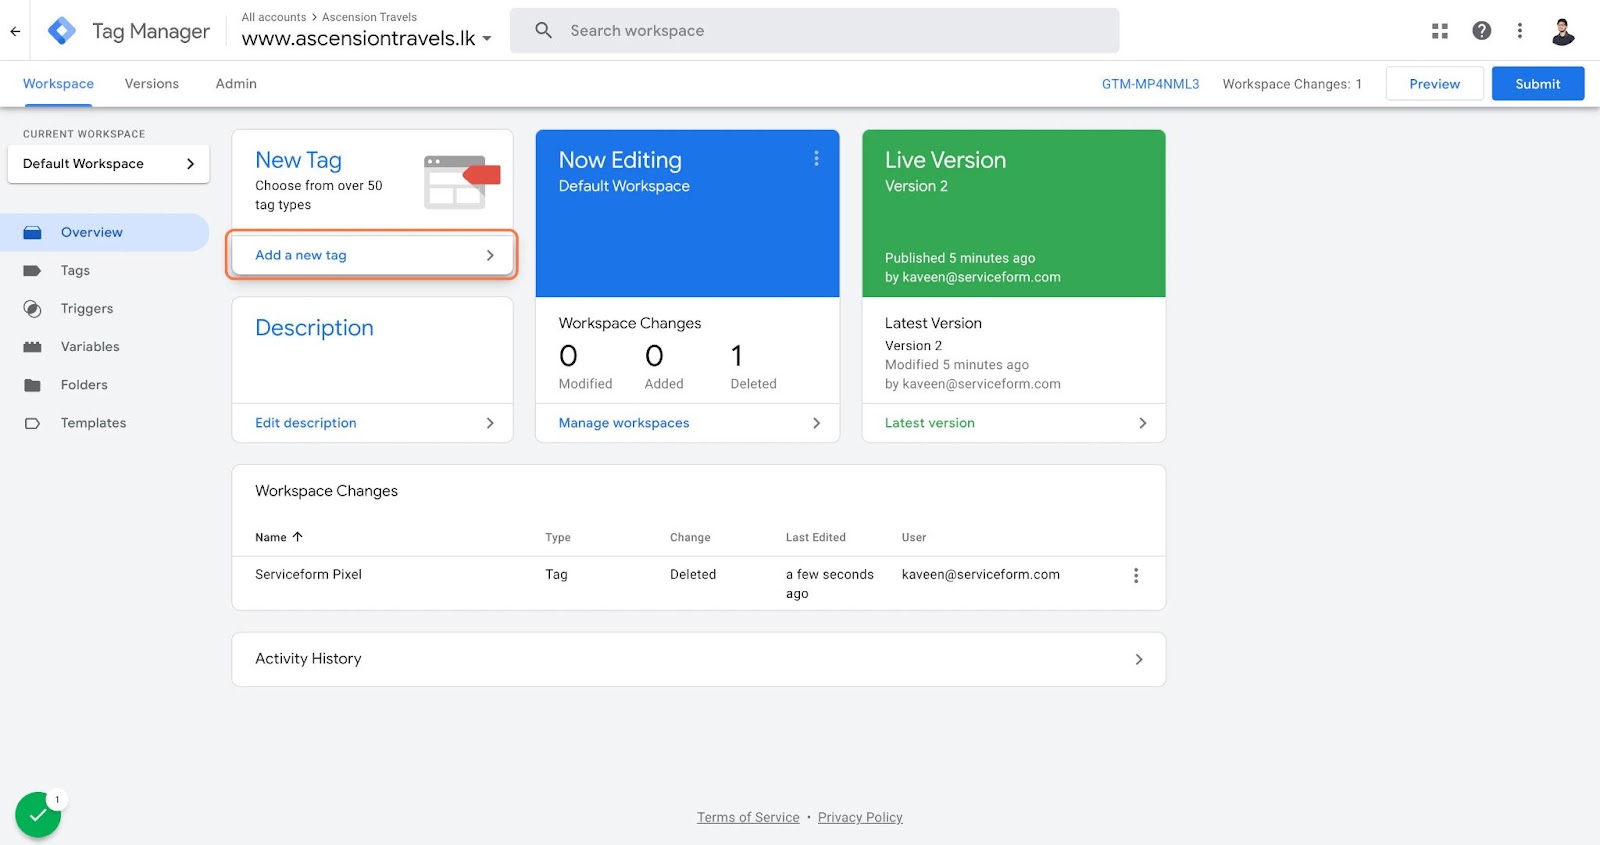
Once you've named your tag, head to the tag configuration and choose custom HTML from the drop-down menu. Then, simply paste the Serviceform pixel code you copied earlier into the code area.
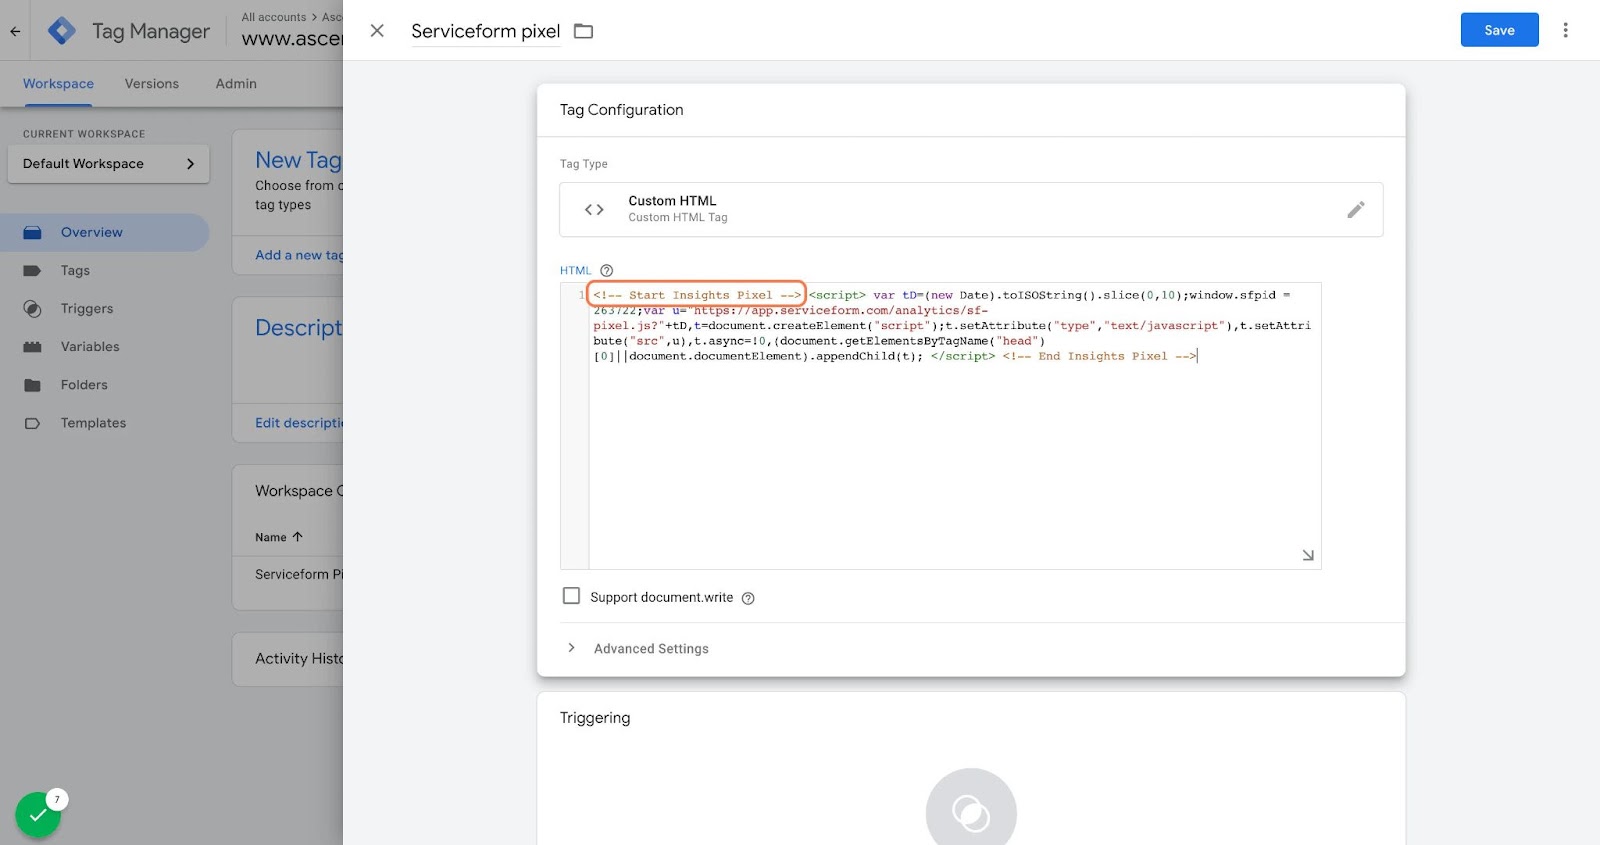
Then click on ‘triggering’ and select ‘all pages.’ Then save your work and press submit. In the submission configuration screen, type ‘Adding Serviceform pixel’ into the ‘Version name’ area, and you’re all set.
Step 3. Test if your Serviceform pixel is live
You can check if your pixel is active by looking at the top right corner of your dashboard.
If you see a green circle, that means it's active and ready to go. But if you see a red circle, it means it's not active yet. No worries, just give it a quick check and get it up and running in no time.


.png)


.png)


