
Microsoft Teams is a comprehensive collaboration platform that brings together all your team's conversations, files, and tools in one place. With Teams, you can stay connected and productive no matter where you are or what device you're using. It allows for instant messaging, video conferencing, and even calling, making it a go-to tool for businesses to stay connected and productive.
To make the most out of Microsoft Teams, you should also consider incorporating a floating bar into your website. This enhances the customer experience and makes it easier for you to collect essential data about your leads.
Floating bars are highly visible and can increase your website's conversion rate by providing customers with a quick and easy way to provide their contact information. Additionally, by using a floating bar, you can display special offers or promotions to your visitors, encouraging them to take action and engage with your business.
By connecting your floating bar to Teams, you can receive notifications in real-time whenever someone submits their information through your floating bar. By using Teams and floating bars together, businesses can streamline their processes and better engage with their target audience.
Choose the most reliable and high-quality floating bar solution for your Microsoft Teams.
Why Serviceform Floating bar is the best for Microsoft Teams
- No coding knowledge is necessary to create a Serviceform Floating bar.
- Customise easily to fit your brand with Serviceform Floating bars' high level of customisation.
- Enjoy the built-in real-time website and tool analytics at no extra cost with Serviceform.
- Experience high engagement rates on your website with the use of Serviceform Floating bars, as seen with satisfied customers.
- Enhance your website presence by displaying discounts, coupons, seasonal promotions, and other offers in prominent areas of your website.
- Encourage important actions from B2B website visitors, such as newsletter subscriptions, webinar signups, white-paper downloads, and more.
- Easily communicate company news and guide visitors to learn more.
- Take advantage of Serviceform's extensive library of over 500 free, tested templates for inspiration.
Step 1. Create your Serviceform account
Start by creating your free Serviceform account. After that, you can generate your Serviceform pixel in the box below. To start, type your website URL and select "START NOW".

Step 2. Install the free floating bar on your website
Using HTML
If you're a tech-savvy person or have a developer in your team, it's easy to add a Serviceform Floating bar to your website using HTML.
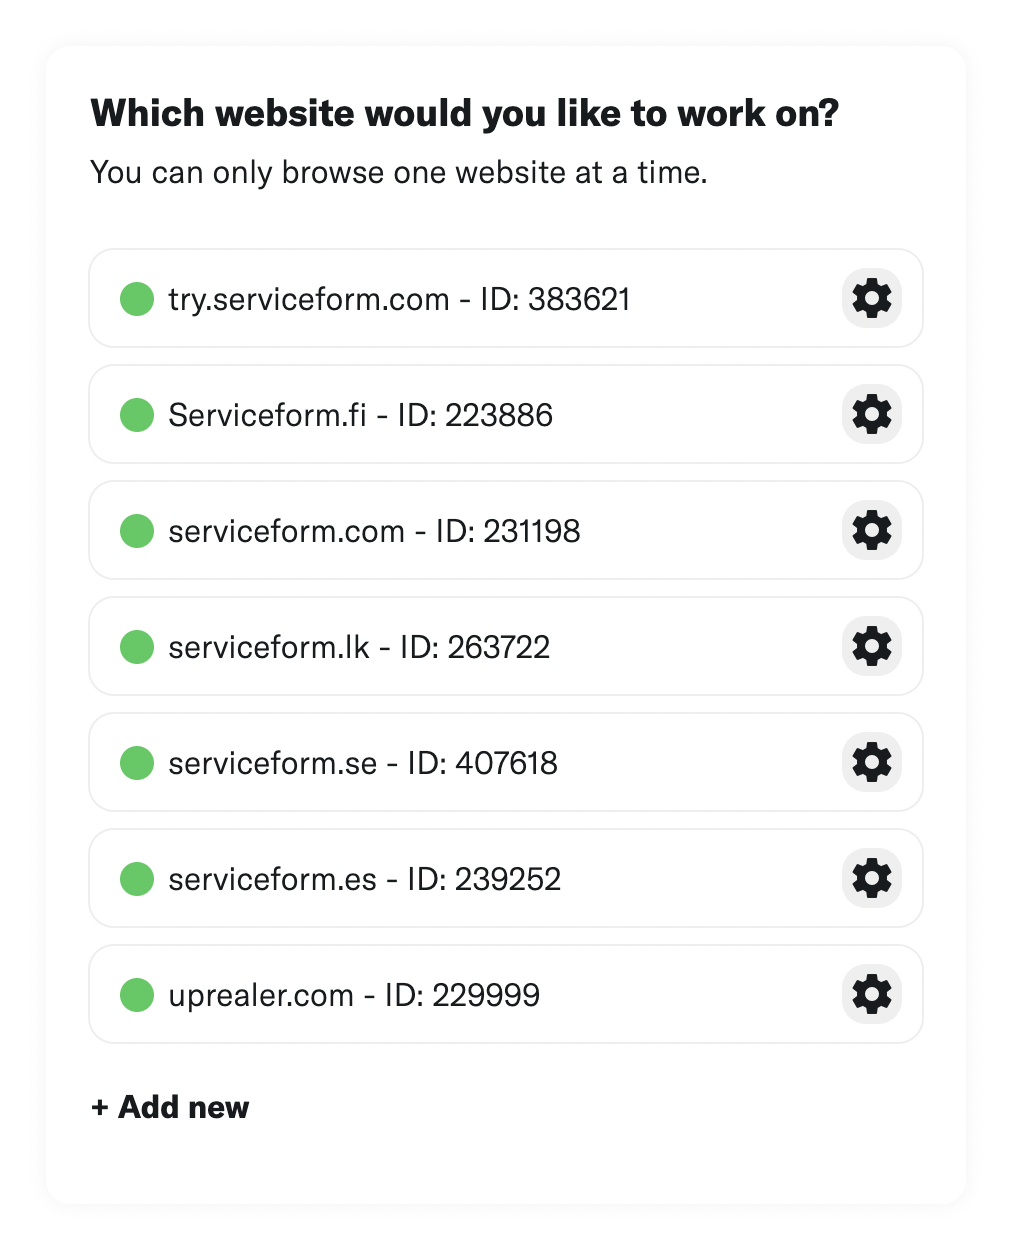
To start, click on the website you’ve set up on your Serviceform account and select settings.
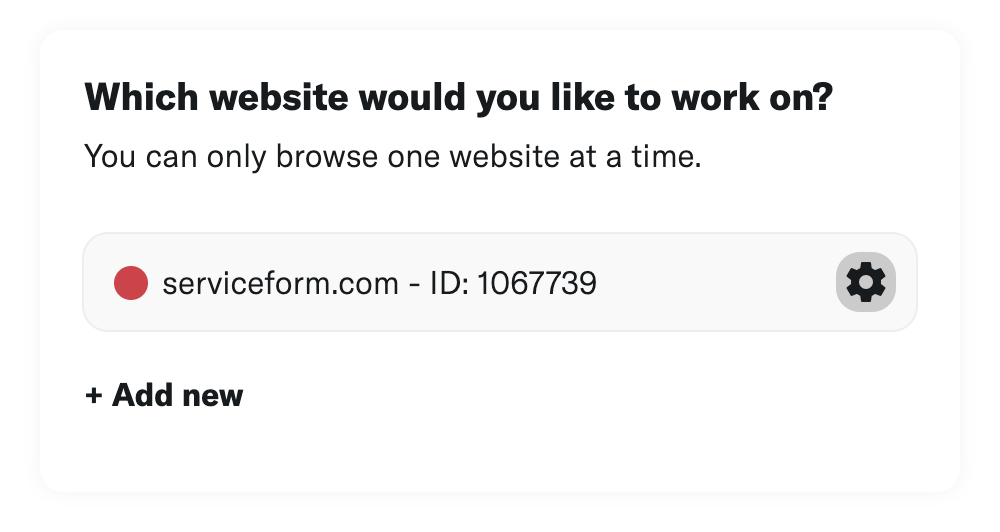
Then, copy the pixel code and paste it on the header tag section of your website.
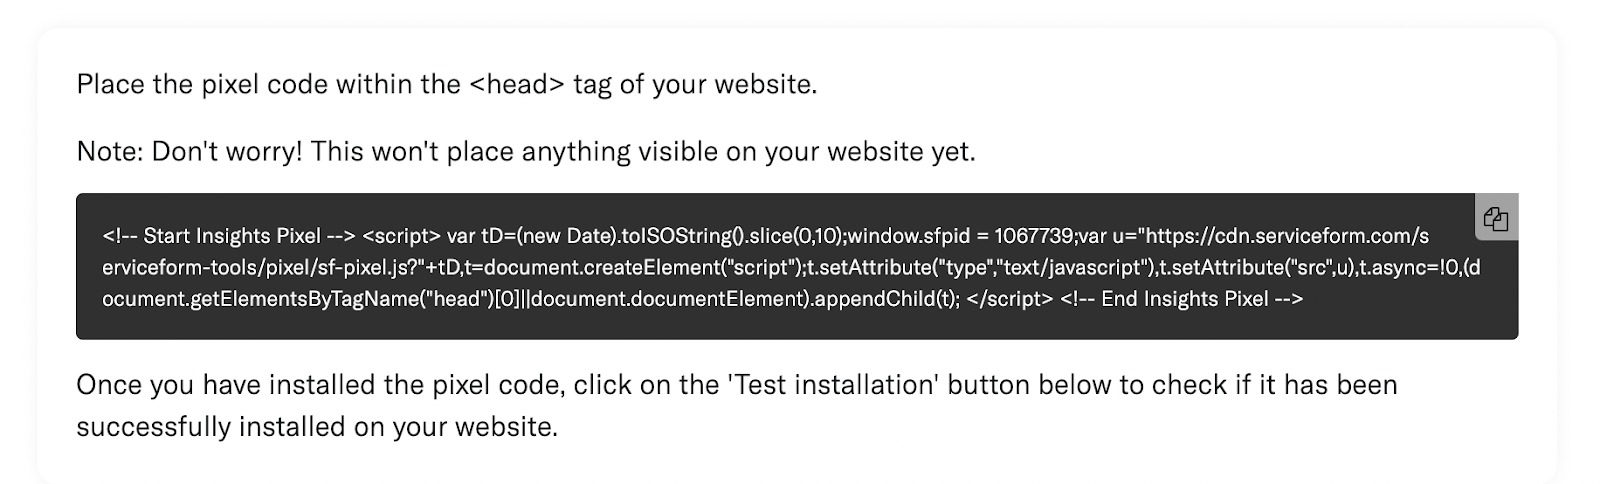
Voila! Your website just got a lot cooler with Serviceform’s Floating bar.
Using Google Tag Manager
No worries if HTML isn't your thing. Installing the Serviceform pixel onto your website using Google Tag Manager is easy.
Simply choose the option to install via Google Tag Manager in your Serviceform account, then copy your unique pixel code.
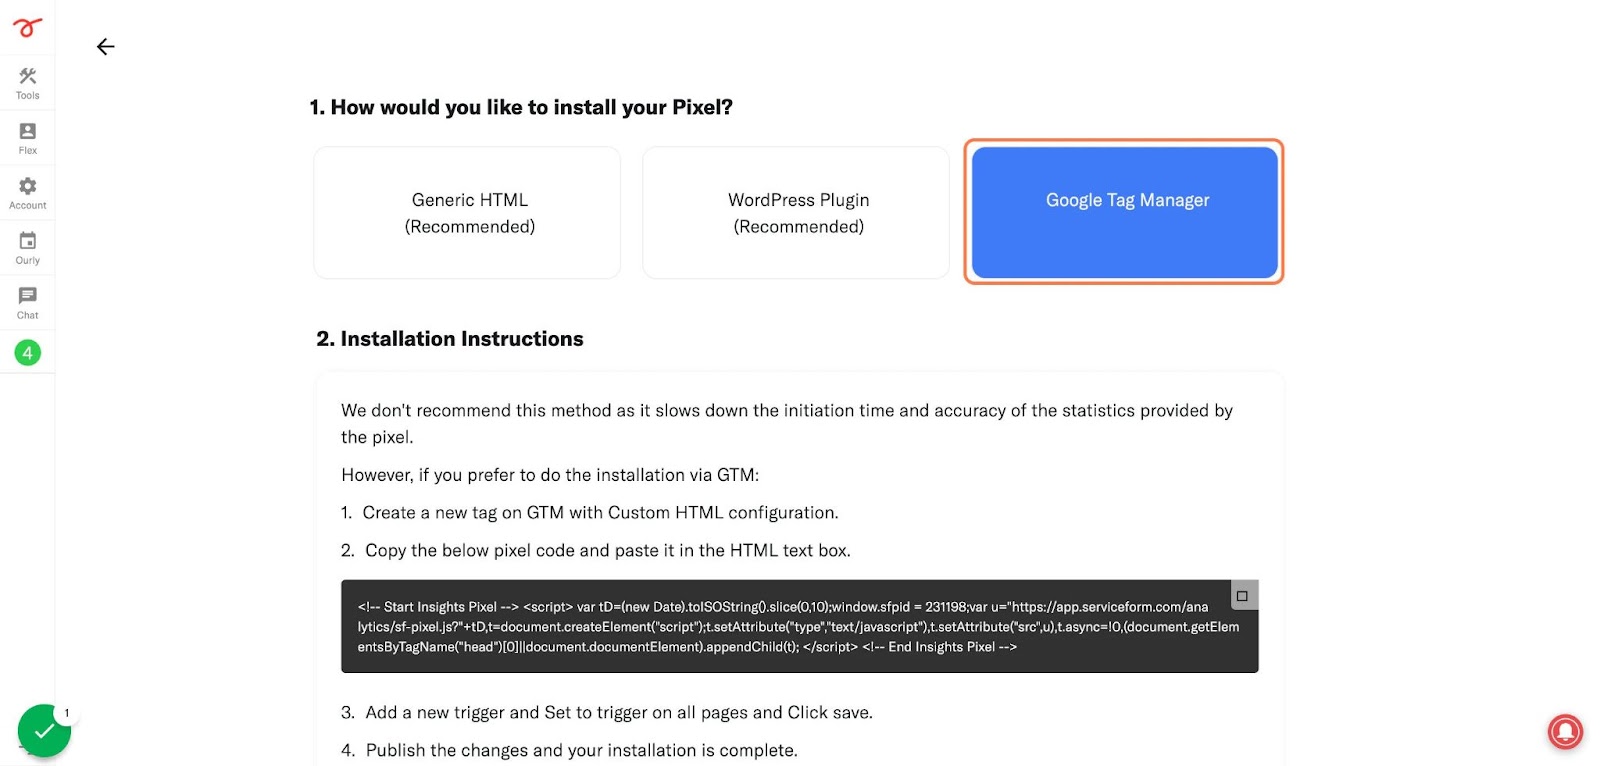
Next, head over to your Google Tag Manager account and create a new tag. Then name your tag.
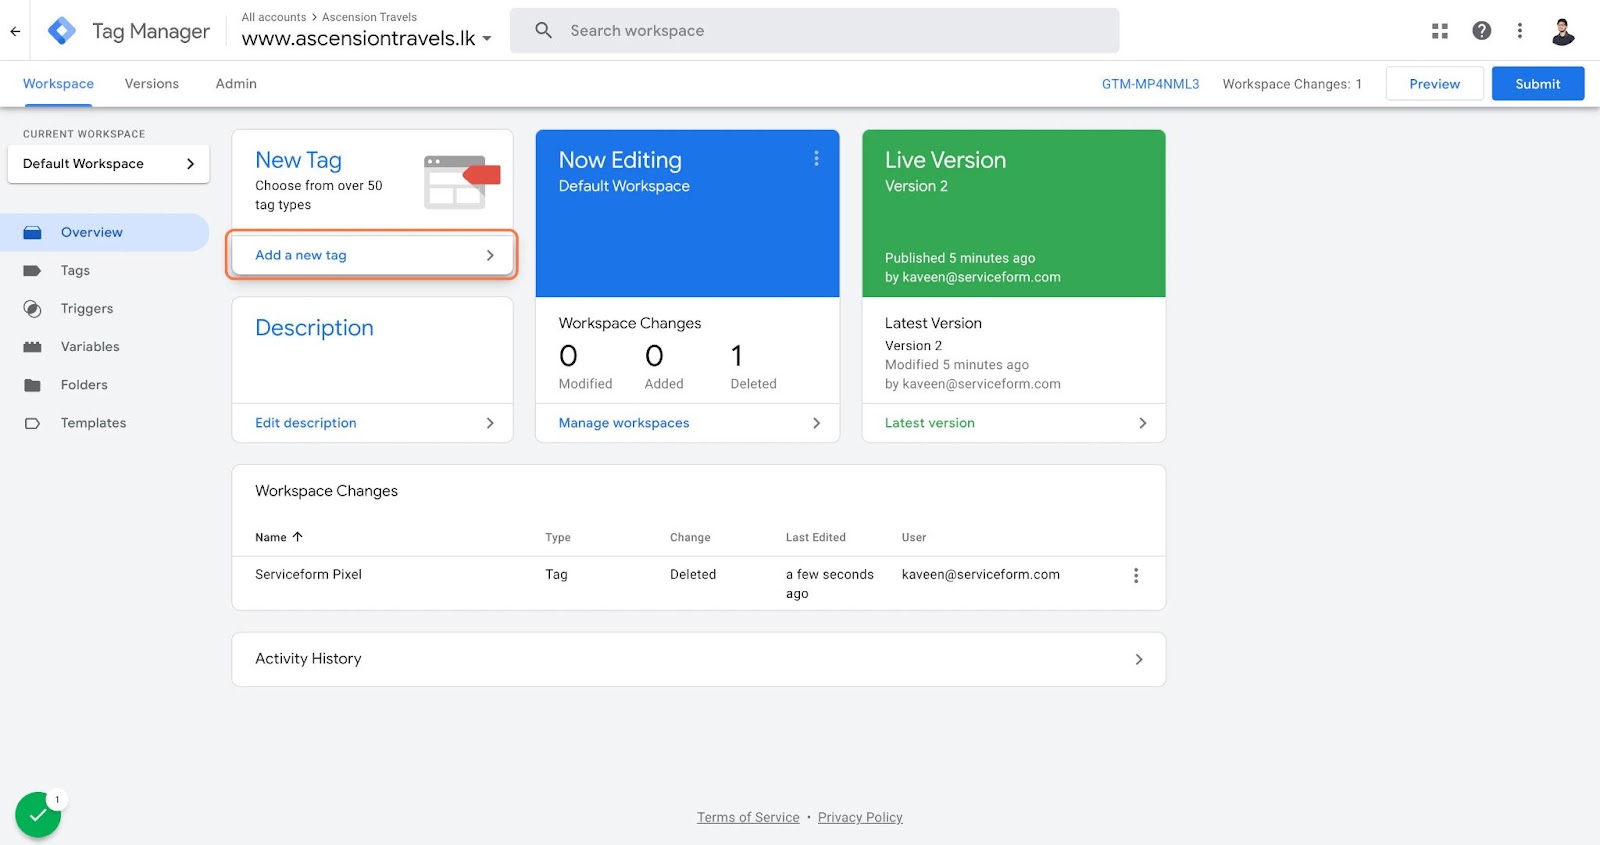
Once you've named your tag, head to the tag configuration and choose custom HTML from the drop-down menu. Then, simply paste the Serviceform pixel code you copied earlier into the code area.
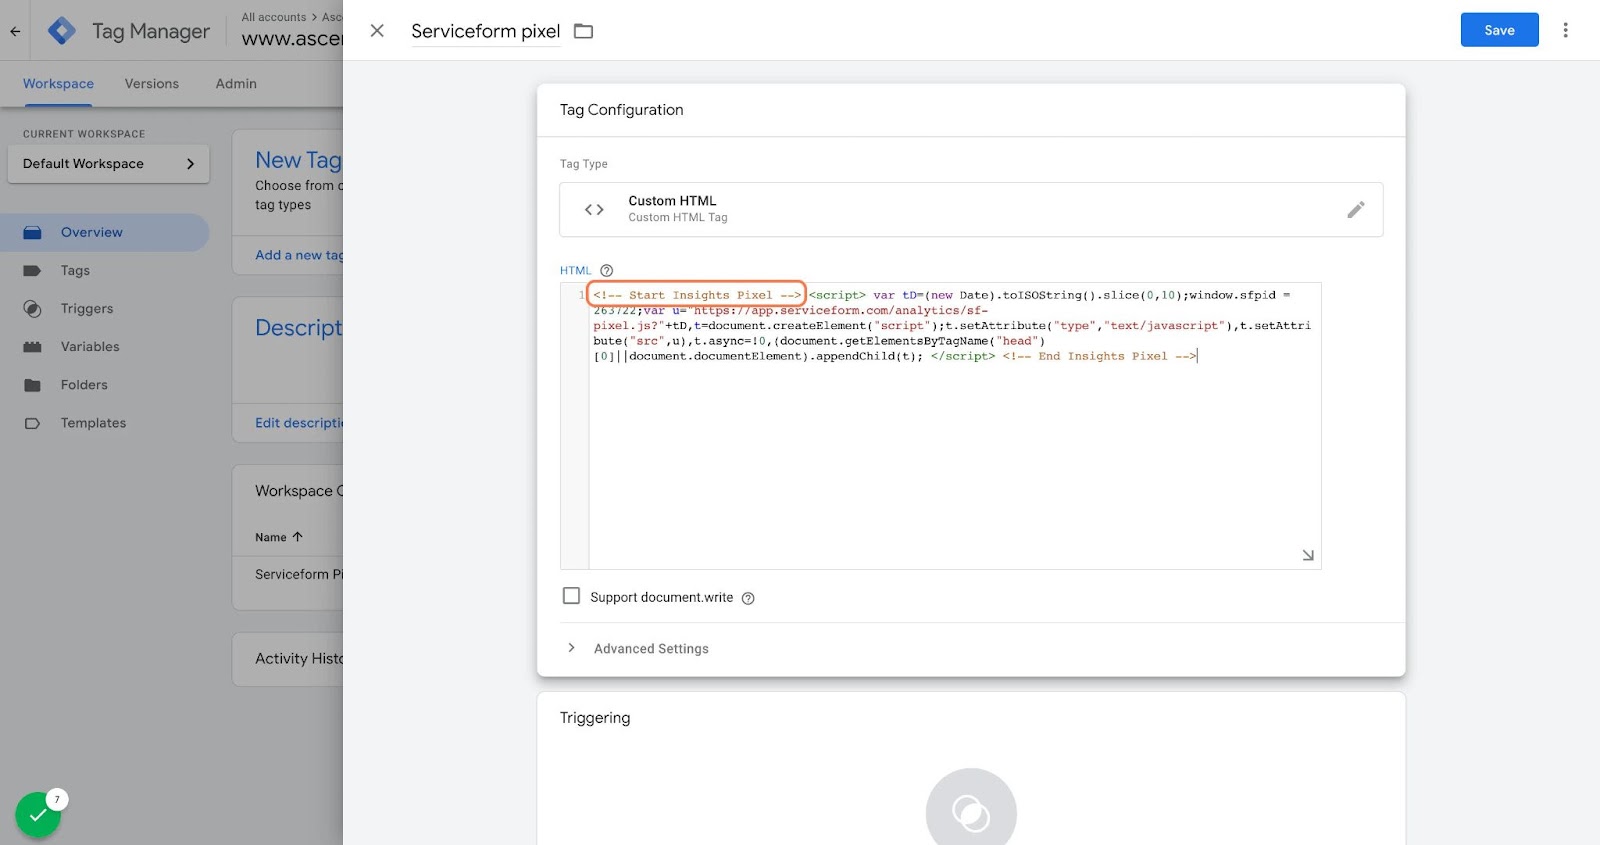
Then click on ‘triggering’ and select ‘all pages.’ Then save your work and press submit. In the submission configuration screen, type ‘Adding Serviceform pixel’ into the ‘Version name’ area, and you’re all set.
Step 3. Test if your Serviceform pixel is live
You can check if your pixel is active by looking at the top right corner of your dashboard.
If you see a green circle, that means it's active and ready to go. But if you see a red circle, it means it's not active yet. No worries, just give it a quick check and get it up and running in no time.
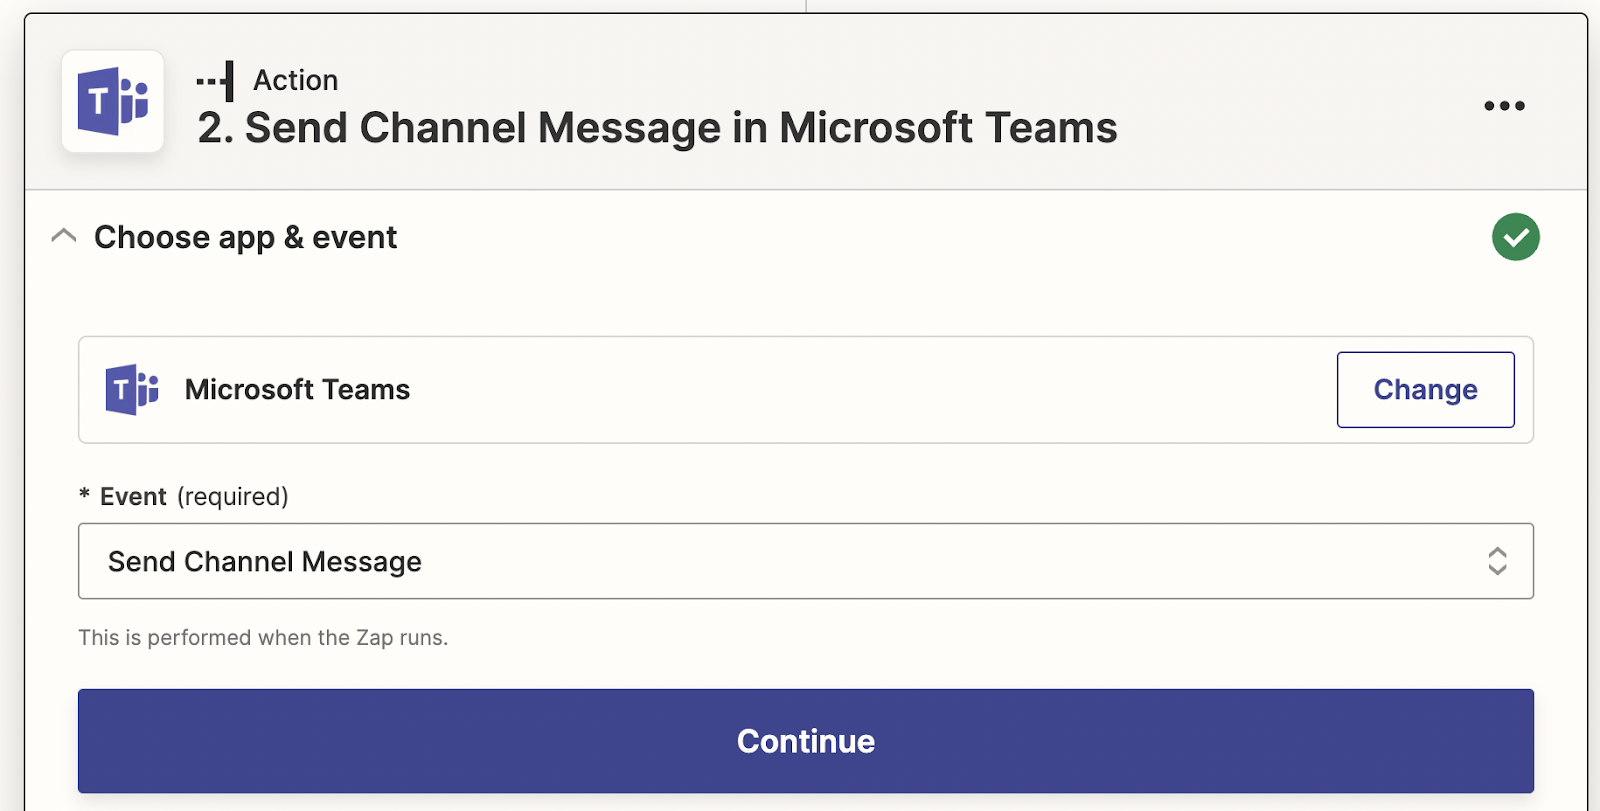
Step 4. Connect your floating bar with Microsoft Teams through Zapier
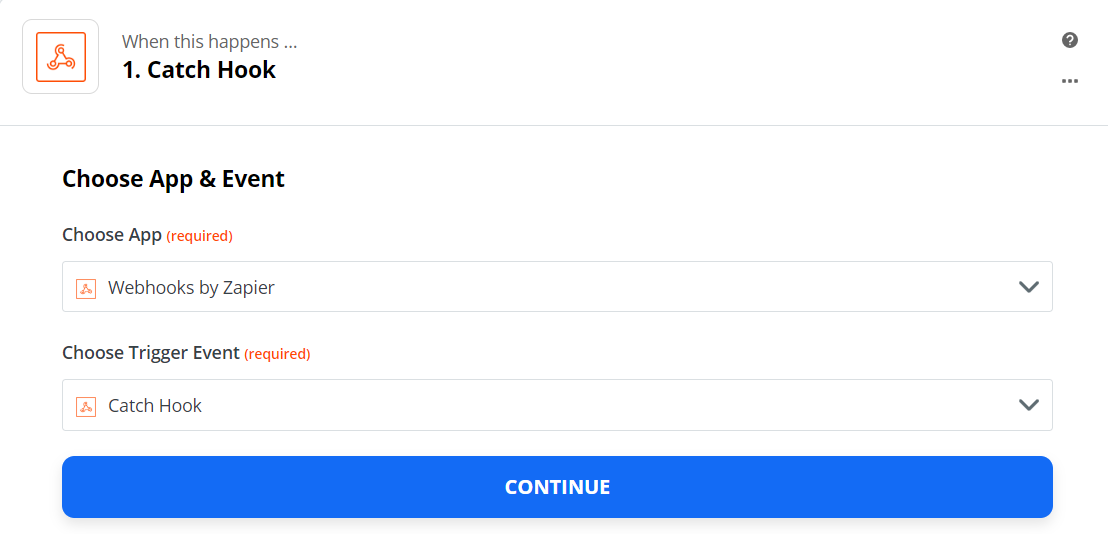
Once logged in, click on the option to create a new Zap. In the next step, select “Webhooks by Zapier” under the “App & Event” section, trigger the event “Catch Hook” and click “Continue”.
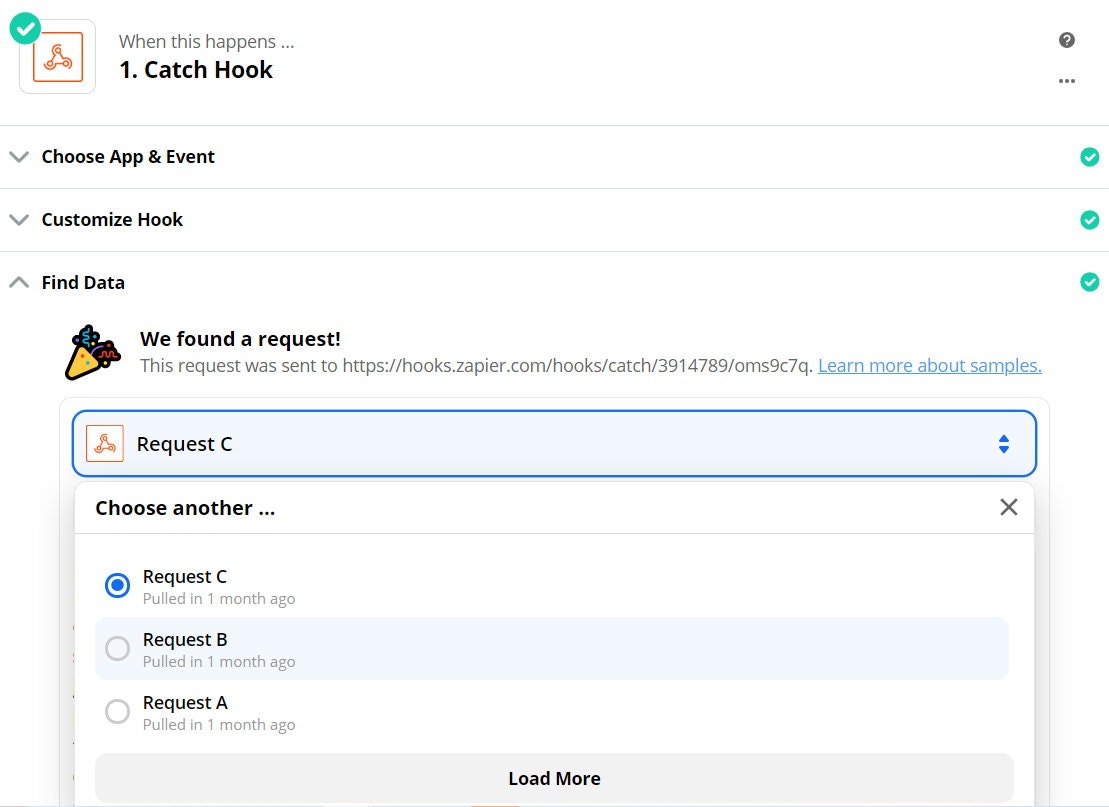
Copy the webhook URL from the floating bar's settings, then go to the preview and submit a test to see if the webhook correctly tracks your submission.

On Zapier, go to “Test & Review”, and choose the request you want to monitor.
Now at the next step, select the Microsoft Teams app and choose the “Create or Update Contact” action event. Proceed by selecting “Continue” and then pick your Microsoft Teams account.
If you haven't connected your Zapier account yet, go to “Edit Accounts” and log in. Next, proceed to “Customise Contact” and fill in the necessary fields for successful integration with your Microsoft Teams account. Once you have completed the desired information, select “Done Editing” and run the final test.
Congratulations! You're now ready to go. You can run tests, set up email notifications, and more.
Each time a customer completes a flow through the floating bar and submits their information, that data will automatically be added to your Microsoft Teams account.


.png)


.png)


