
Webflow is a fantastic web design platform that lets you bring your creative vision to life without any coding required. Whether you're a seasoned pro or just starting out, Webflow gives you the tools you need to bring your ideas to the web in no time.
Adding a form to your website is a key aspect of converting visitors into leads, but traditional forms can often come across as static and uninviting. With a dynamic form, however, you can offer a more personal and engaging experience that encourages visitors to take action.
By incorporating a dynamic form into your Webflow website, you'll enjoy numerous benefits such as increased conversions, leads, and sales. With its customisable features, you can tailor the form to fit your brand and optimise the user experience for your visitors. Get started today and take your website to the next level.
But don’t compromise on quality, choose the best form for your website.
Why you should use Serviceform Form for the Webflow website
- Choose from a variety of form templates or create your own using the drag-and-drop form builder.
- Create a personalised and engaging user experience with conversational forms that guide users through your website.
- Collect valuable data and insights about your customers with Serviceform's deep-usage statistics and data export options.
- We build our forms with security and reliability in mind, ensuring that your data is protected and your forms are always available.
- Serviceform Forms are designed to reduce form abandonment and increase conversion rates, helping you turn more visitors into customers.
- Serviceform Forms are optimised for fast loading times and a seamless user experience on any device.

You are about to make your Webflow website even better with the best Dynamic form.
But why just stop there?
It's now time to think outside the box and see how you can make the most of your form and increase your online presence. Check out our Dynamic form templates library and be inspired to bring new and creative ideas to your website.
Creating a Webflow form with Serviceform is simple and easy. Let's take a look at how to build a smart form for your Webflow site using Serviceform's builder.
Step 1. Create your Serviceform pixel
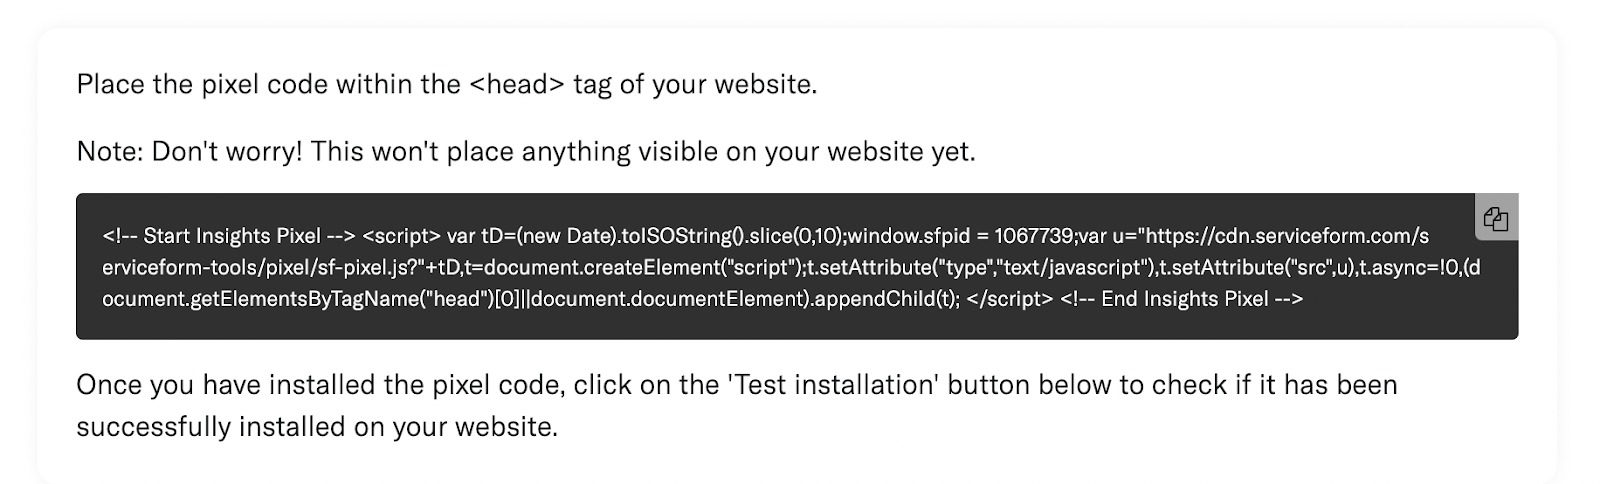
After you create your Serviceform account, you can generate your Serviceform pixel in the box below. To start, type your website URL and select "START NOW".

Step 2. How to install a free form on Webflow
Using HTML
If you're a tech-savvy person or have a developer in your team, it's easy to add a Serviceform Form to your Webflow website using HTML.
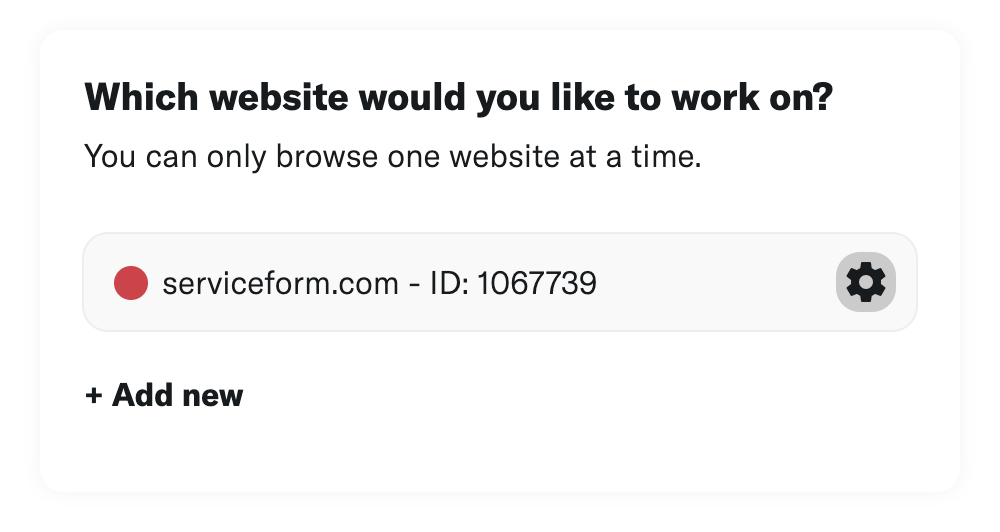
To start, click on the website you’ve set up on your Serviceform account and select settings.
Then, copy the pixel code.
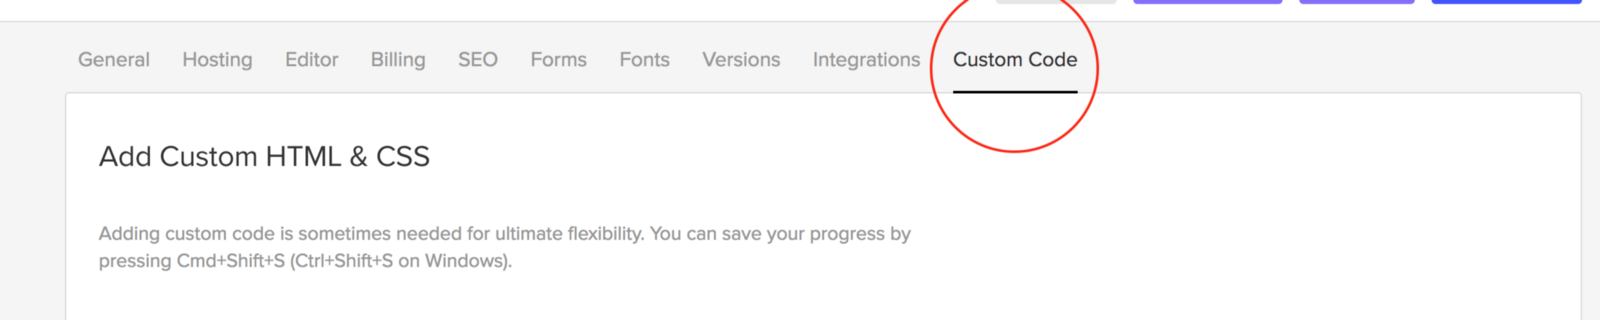
Log in to your Webflow website's admin panel. Once you're in the project, head to the menu by clicking on the Webflow logo in the left corner. Then, navigate to the "Project Settings" and select "Custom Code."
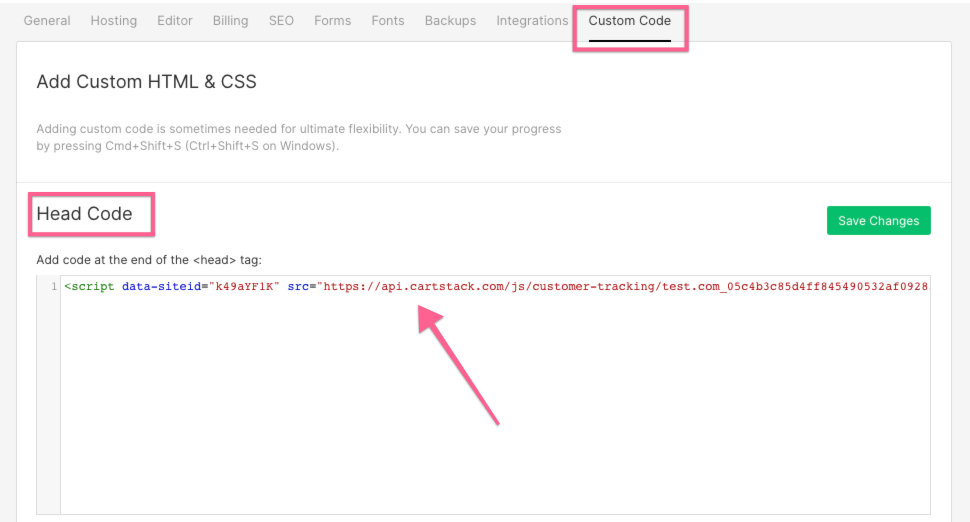
Simply paste the embed code that you’ve copied, in the Head Code section and hit "Save Changes”.
Voila! Your Webflow website just got a lot cooler with Serviceform’s Dynamic form.
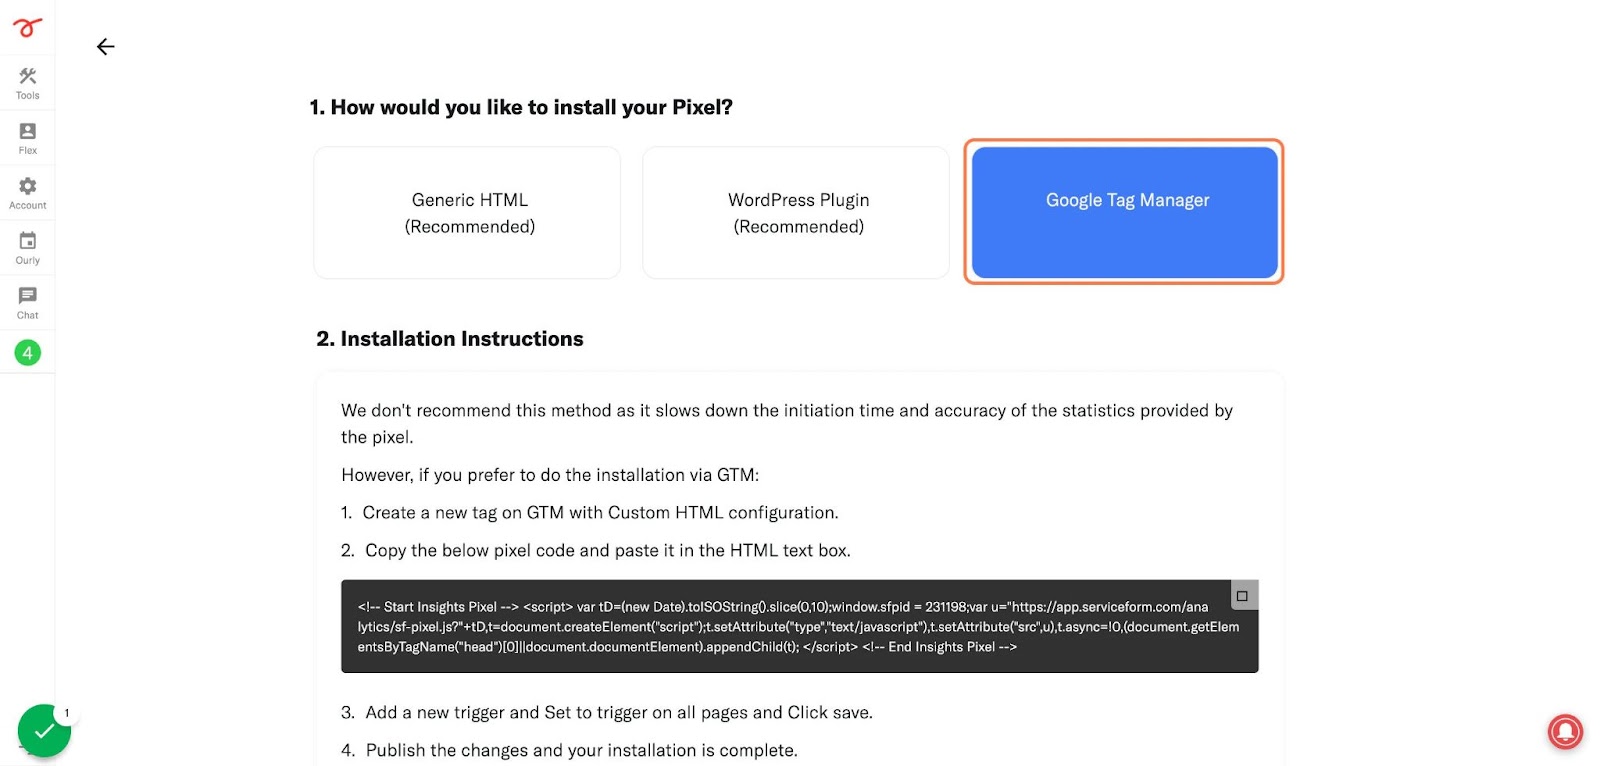
Using Google Tag Manager
No worries if HTML isn't your thing. Installing the Serviceform pixel into your Webflow website using Google Tag Manager is easy.
Simply choose the option to install via Google Tag Manager in your Serviceform account, then copy your unique pixel code.
Next, head over to your Google Tag Manager account and create a new tag. Then name your tag.
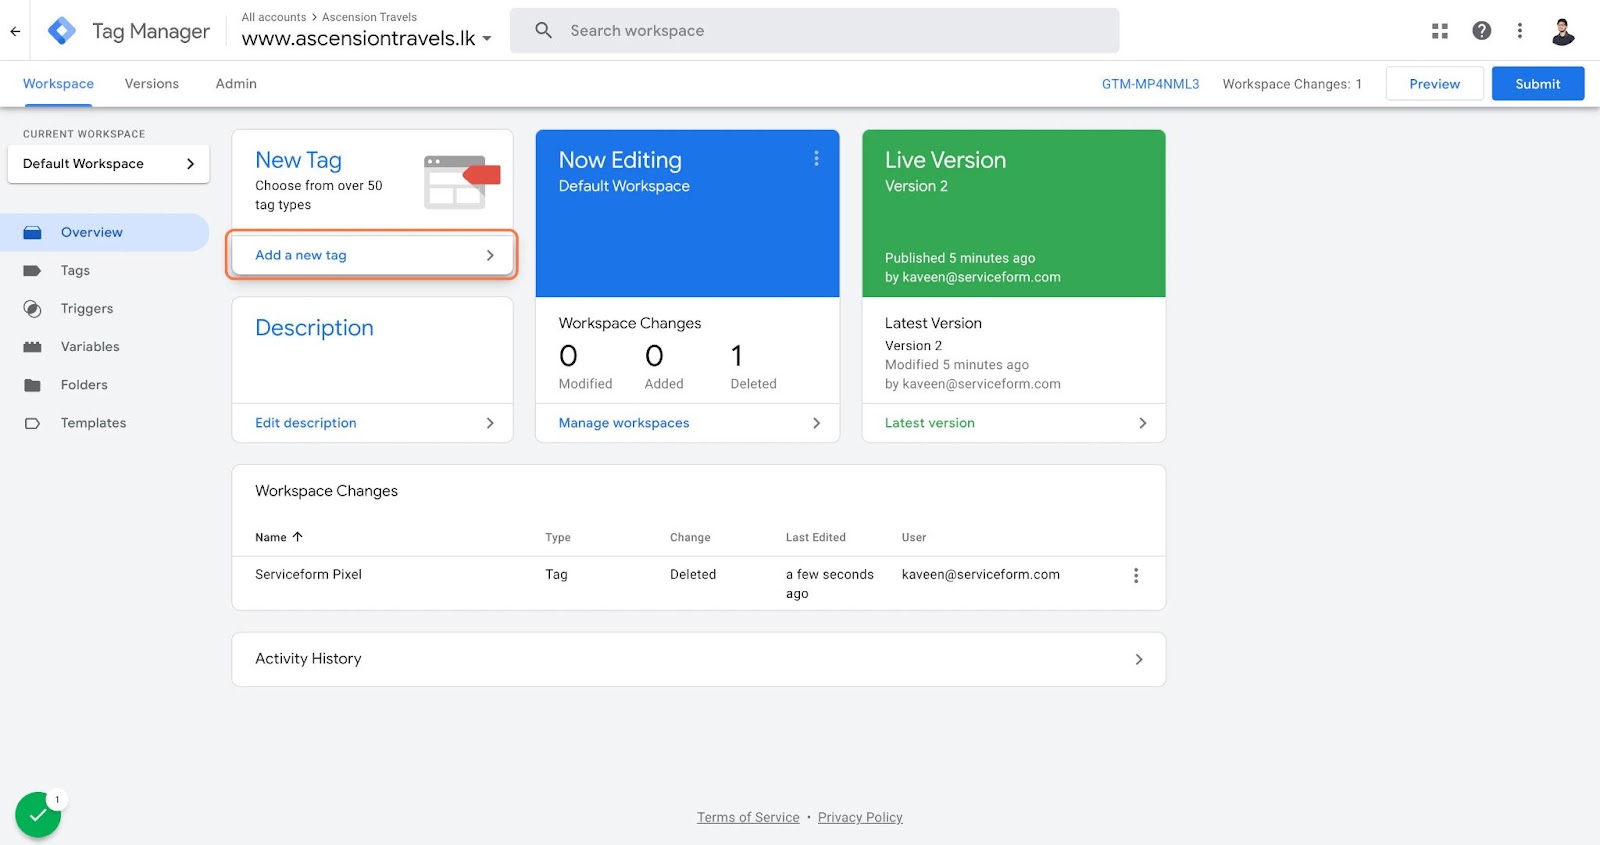
Once you've named your tag, head to the tag configuration and choose custom HTML from the drop-down menu. Then, simply paste the Serviceform pixel code you copied earlier into the code area.
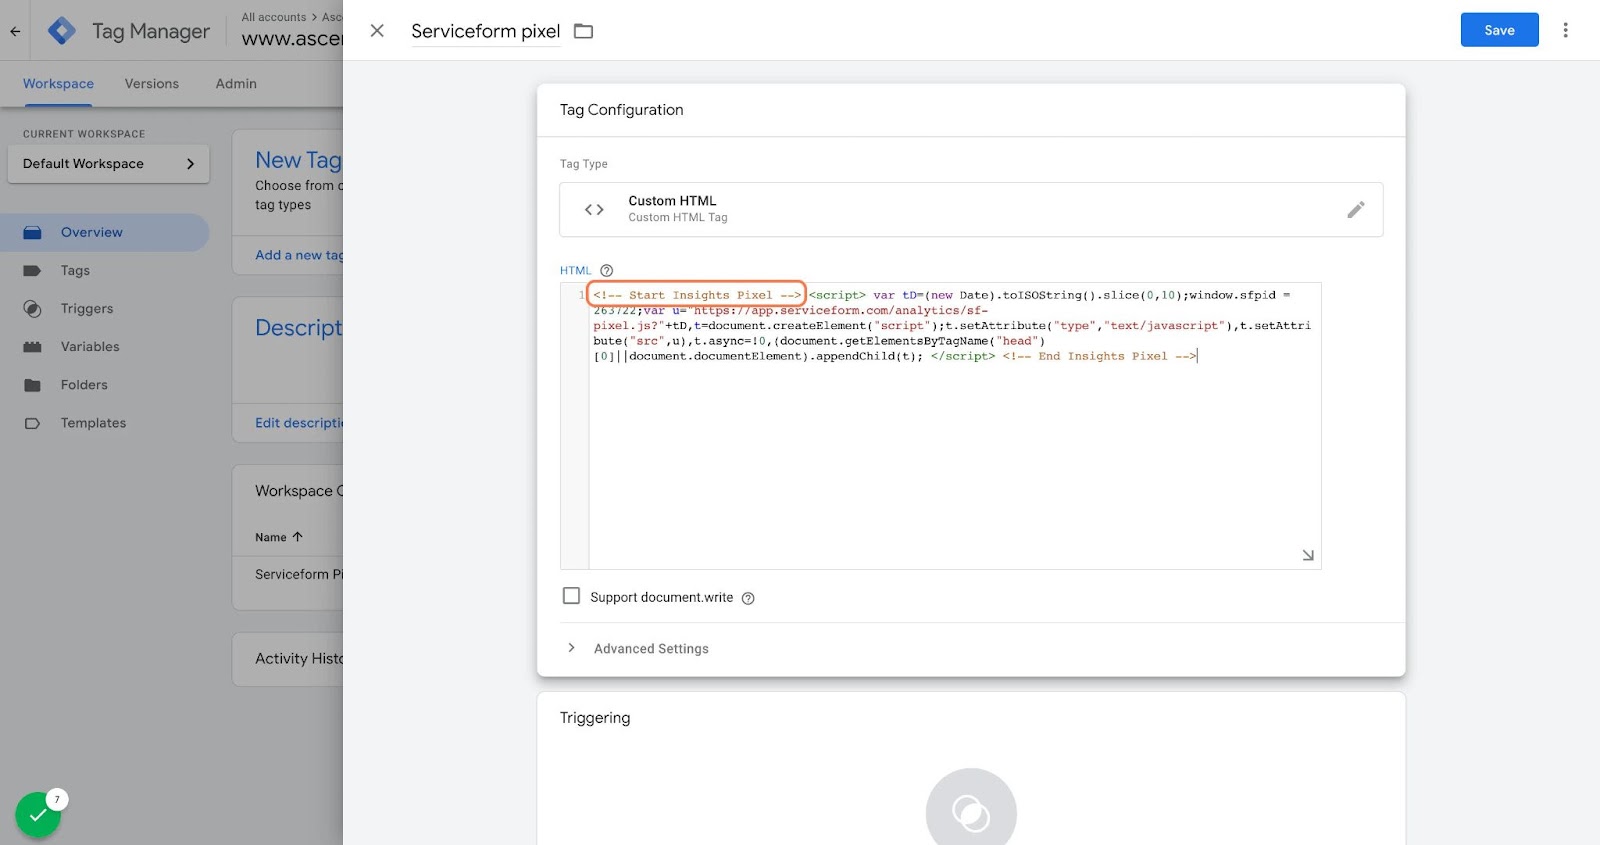
Then click on ‘triggering’ and select ‘all pages.’ Then save your work and press submit. In the submission configuration screen, type ‘Adding Serviceform pixel’ into the ‘Version name’ area, and you’re all set.
Step 3. Test if your Serviceform pixel is live
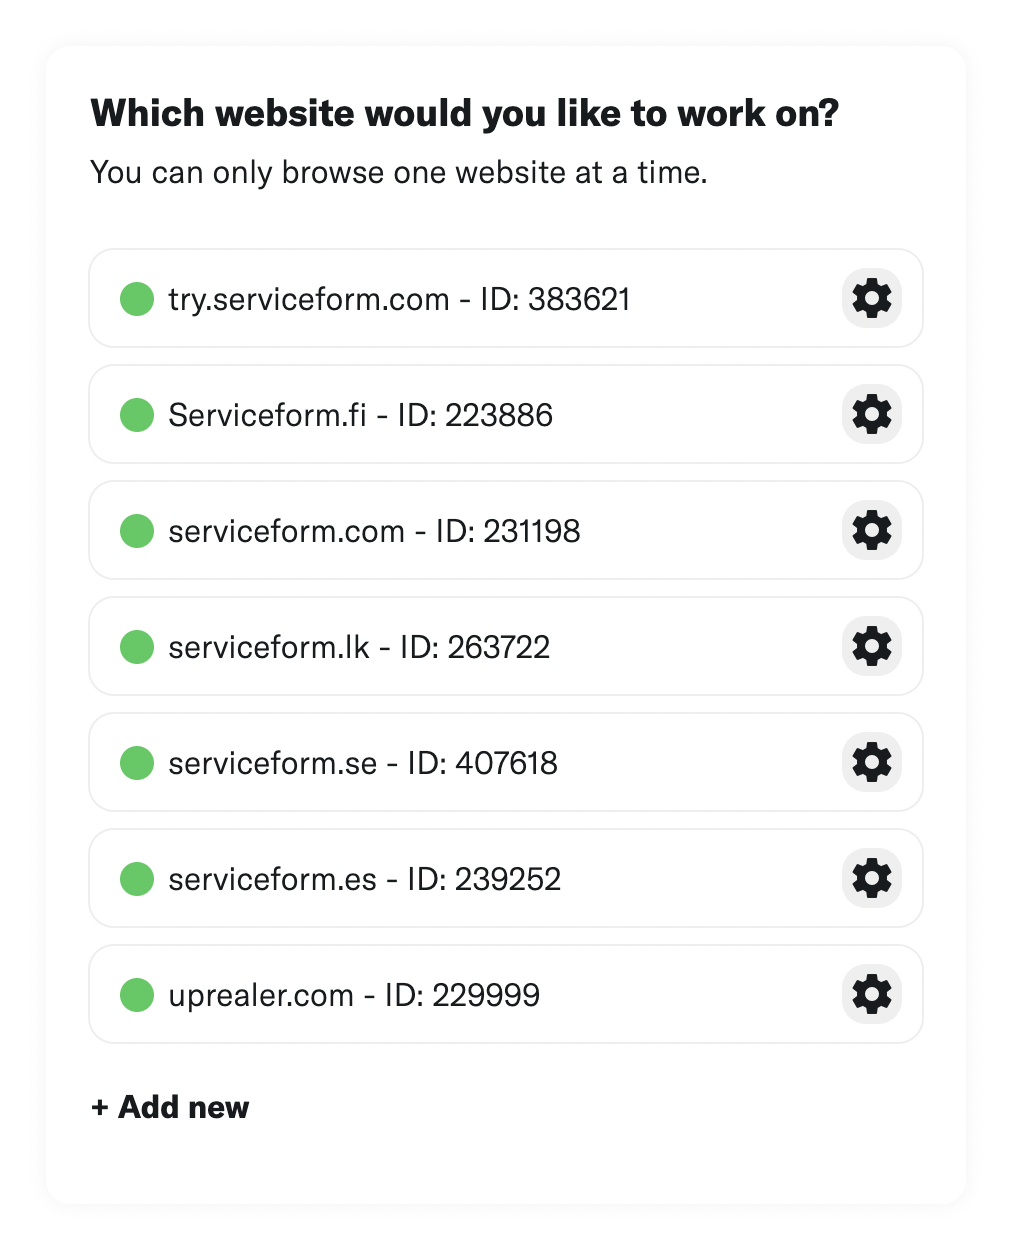
You can check if your pixel is active by looking at the top right corner of your dashboard.
If you see a green circle, that means it's active and ready to go. But if you see a red circle, it means it's not active yet. No worries, just give it a quick check and get it up and running in no time.


.png)


.png)


