




Dynamic tags
Learn how to make use of dynamic tags in your Chat flow.
You can update the information in the chatflow dynamically based on the data submitted by the customer. Here is how you can do it:
1. Navigate to the chat flow in the tool builder.
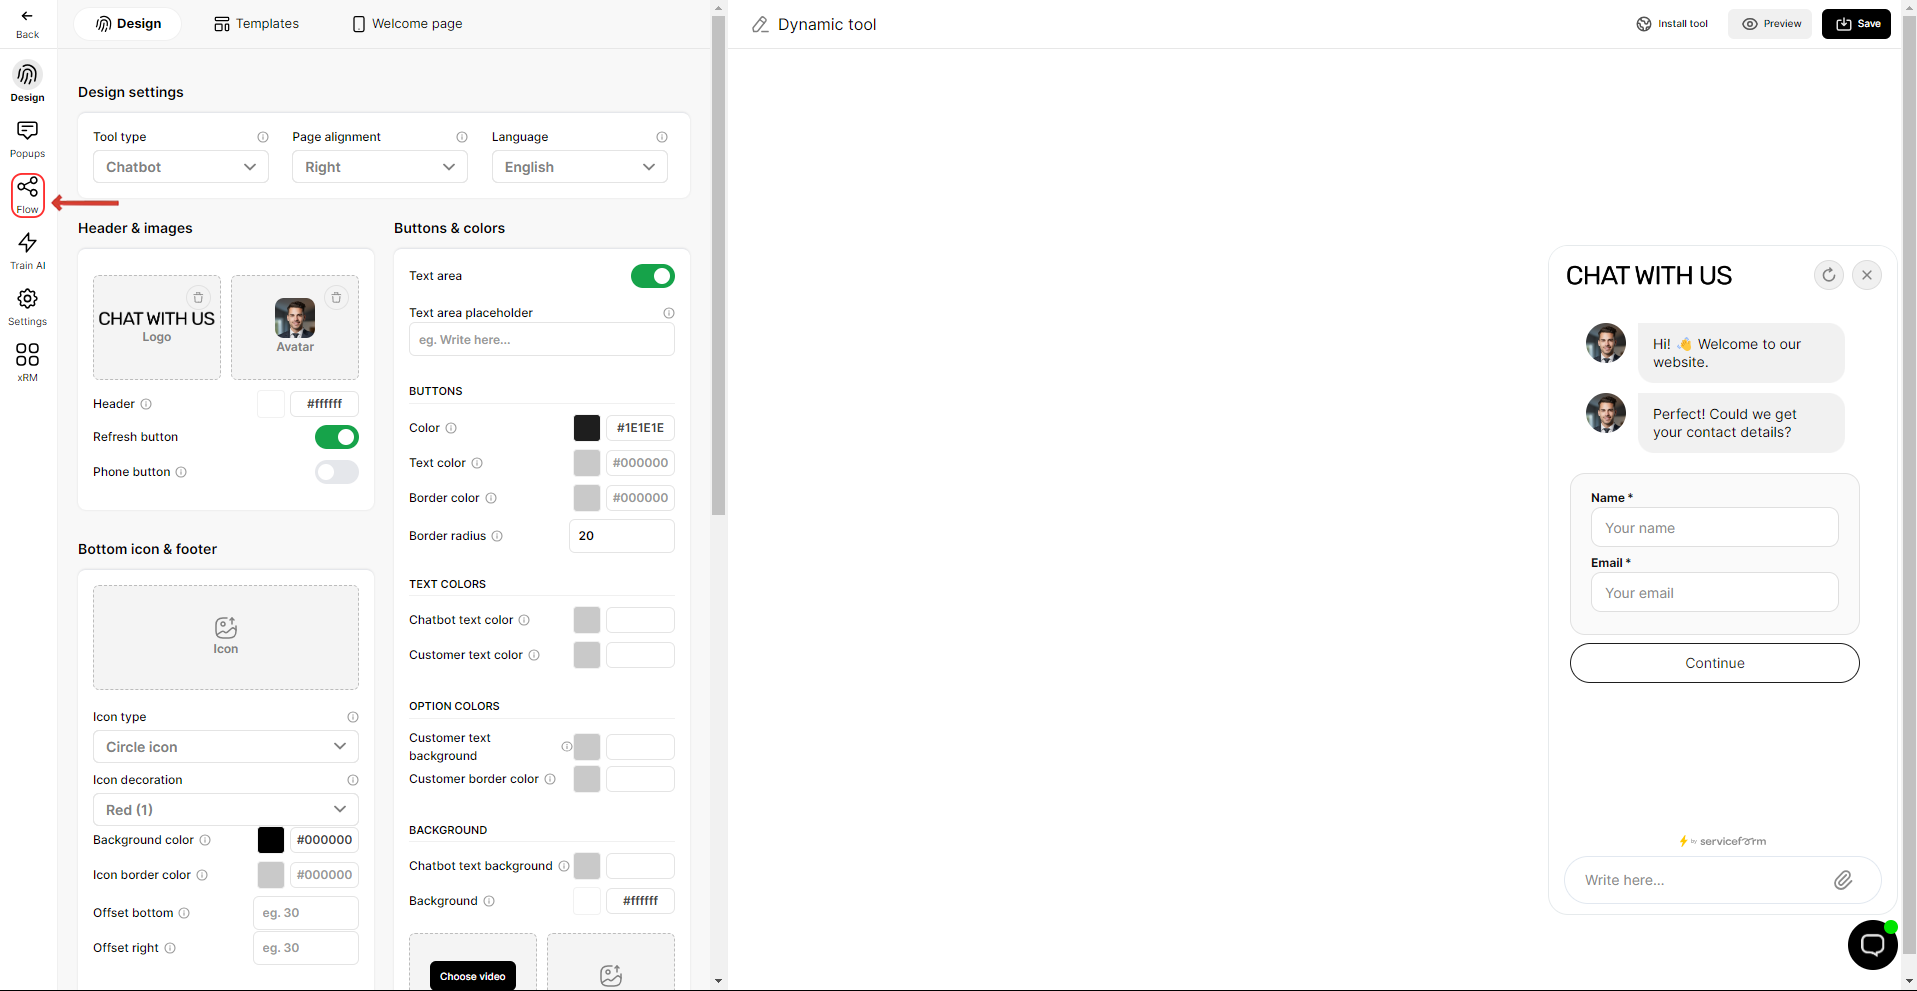
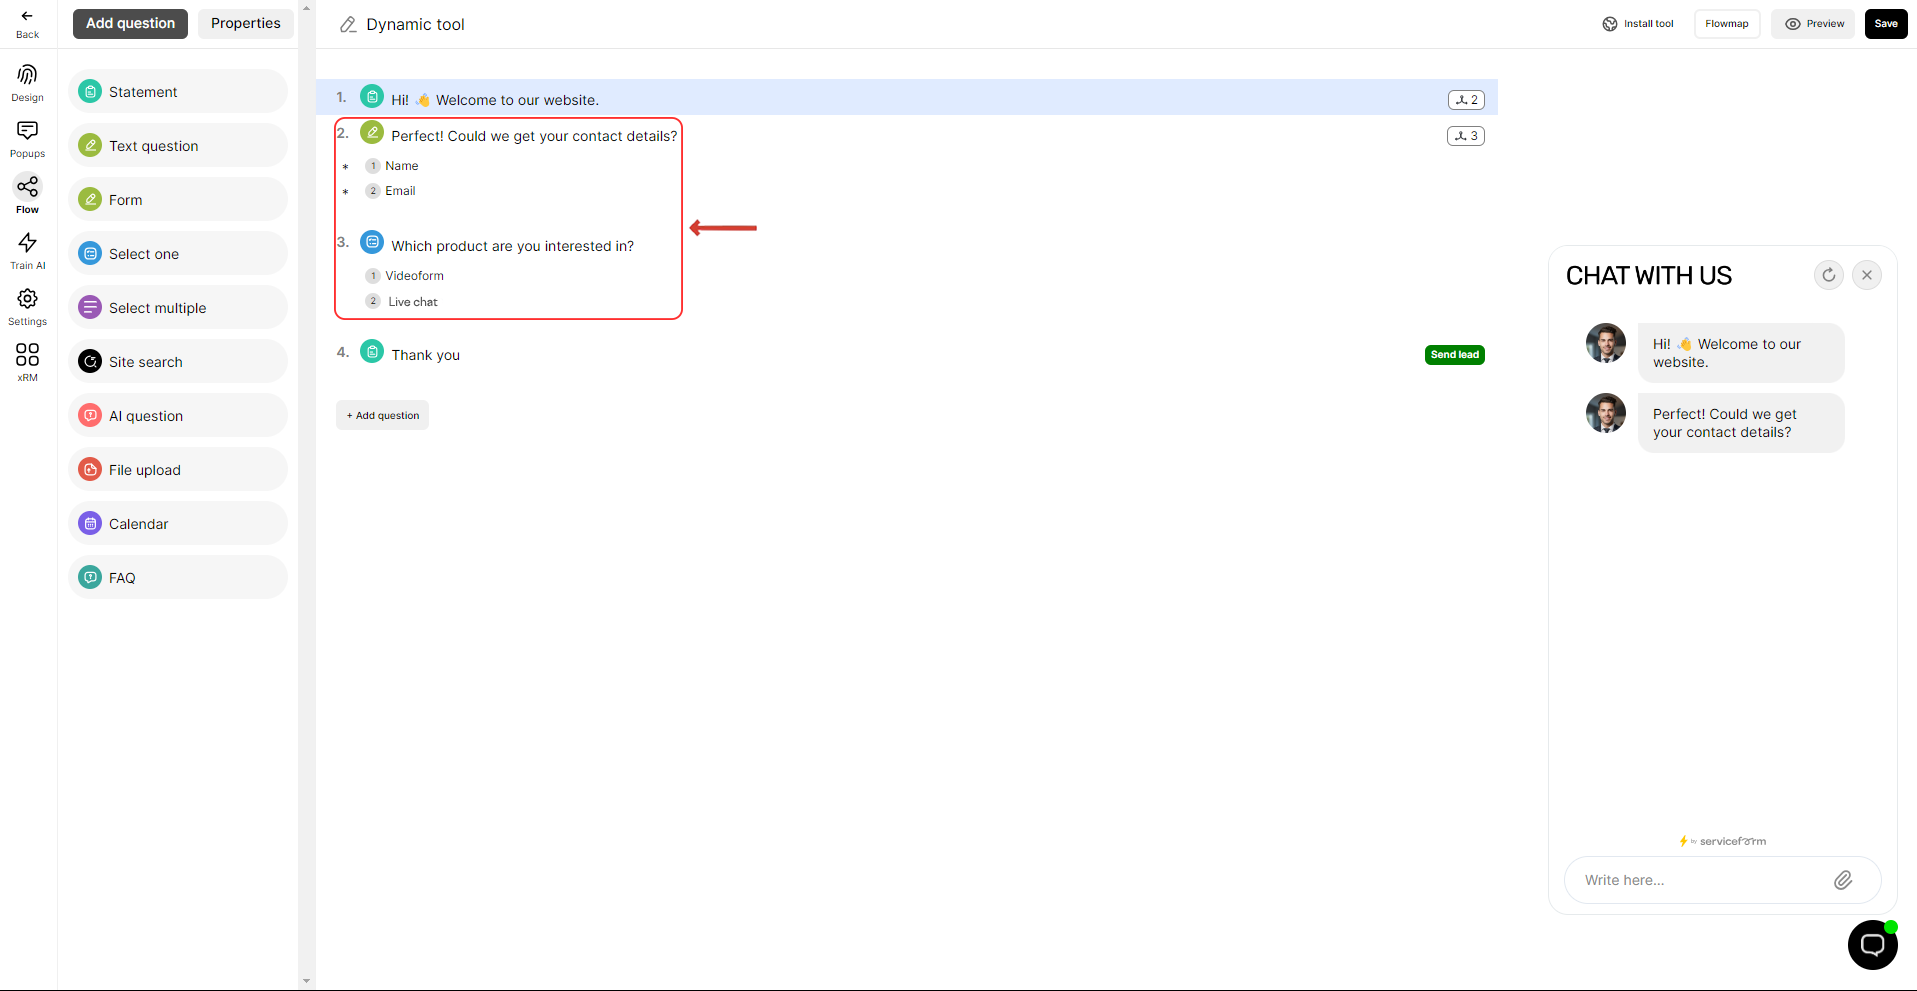
2. For instance, if you want to use the data submitted by the customer in field 1 and 2 of question 2 (Form type question), you will be able to use the following tags for :
• #question2field1
• #question2field2
If the third question is a multiple choice question you can get the answer chosen by the customer using :
• #Q3
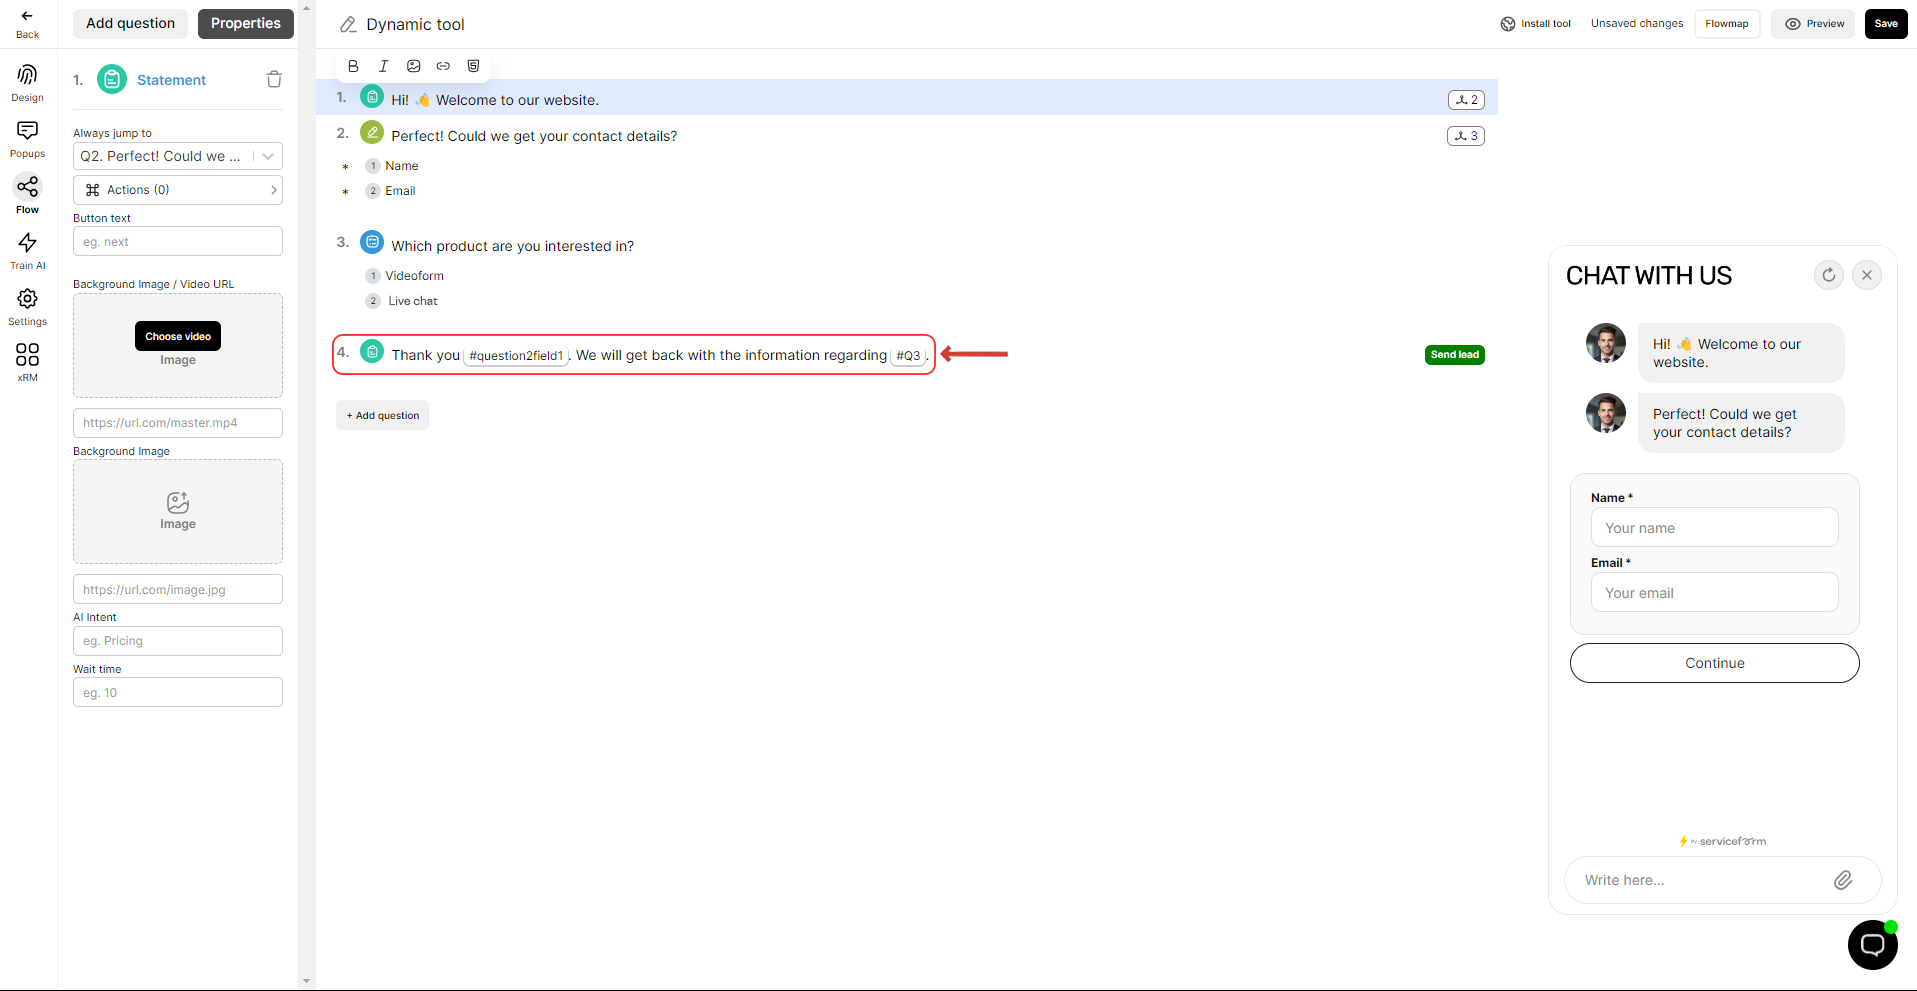
3. You can use the data submitted by the customer in another question by using the tags mentioned above.
For instance, if you want to use it in question 4 :
“Thank you #question2field1. We will get back with the information regarding #Q3”
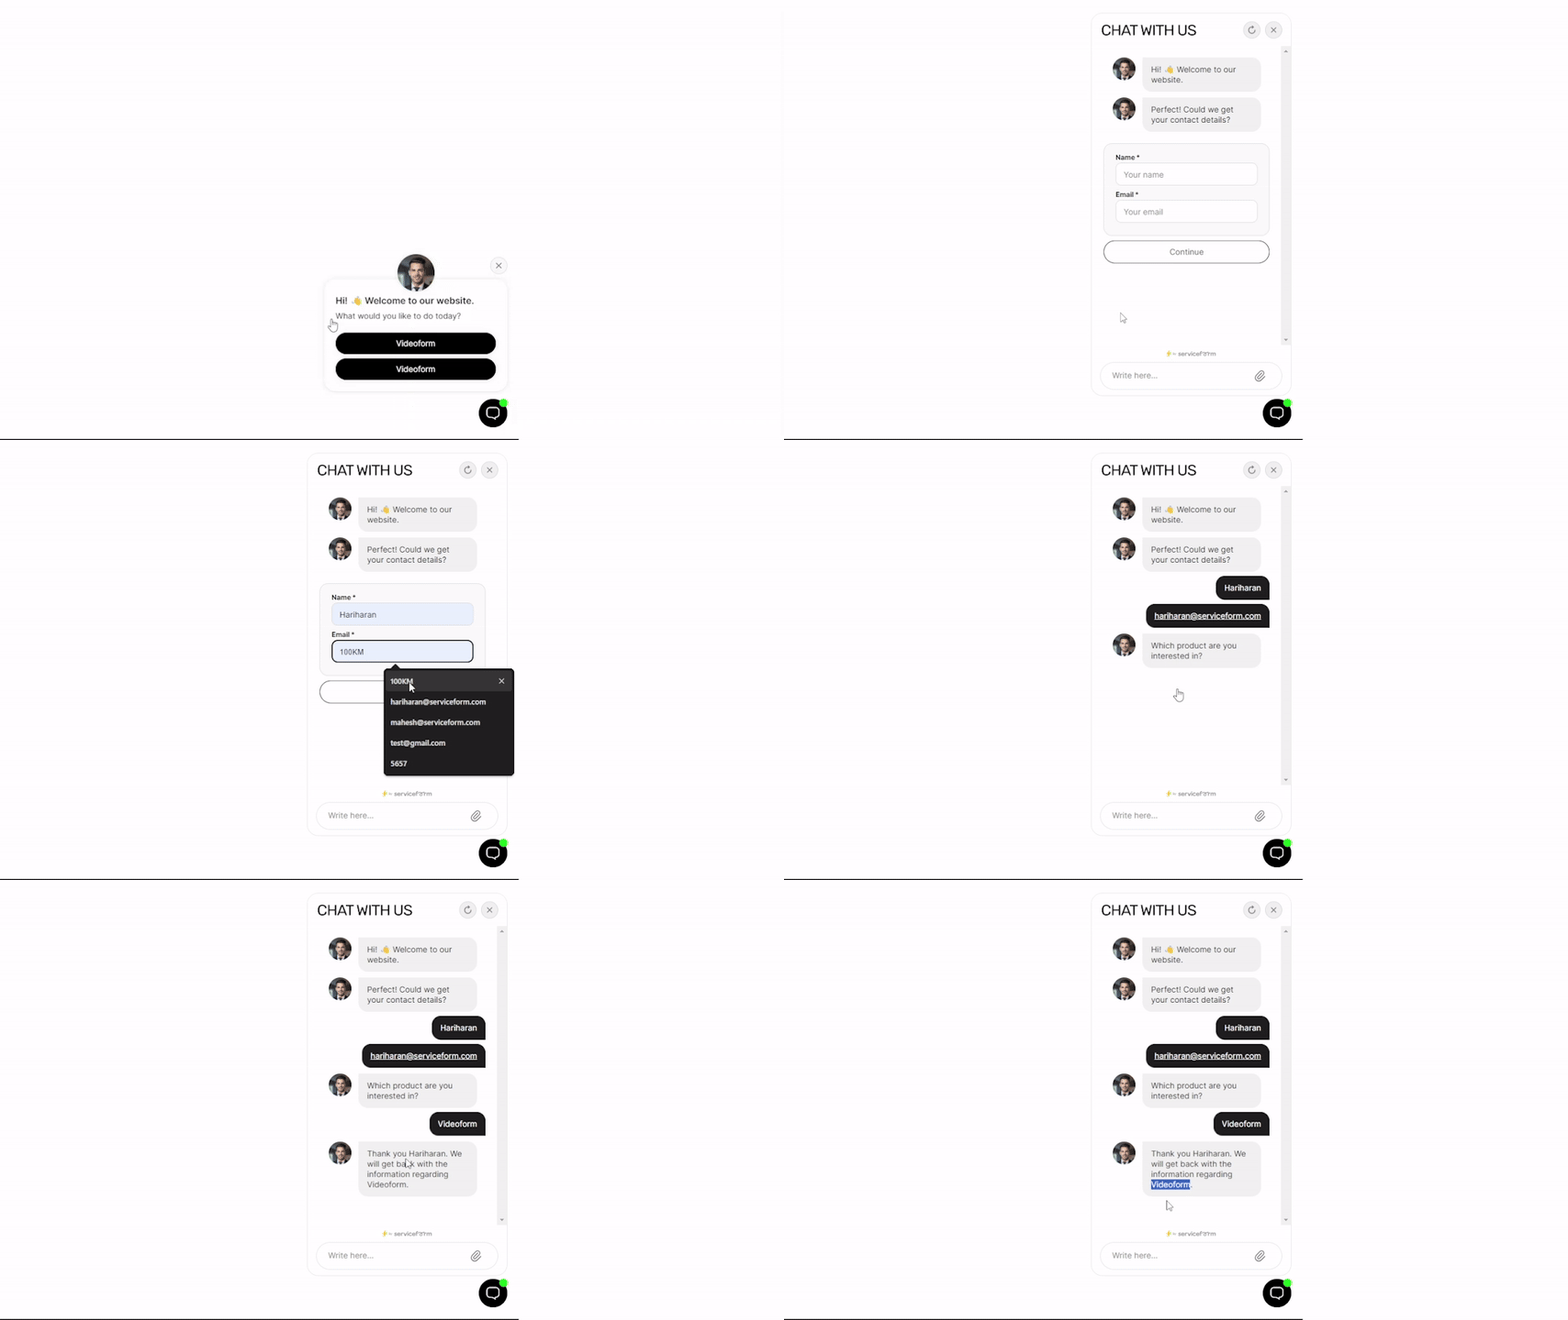
4. Click on Preview the Chatbot. Note that the dynamic tags are not visible in the chatbot preview located in the left side of tools builder page.
The following dynamic tags are available for direct access to fields in chatbot Form question types. These tags map automatically based on specific field types and can be used to retrieve values across the chat flow:
**• #customerAddress**
Maps to fields using Address and Address autocomplete (Google) validation.
**• #customerDate**
Maps to “Calendar” question type.
**• #customerEmail**
Maps to the field
**• #customerName**
Maps to fields with validation Name, Full name, First name, or Last name.
**• #customerPhone**
Maps to fields with validations Phone number or Phone number (Country dropdown).
**• #customerPostcode**
Maps to fields with validations as Post code or Post code (numbers only).
When multiple forms contain fields with the same validation type, the tag retrieves only the most recent value entered. For instance, if two forms include a field validated email address, the last entered email will be accessible using #customerEmail.
With the use of dynamic tags you can provide a personalized experience to your customers. Give it a try! 🚀
Related articles
- Creating a chatbot In just 5 minutes, you can have your very own chatbot up and running with the help of Serviceform's drag-and-drop, no-code chatbot builder.
- Design the Chatbot This section guides you through customizing your chatbot's interface. Optimize design elements for a user-friendly experience with detailed instructions and visuals.
- Customize the Welcome page The welcome page is the initial interaction point for users engaging with your chatbot.
- Pop up design Learn how to configure the Pop up of your Chatbot.