




WhatsApp Embedded Signup
Quickly connect your WhatsApp Business account to Serviceform.
Easily connect your WhatsApp Business number to Serviceform directly through the dashboard, no separate Meta setup needed.
Prerequisites
Before getting started, there are a few pre-requisites to be satisfied :
• A Facebook account with administrator access.
• Phone number(s) (preferably a Business phone number) which is not registered either on personal or WhatsApp business. If it is registered, you will have to delete your account. Refer this link to know more.
• Credit/ Debit card to add a payment method to WhatsApp Business account. Refer this link to know more.
WhatsApp Embedded Signup
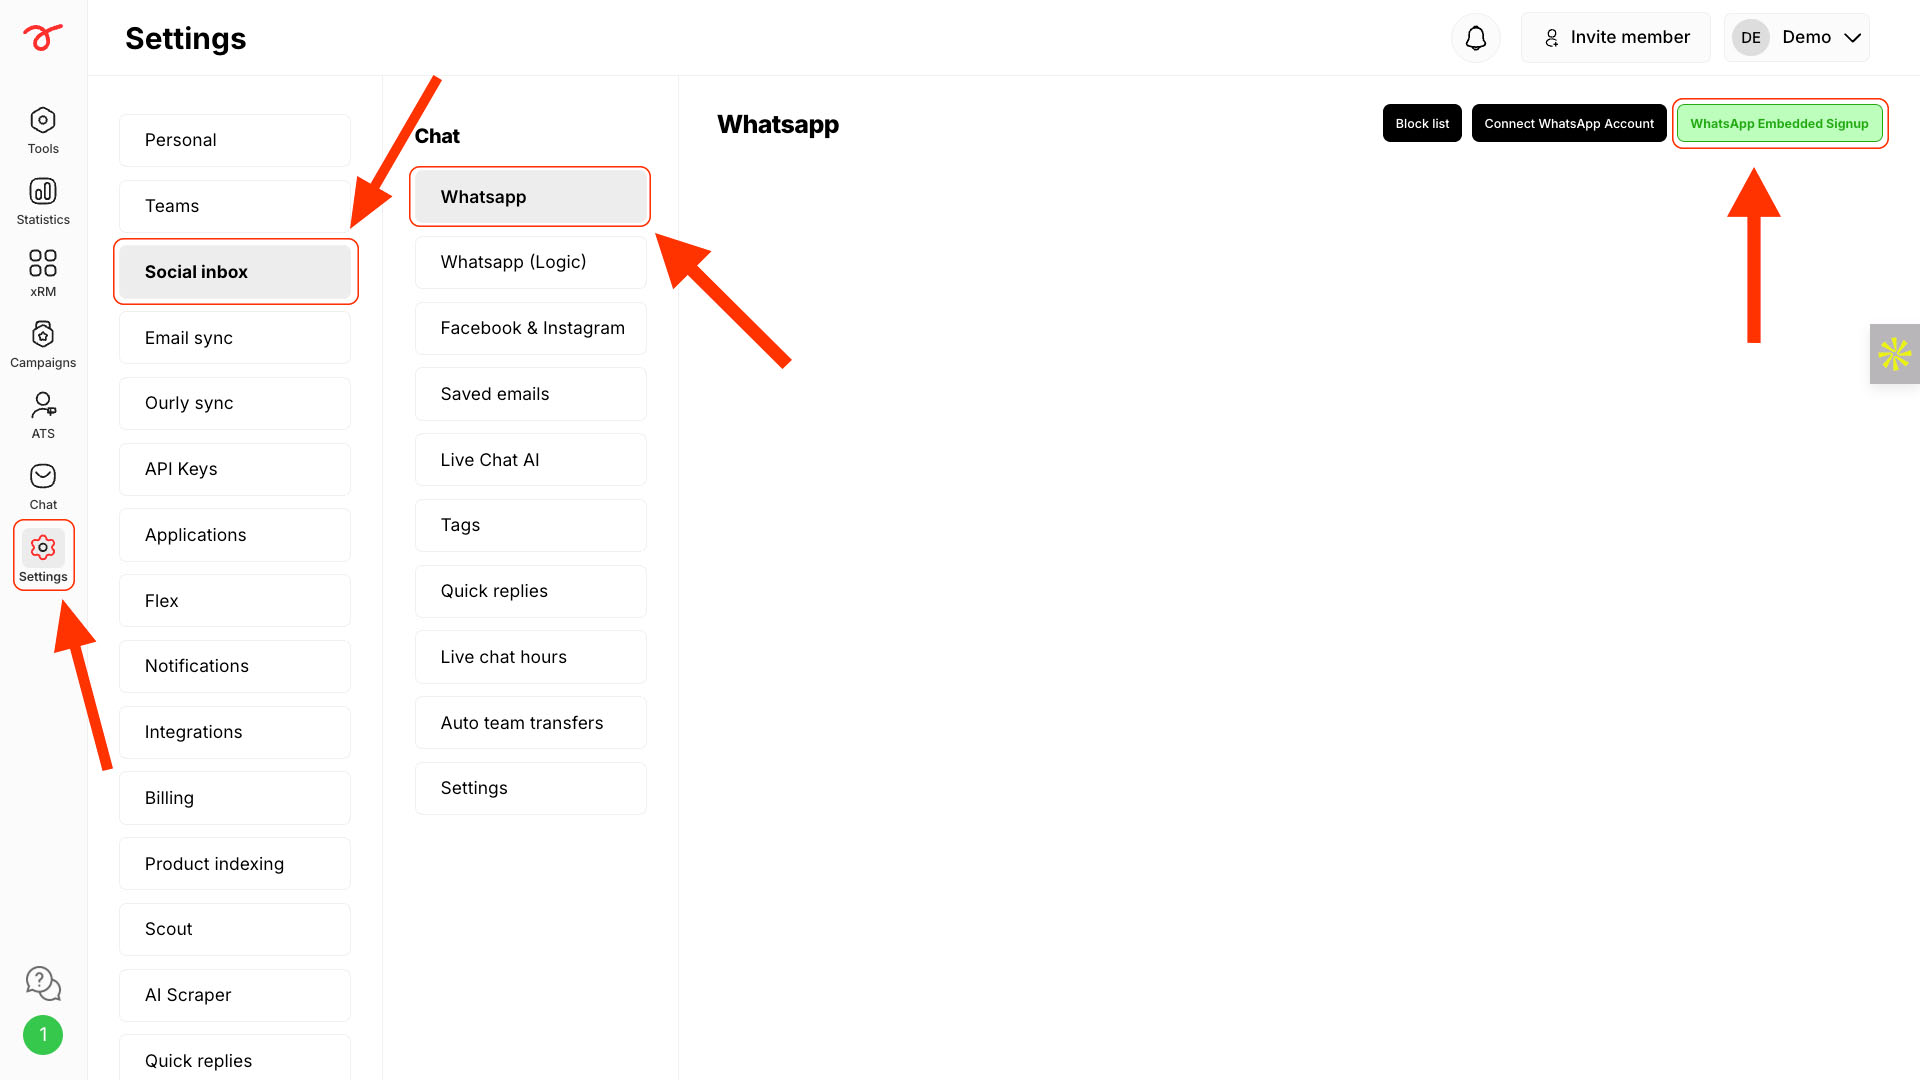
1. Navigate to Settings -> Social inbox -> WhatsApp and click WhatsApp Embedded Signup.
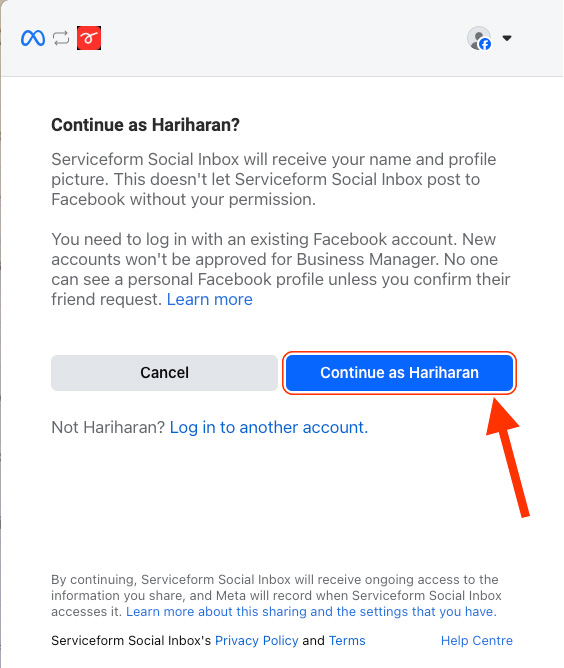
2. Click on Continue.
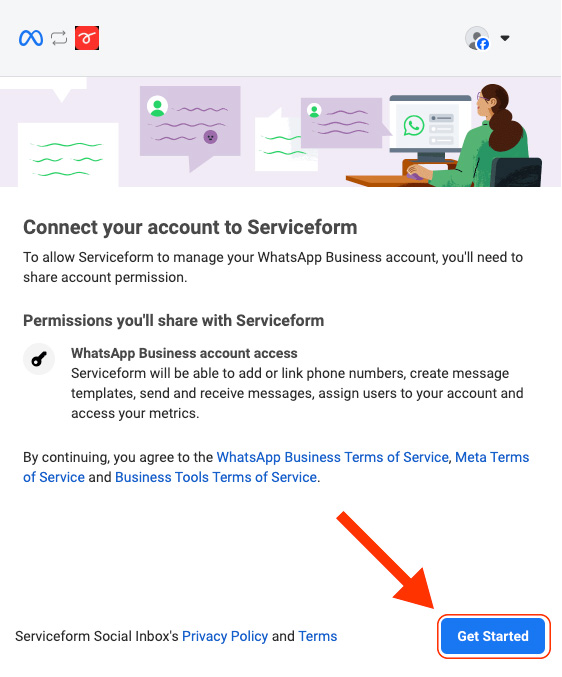
3. Click on Get Started.
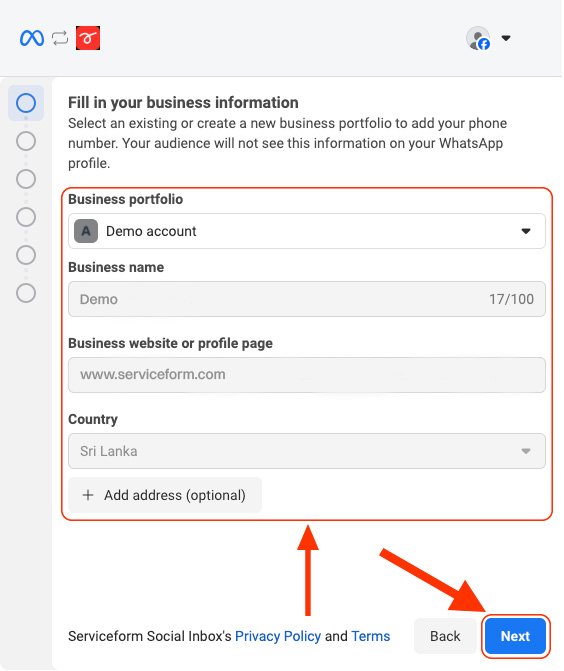
4. Confirm your business information and optionally update your business’s address as well.
5. Select or create your WhatsApp business account and business profile.
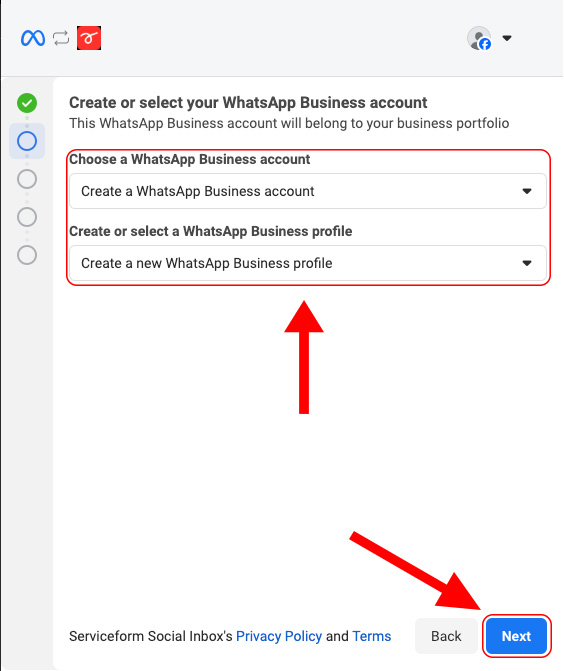
If you have chosen to create a new WhatsApp business account, follow the steps below or feel free to skip to step 8.
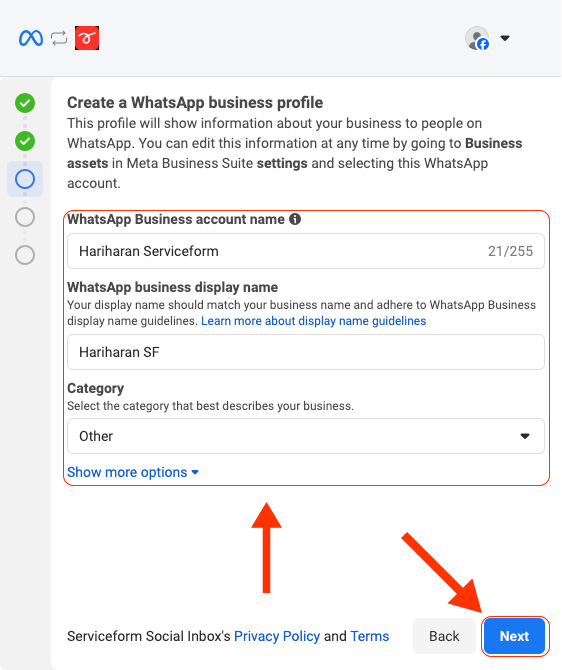
6. Enter the WhatsApp business account name and display name. Select a category.
Additionally, you can update the information, such as time zone, business description, and website URL, under Show more options.
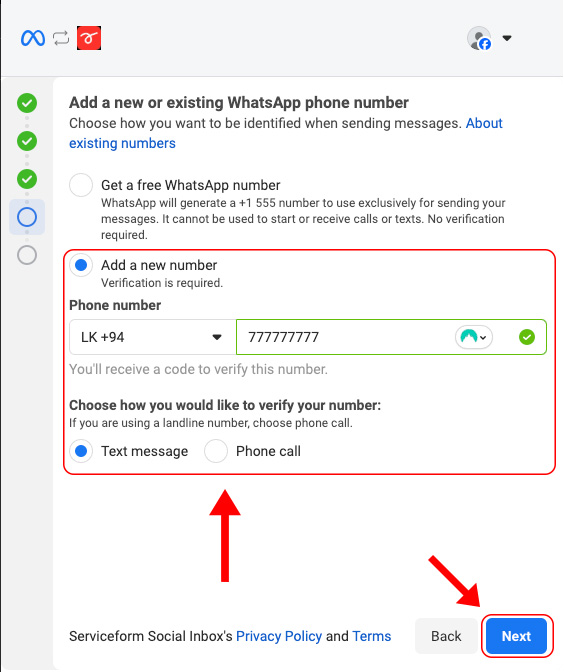
7.Select Add a new number. Enter your number and select your preferred method of verification. Click on Next.
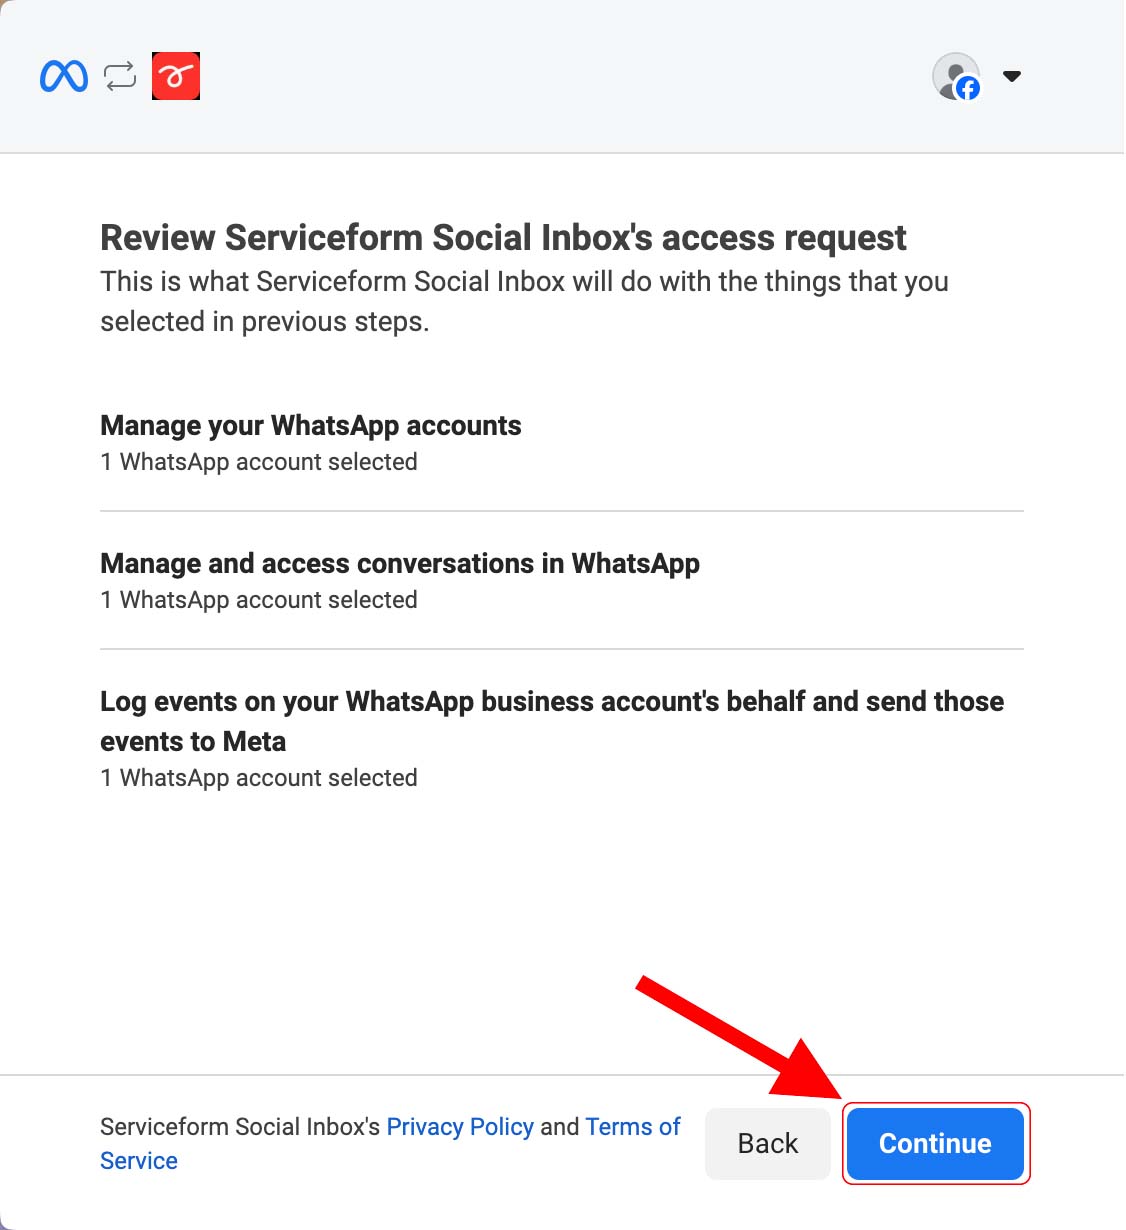
8. Review the access request and click Continue.
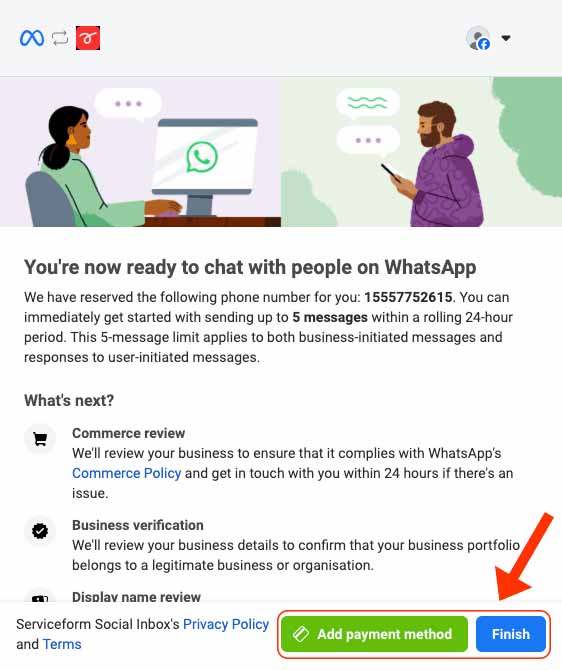
9. You can optionally add a payment method or click on Finish.
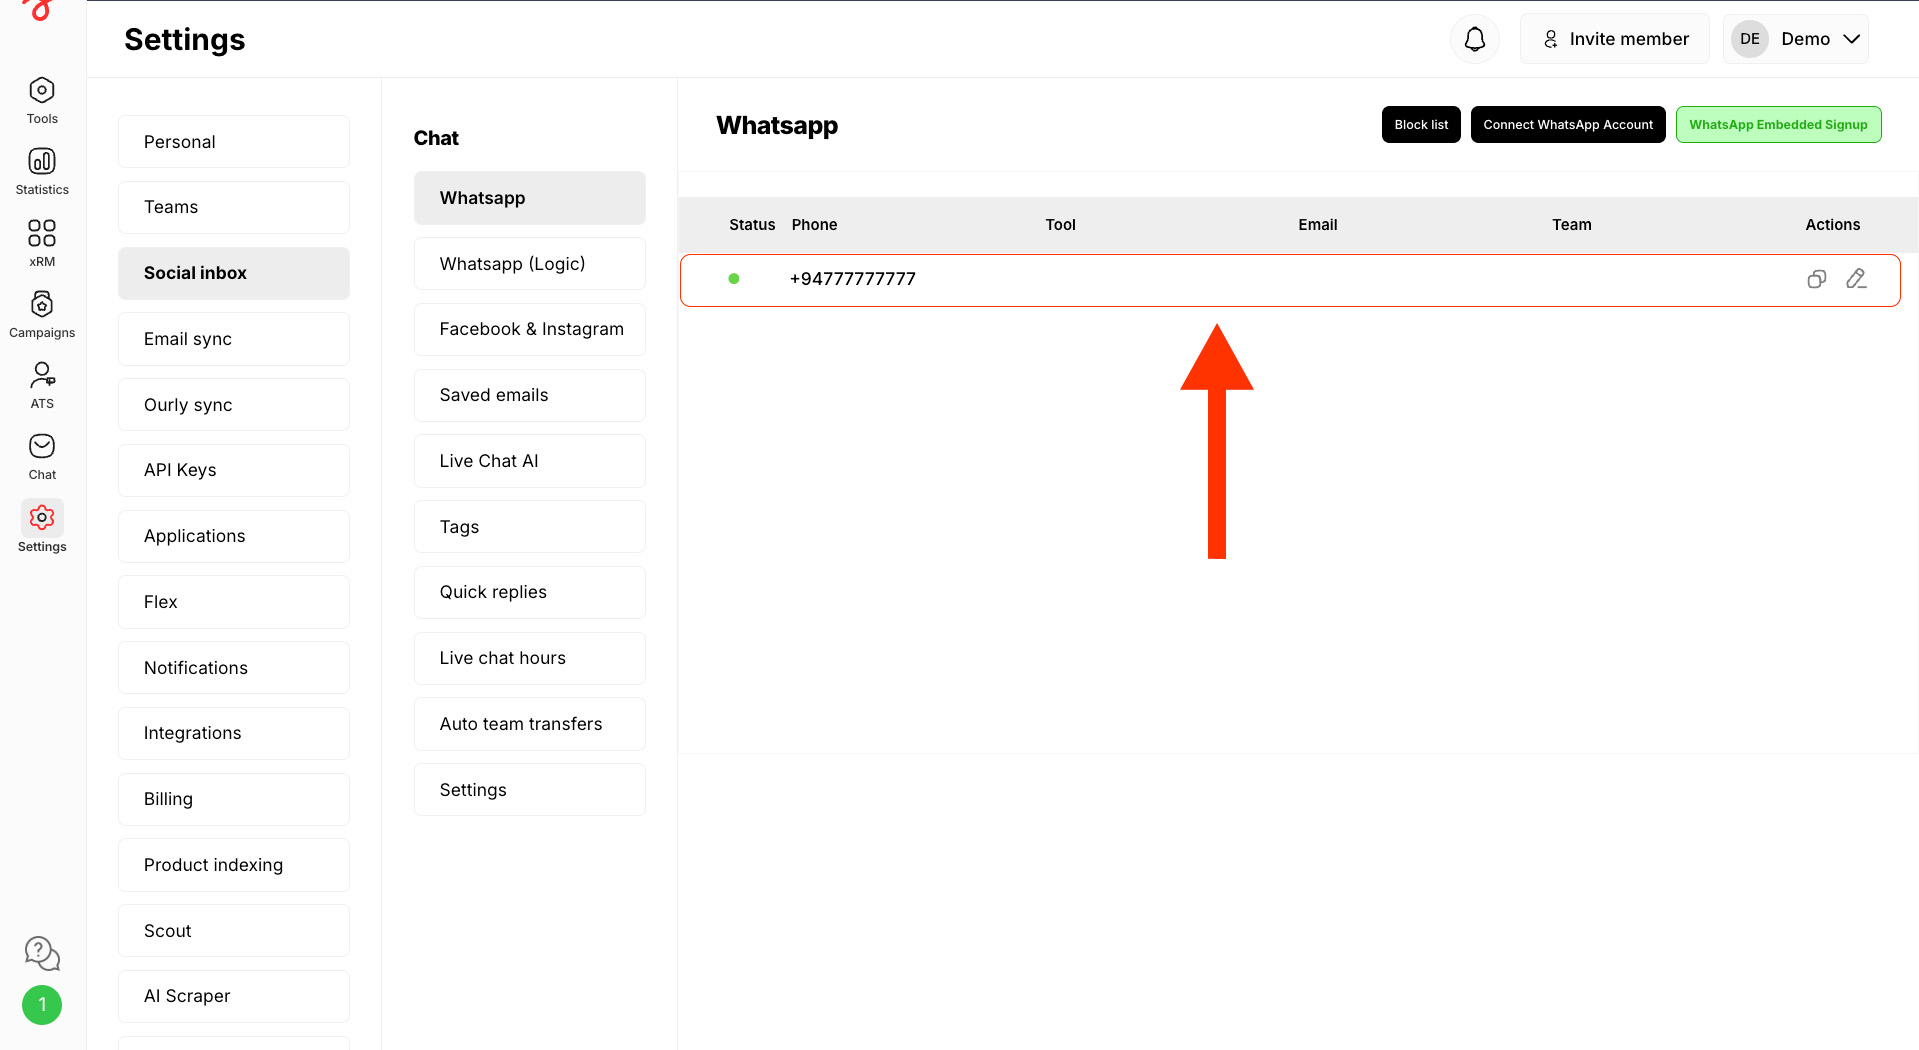
Once you are done, you will see the number in the Serviceform Dashboard.
WhatsApp configuration
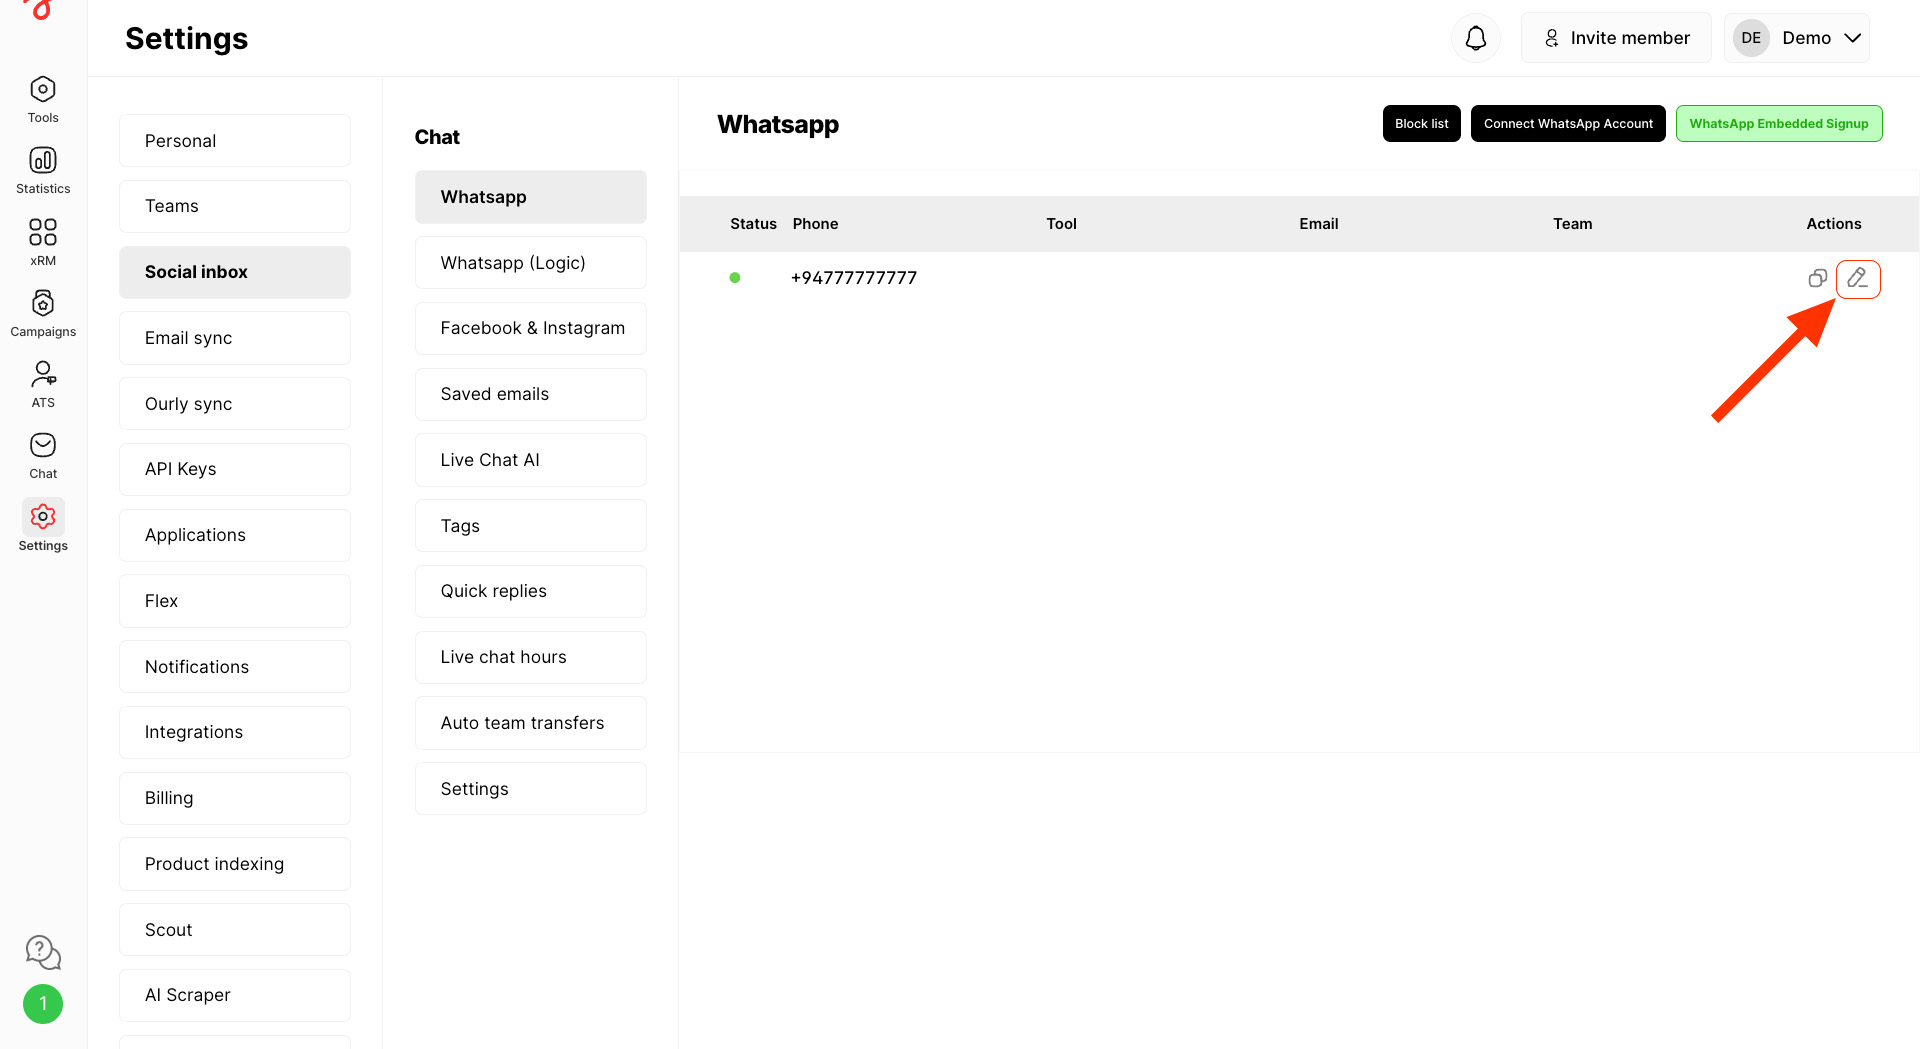
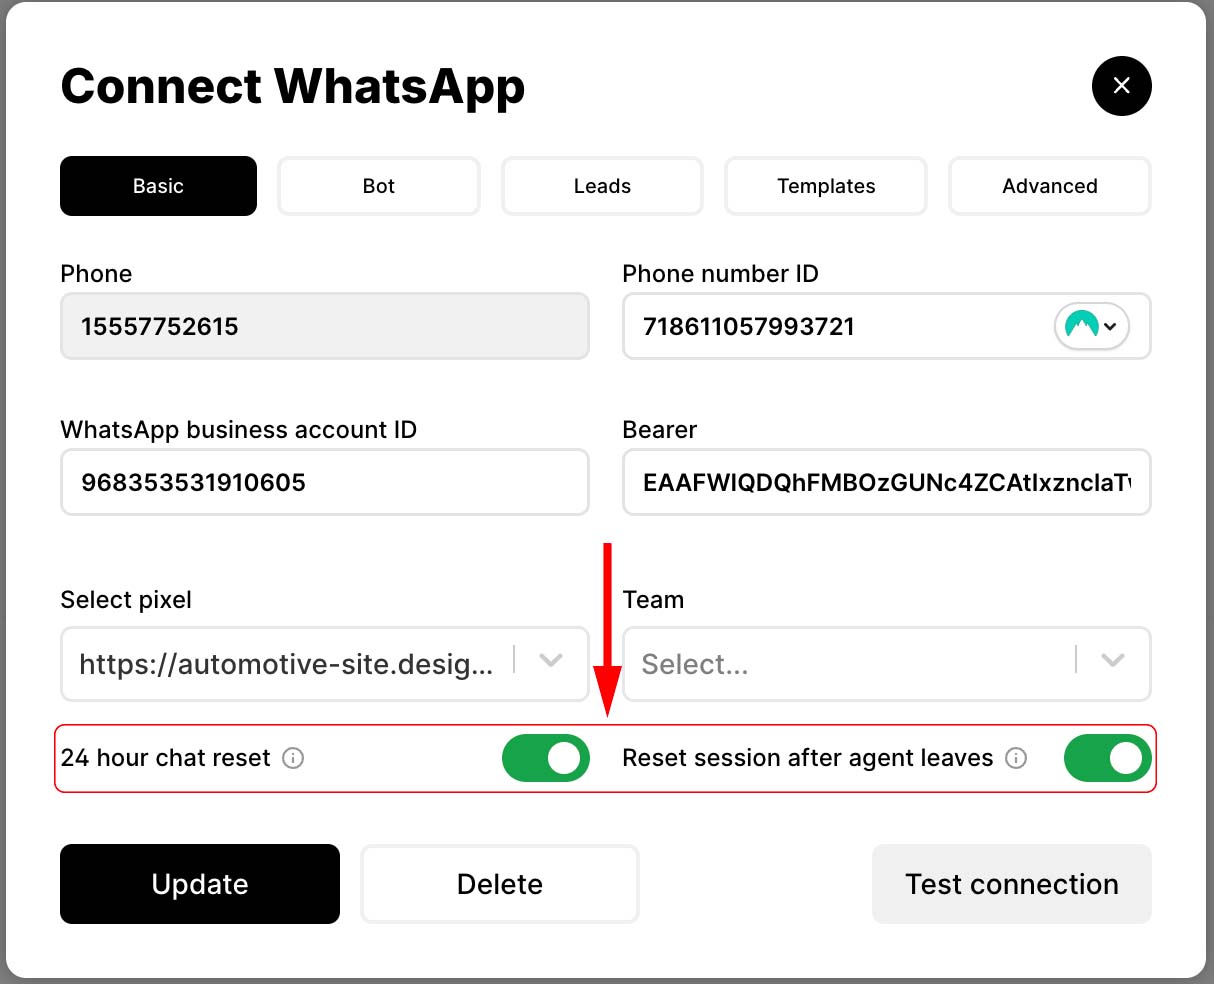
To setup WhatsApp with the Serviceform tools, you can click on the edit icon:
1. Select your pixel and the team to which you want the incoming WhatsApp chats to be assigned.
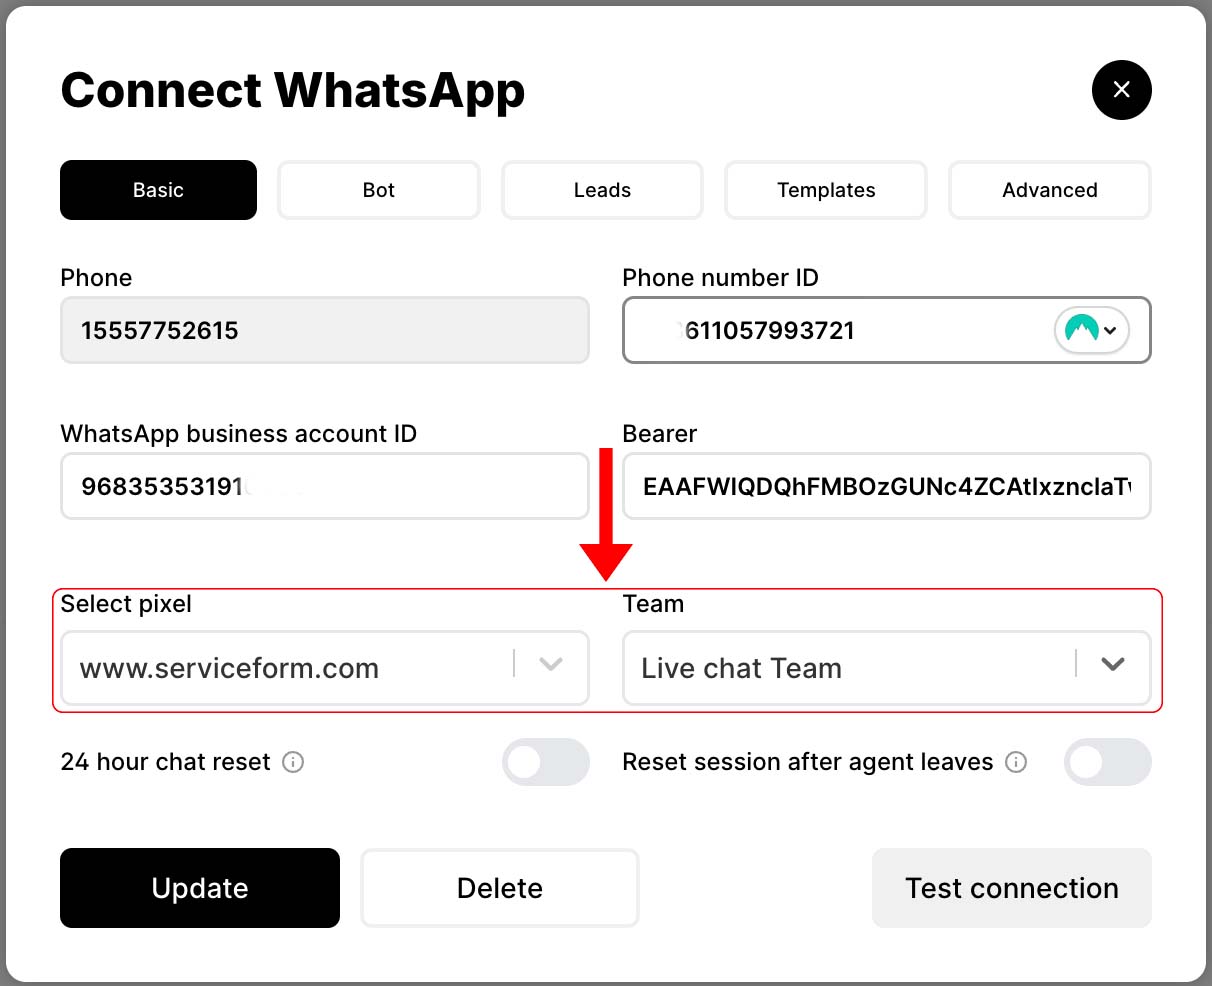
2. Enabling 24 hour chat reset would create a new chat if the customer messages after 24 hours and enabling Reset session after agent leaves would also create a new chat if the customer messages after the agent has left the chat.
Integrating the WhatsApp bot to the WhatsApp business
Link your WhatsApp chatbot to the WhatsApp business account by following the steps below.
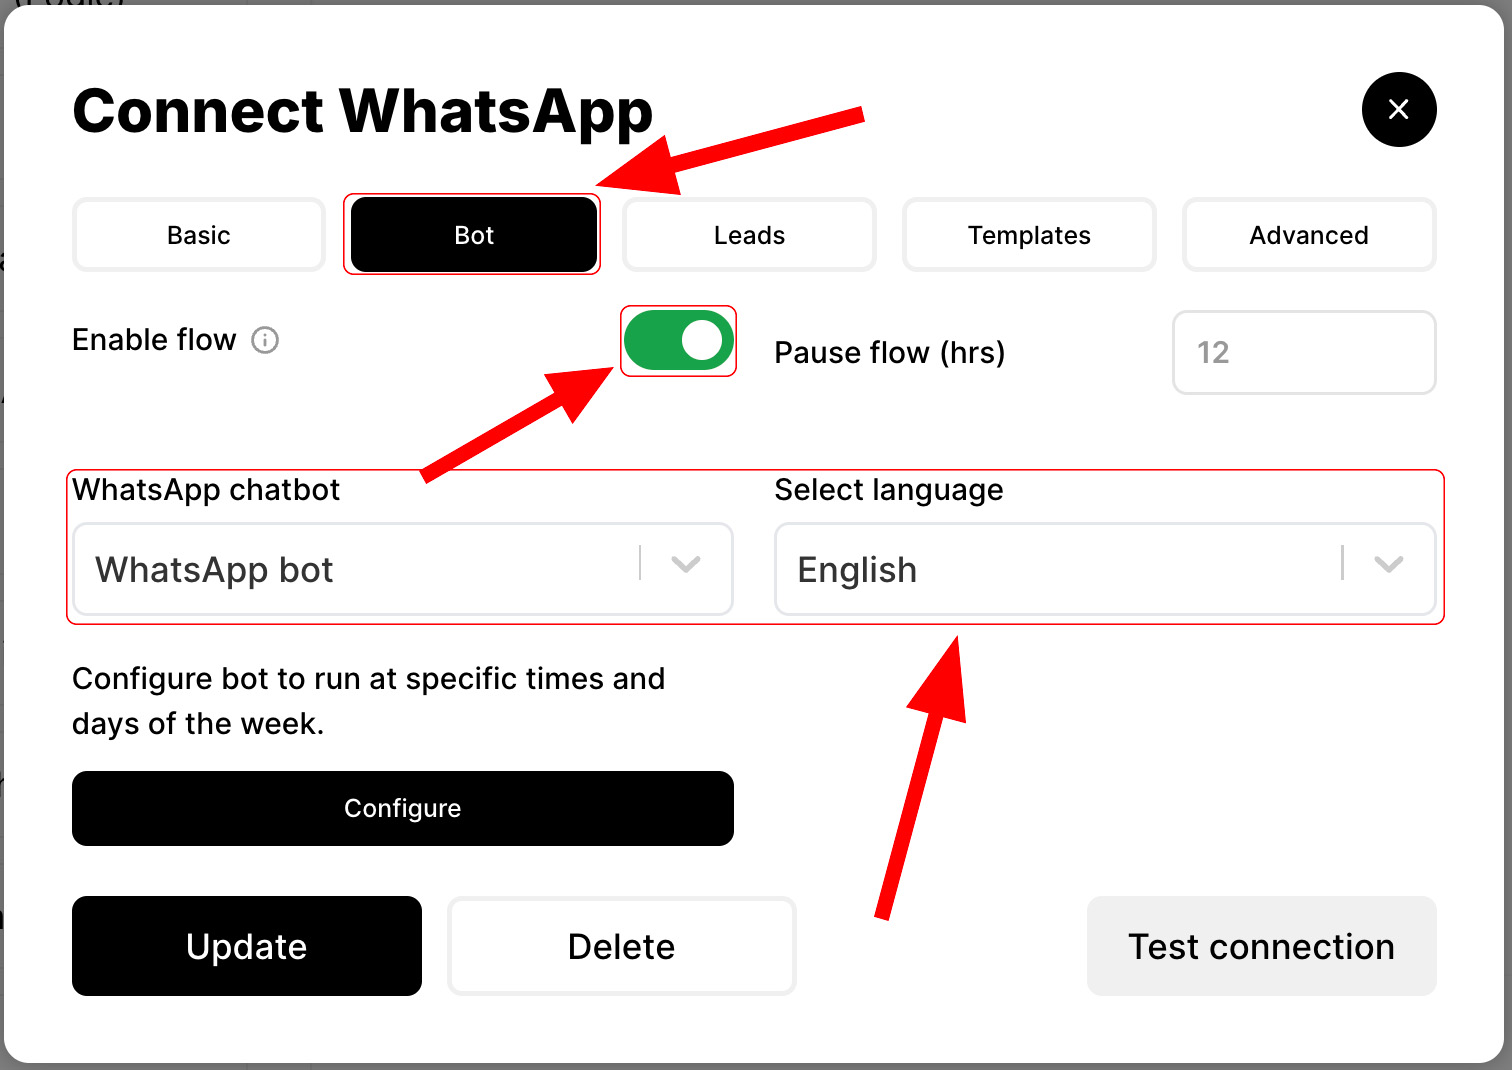
1. Click on Bot and enable the flow. Select the WhatsApp bot you have built previously.
You can also follow this guide to create a new WhatsApp chatbot if you have not created one yet.
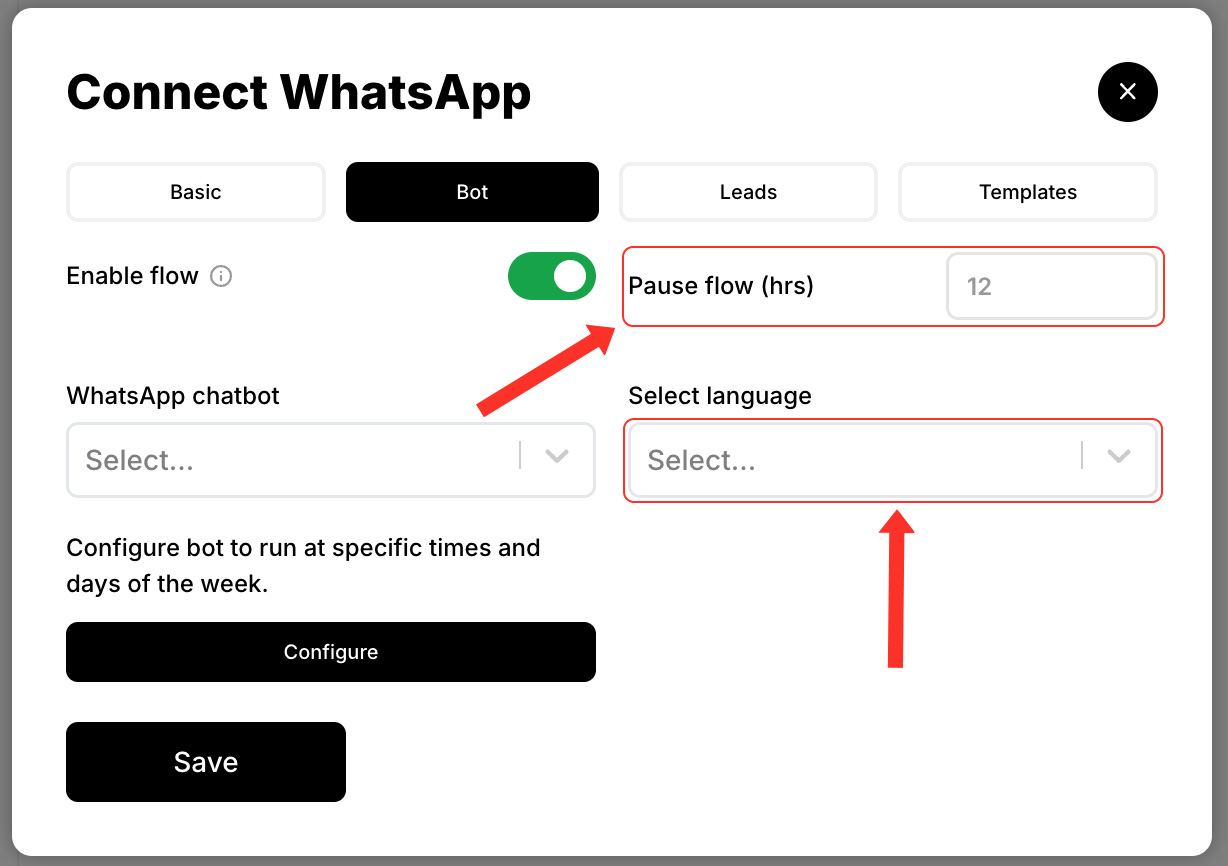
2. Specify the number of hours, since the time the agent left, after which you want to resume the chatbot flow. Select the language.
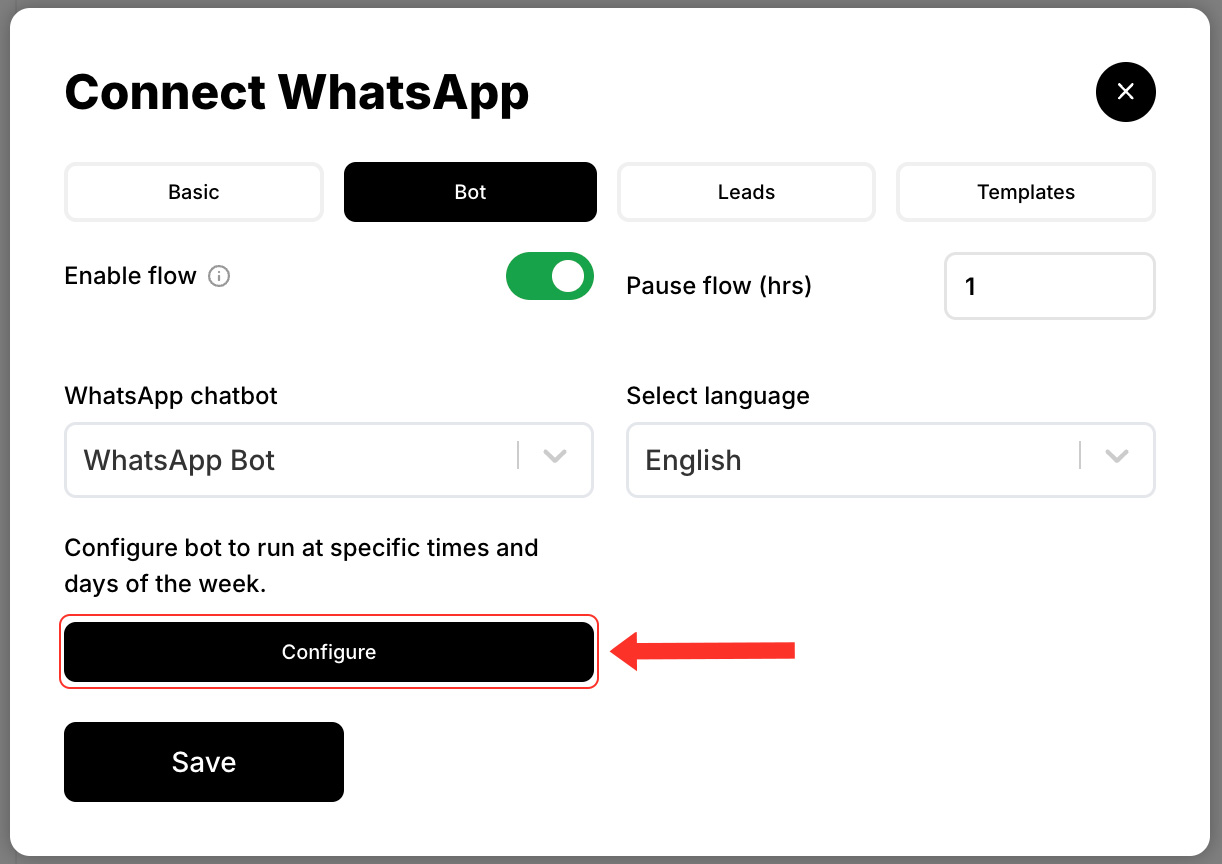
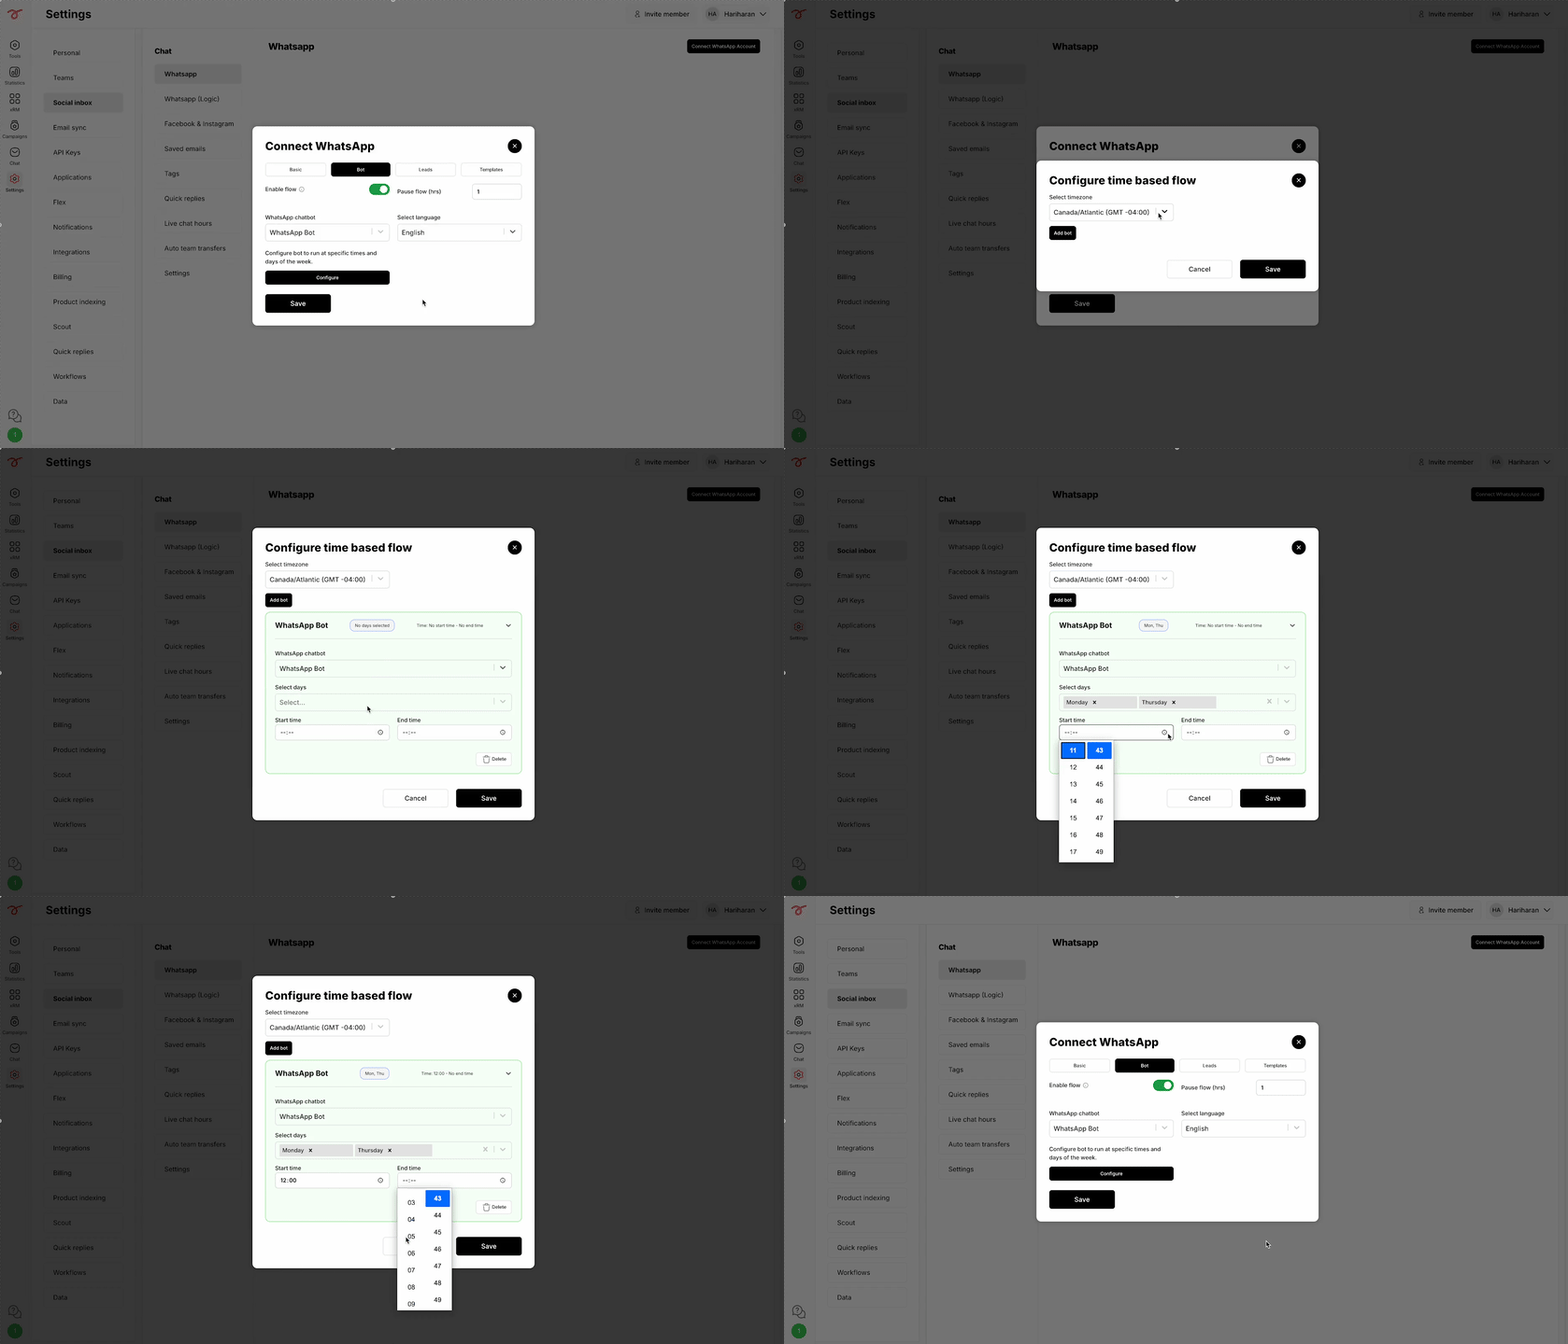
You can also enable different WhatsApp chatbots in different time frames based on your requirements:
3. Click on Configure.
4. Select the time zone, select the WhatsApp bot and set the time frame within which you want to initiate the bot. Finally, click on Save.
5. Click on Update once you are done.
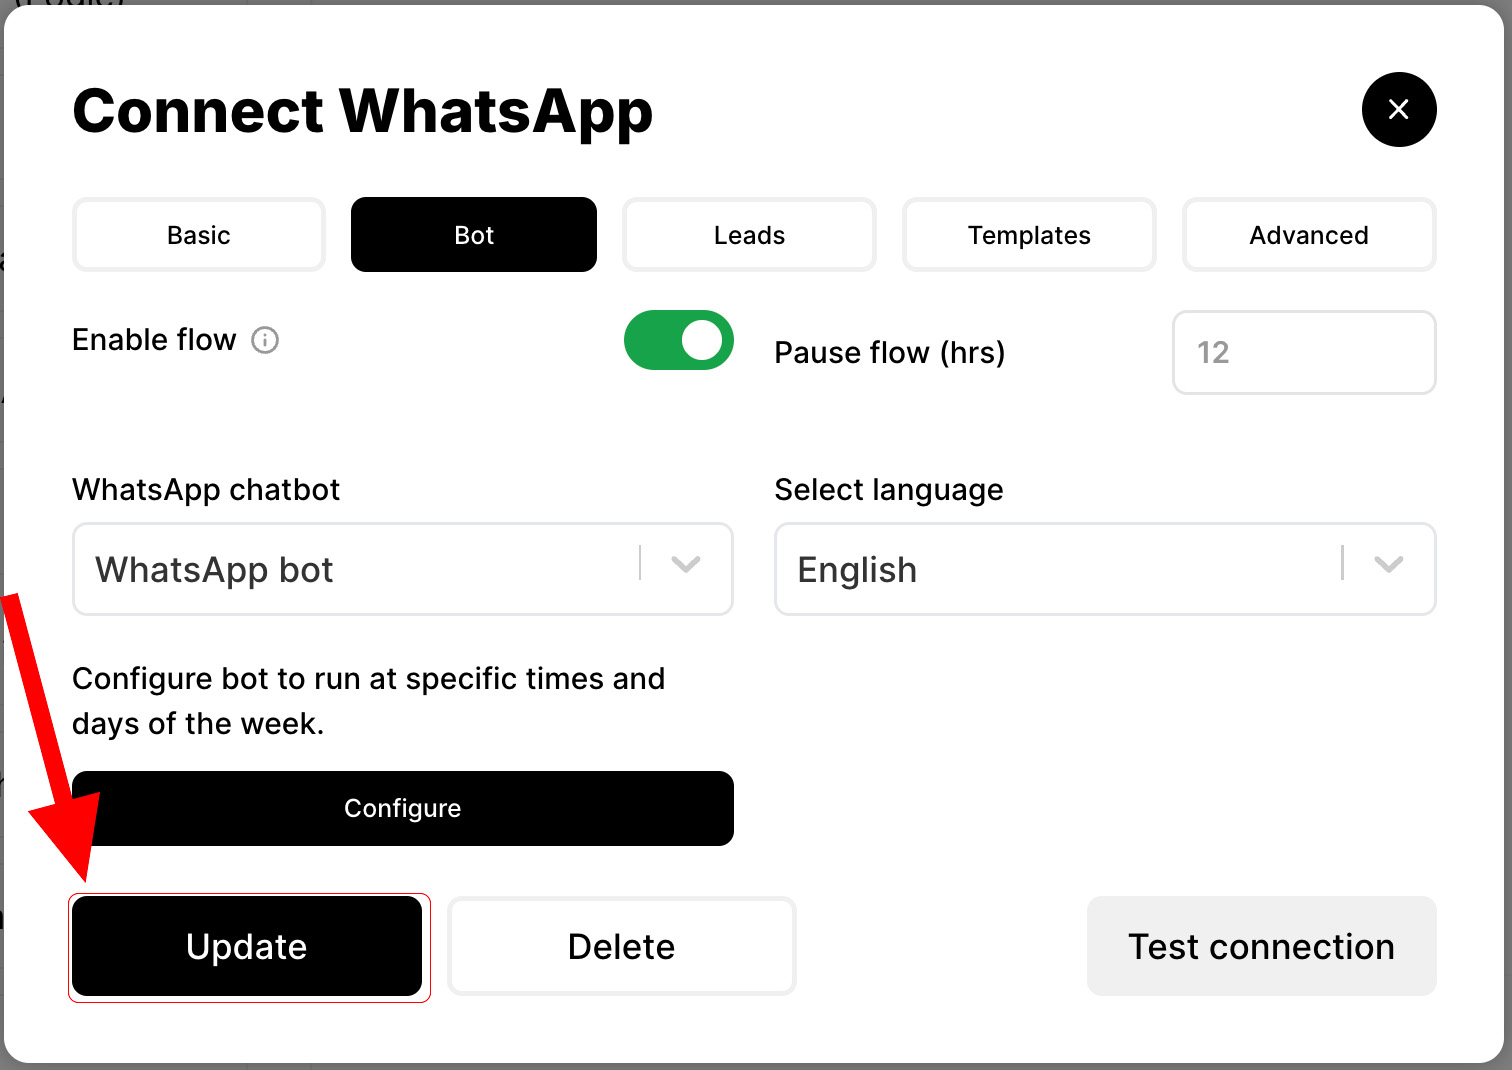
Your WhatsApp Business number is now connected with the WhatsApp bot and ready to use in Serviceform.
Related articles
- WhatsApp for business Learn how to setup and configure WhatsApp Business with Serviceform.
- WhatsApp Bot Learn how to create a WhatsApp bot to answer customer queries simultaneously.
- WhatsApp Meta account Learn how to setup and configure Serviceform's WhatsApp for Business.
- WhatsApp Campaigns and pricing Learn how to create WhatsApp business message templates and start campaigns.