




Setting up ATS
Learn how to configure Serviceform’s ATS settings including job fields, candidate fields, stages, email templates, and user groups for a smooth hiring process.
Before you can start posting jobs and managing applicants, it’s important to configure your Applicant Tracking System (ATS) settings in Serviceform. This guide walks you through all the configurations to ensure your hiring process is customised and ready to go.
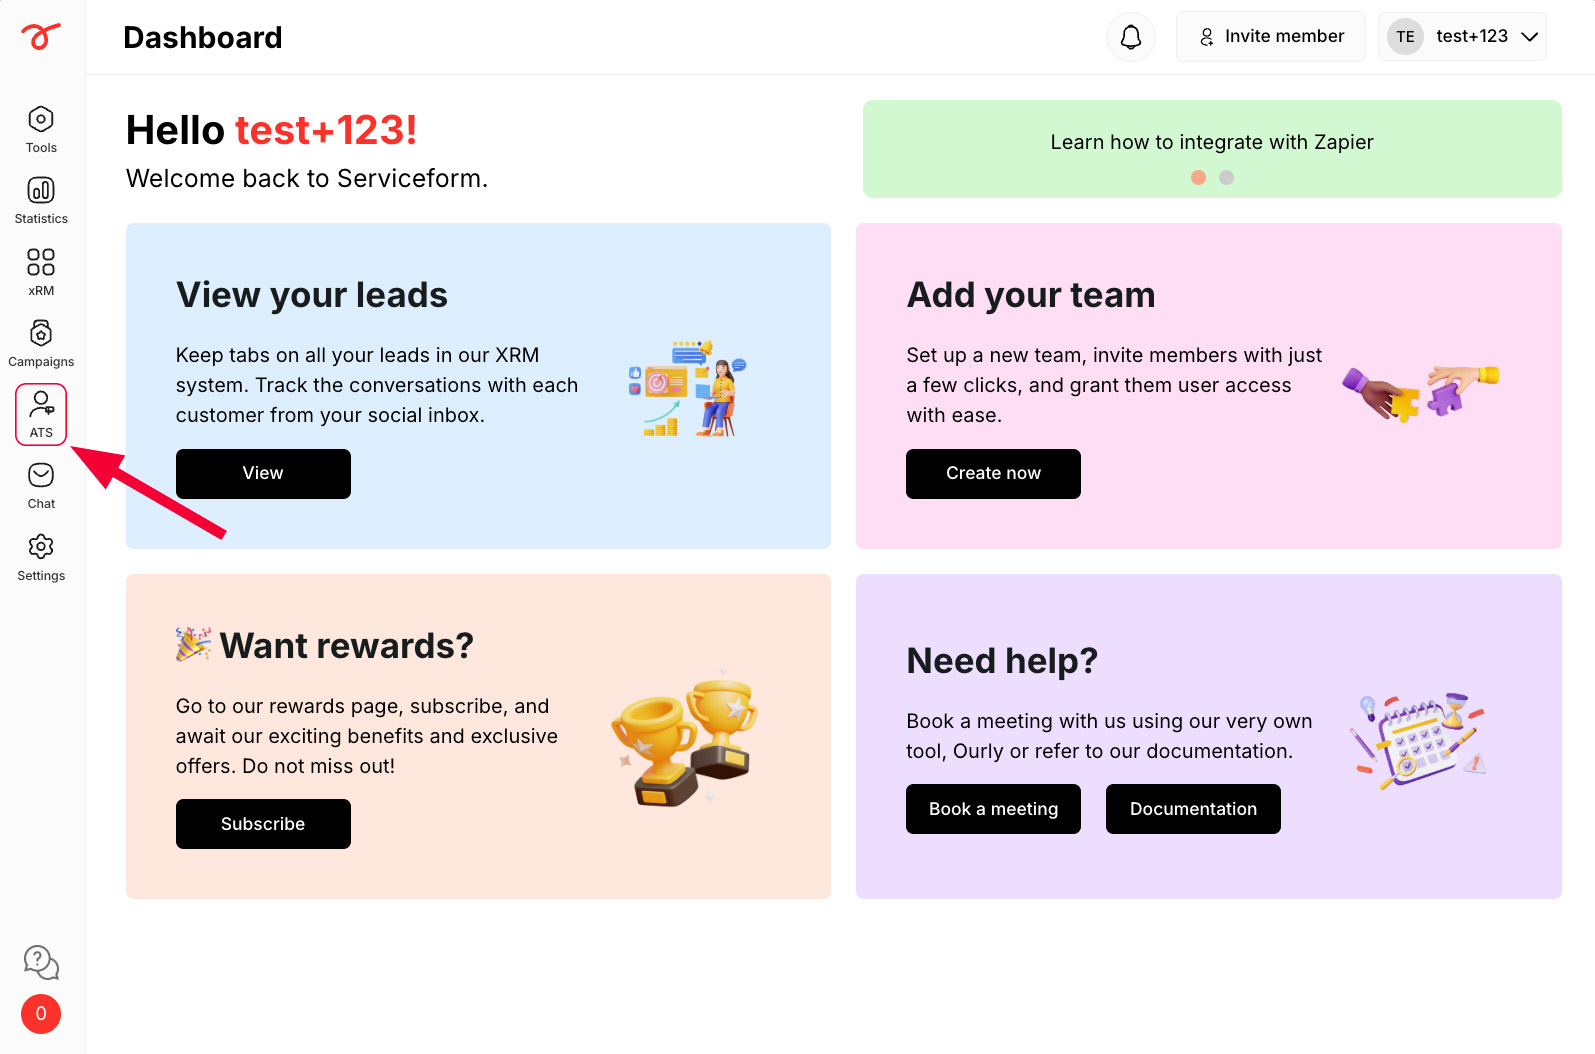
You can navigate to the ATS section by clicking on ATS on the Serviceform dashboard :
Company information and Email settings
1. Click on Settings.
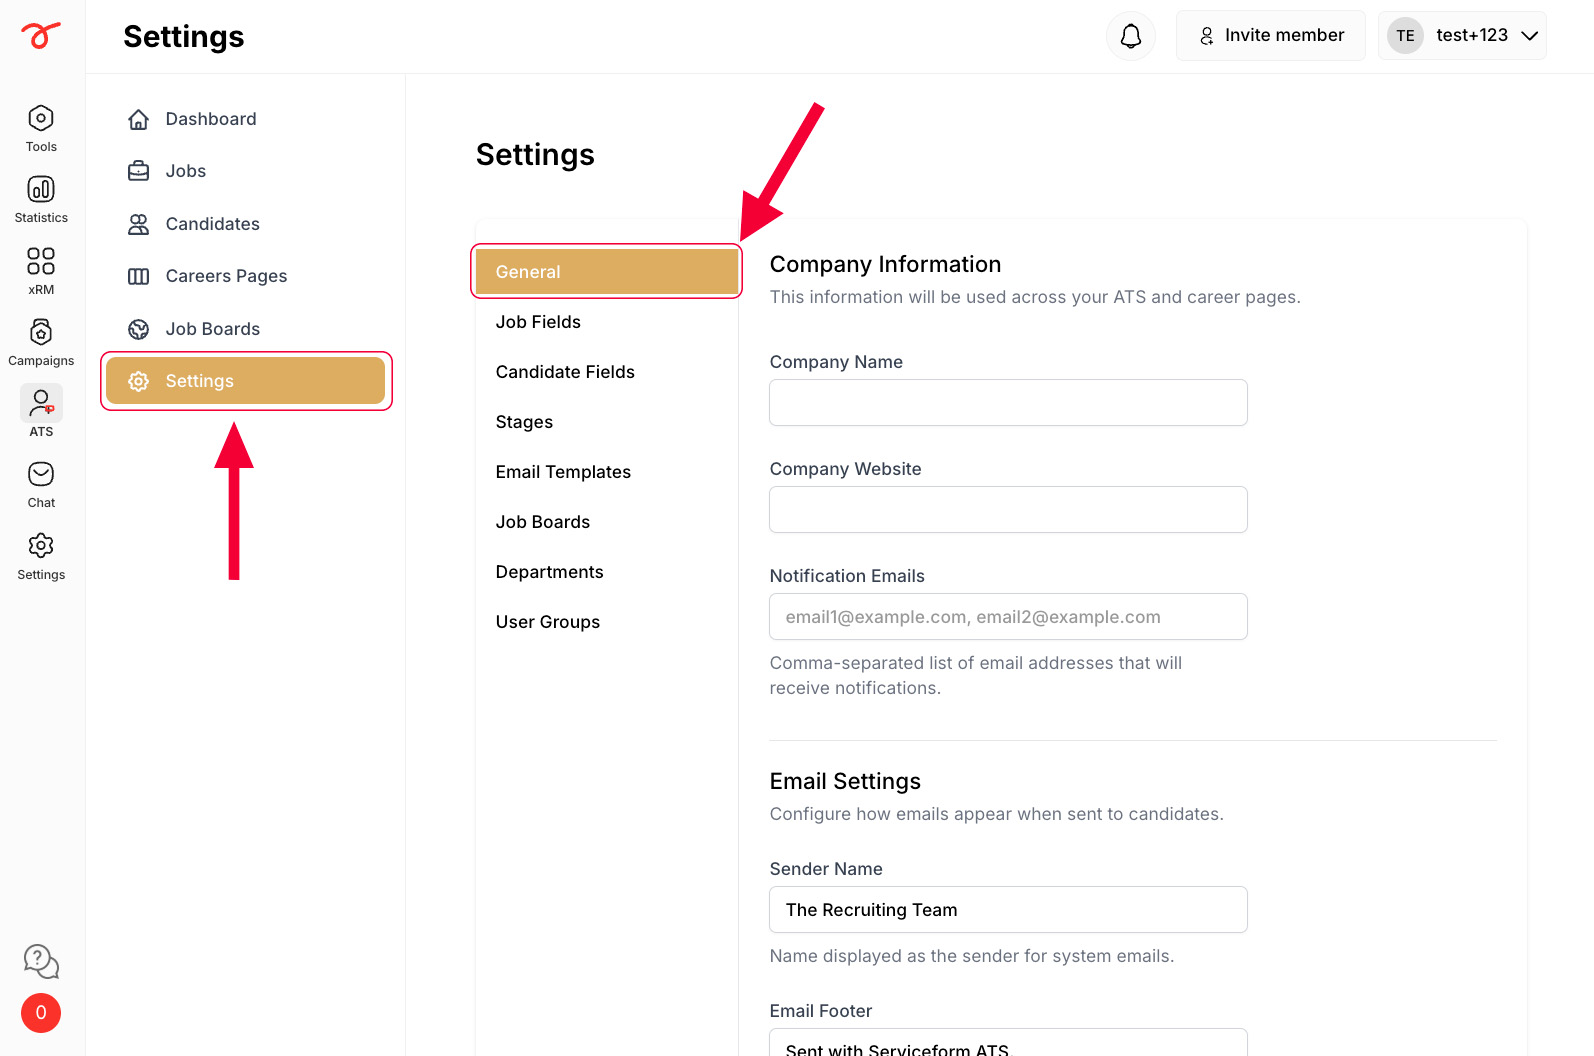
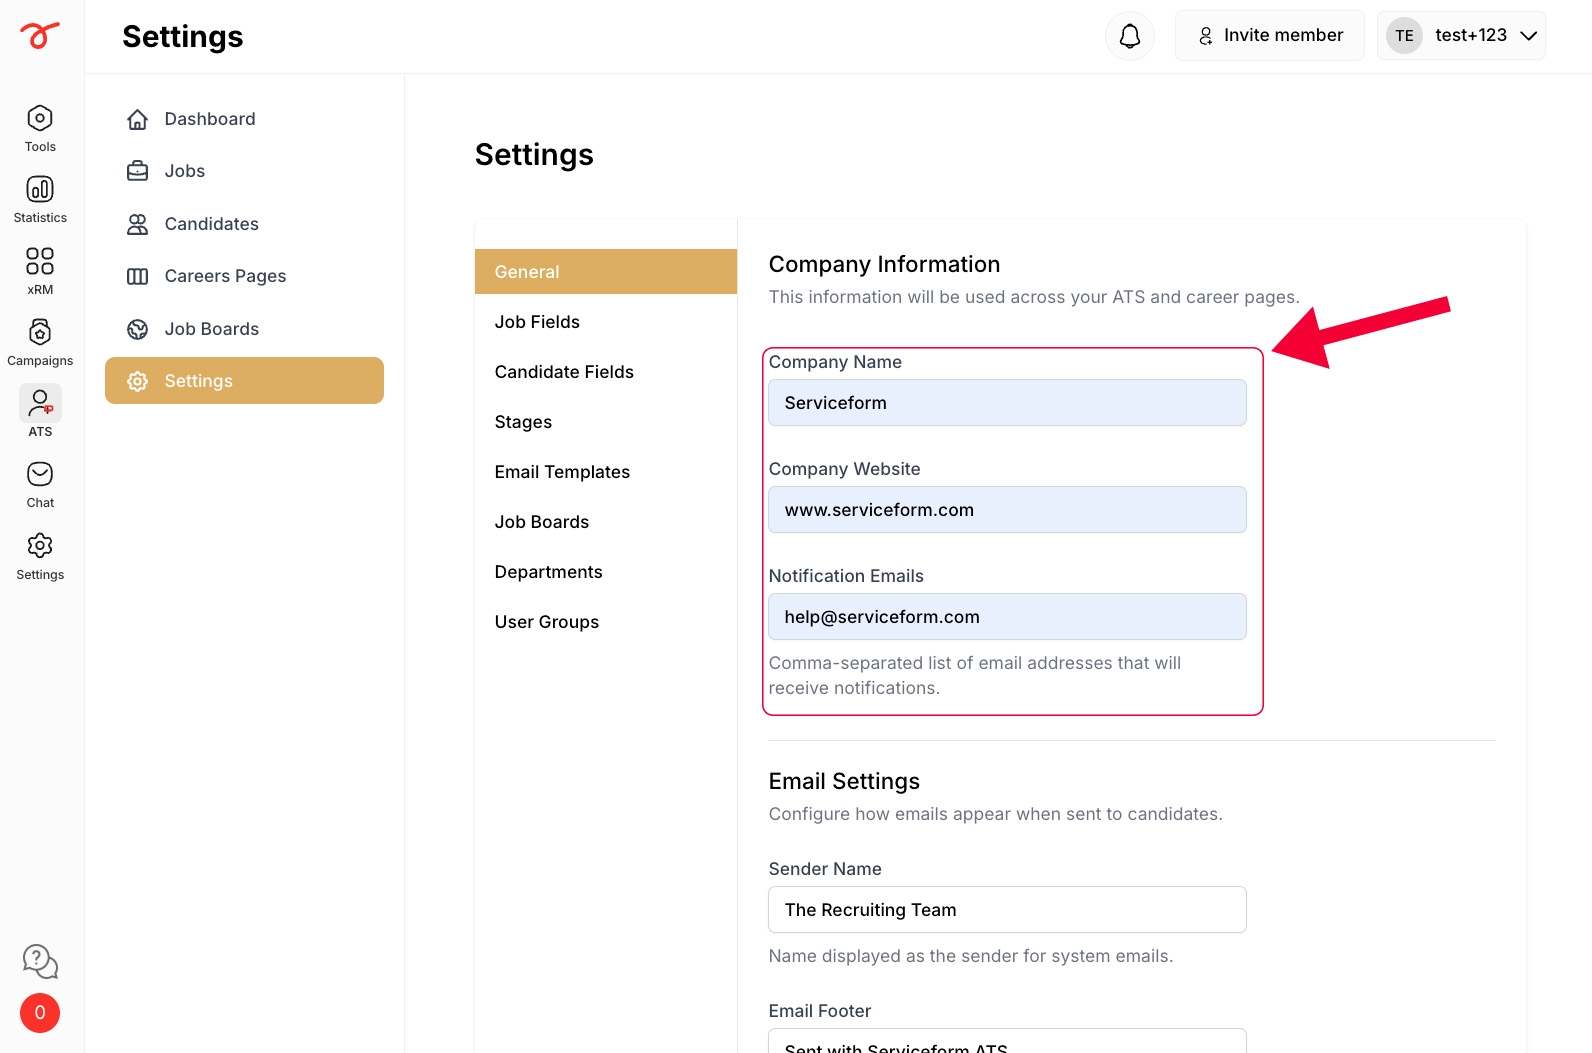
2. Update your Company’s name and website’s URL.
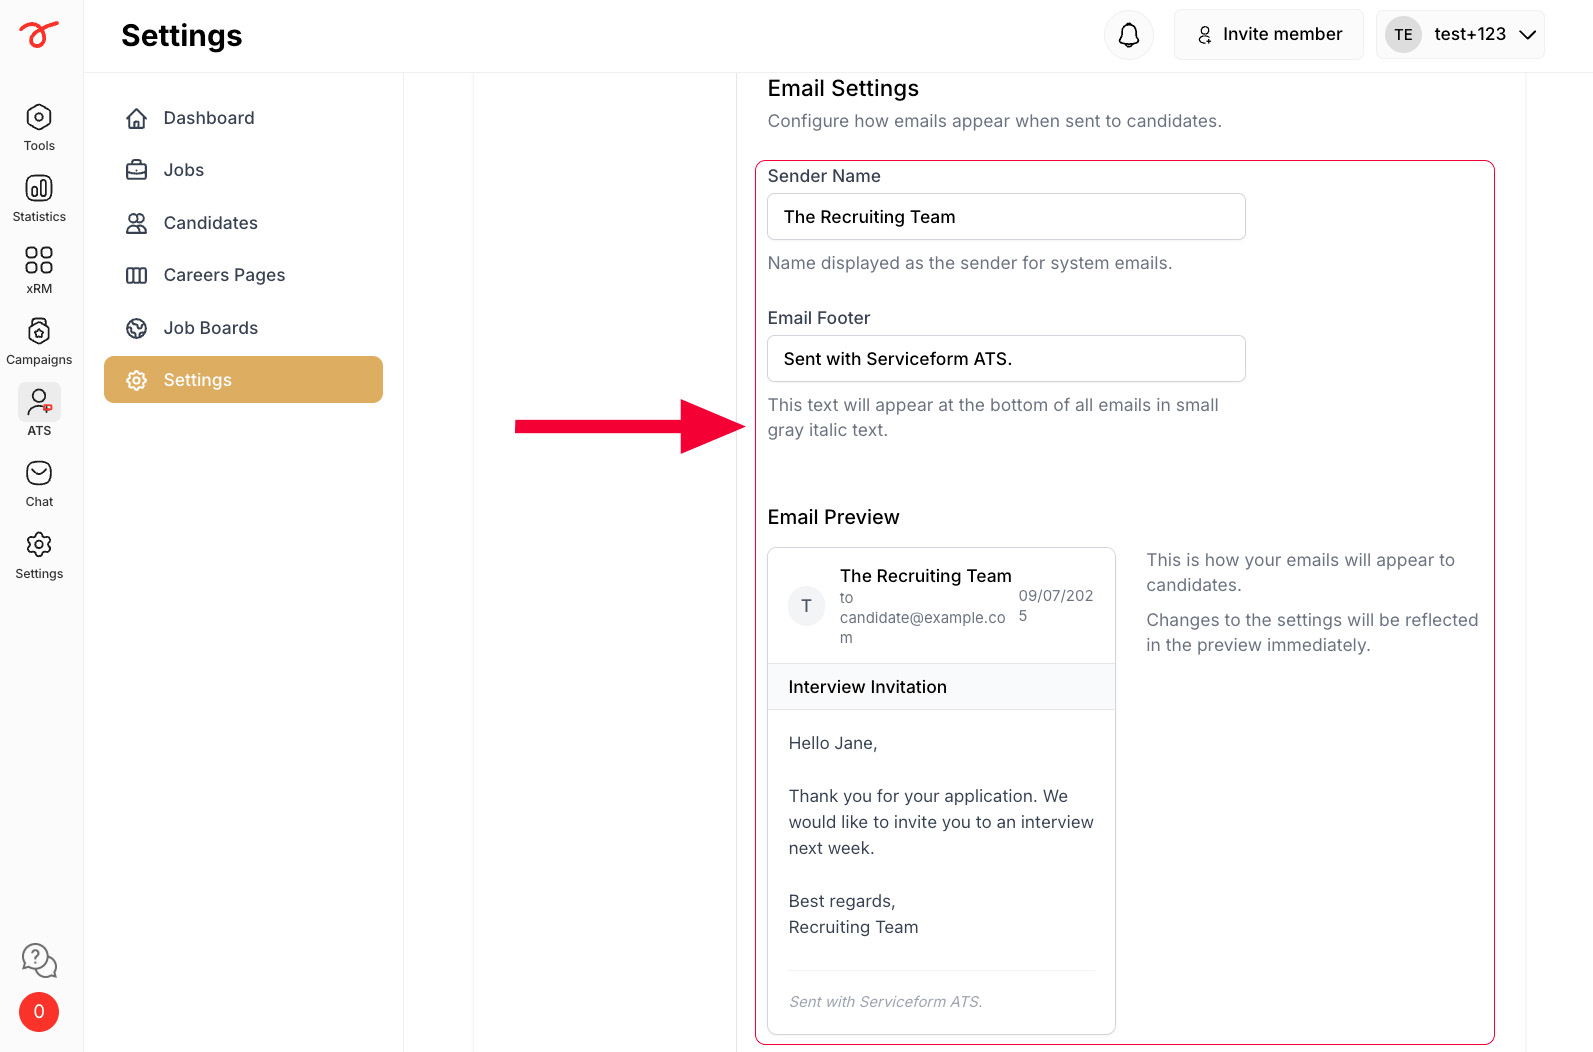
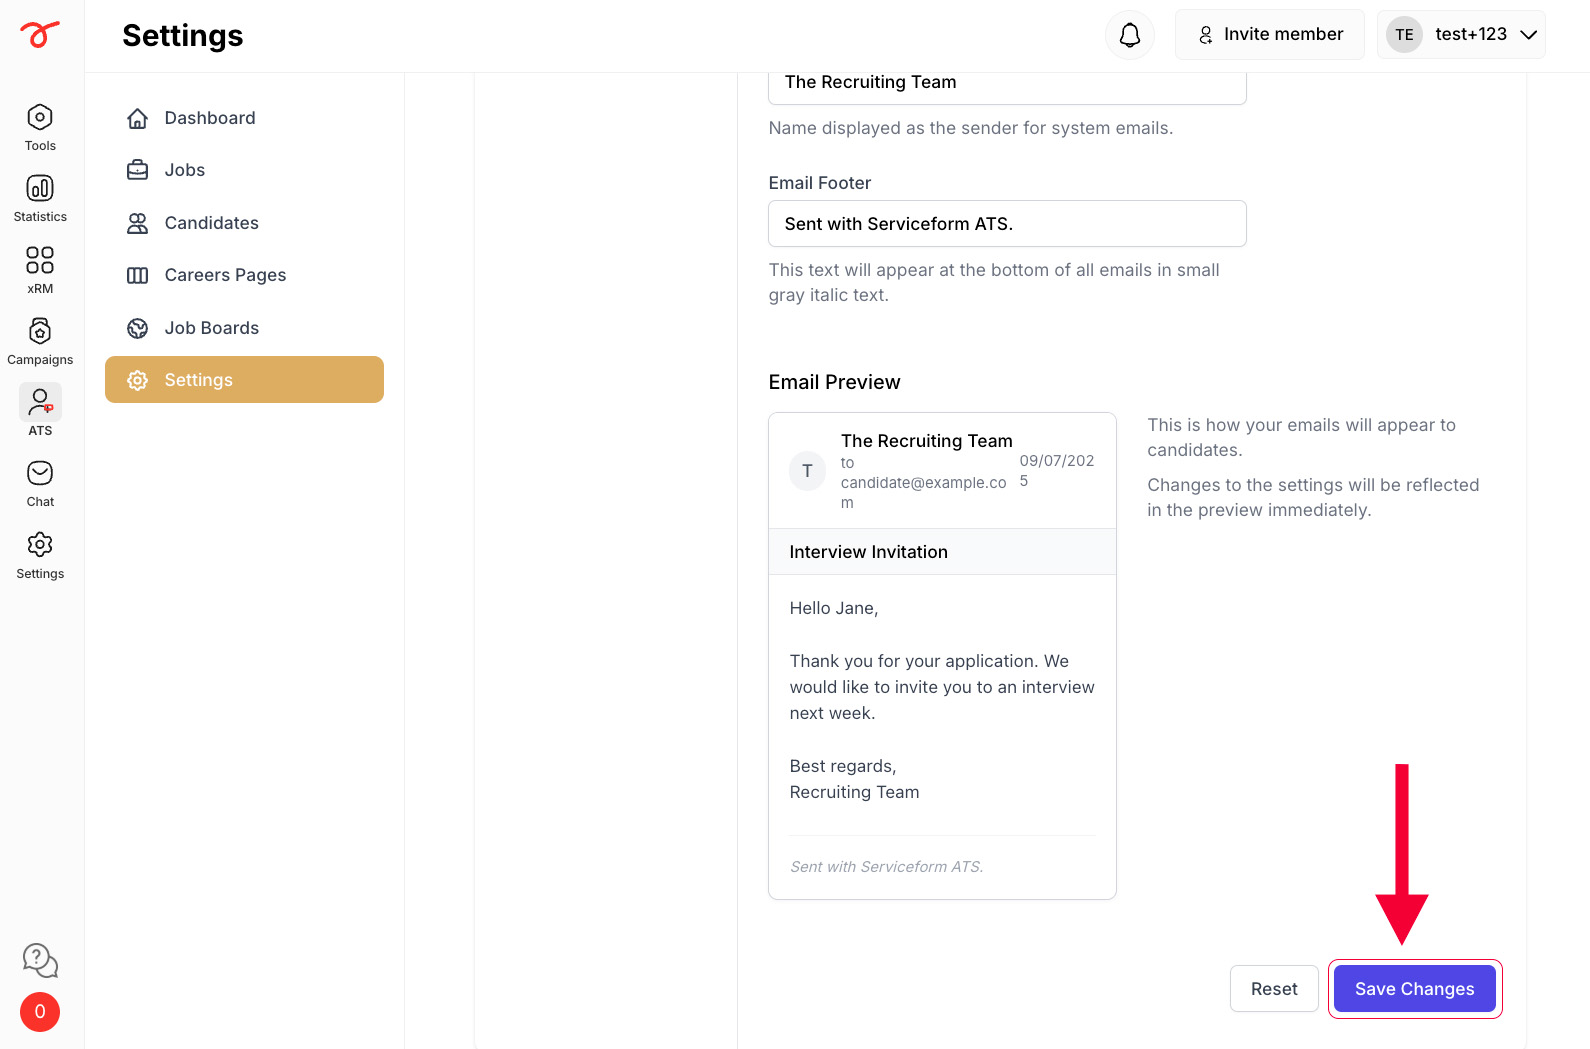
3. Configure Email Settings and preview outgoing emails sent to applicants.
4. Click on Save changes.
Create/ Edit Job Fields
By default First Name, Last Name, Email, Phone, and LinkedIn Profile URL are default application fields.
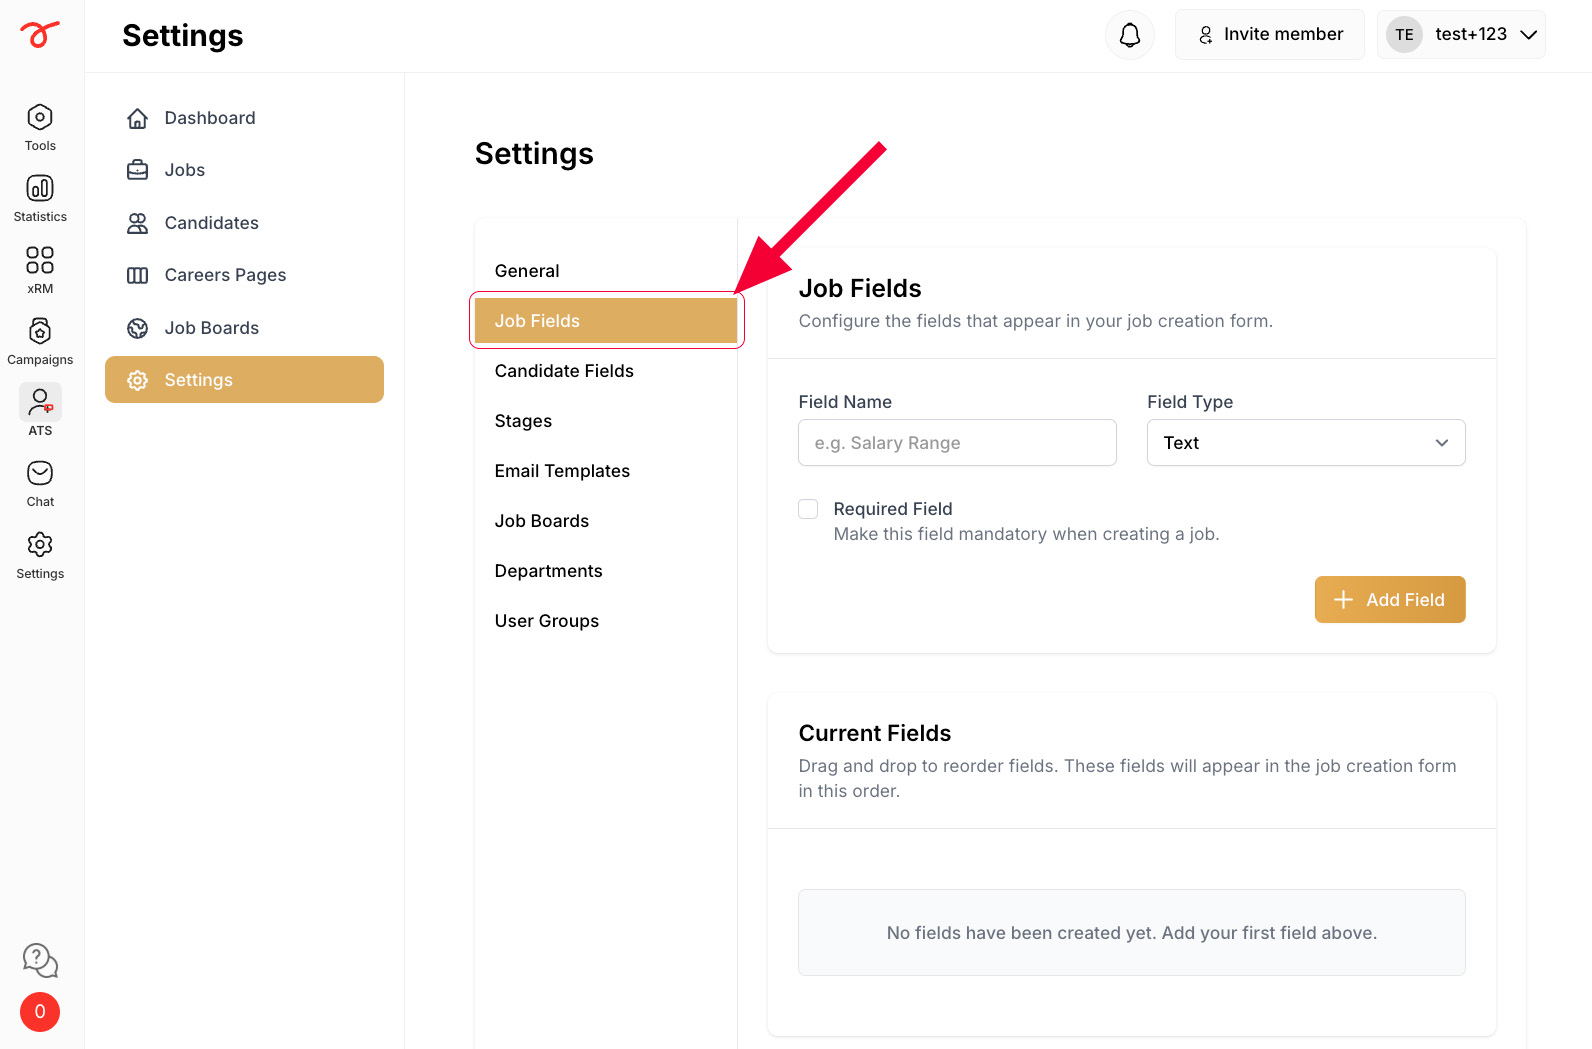
1. Click on Job fields.
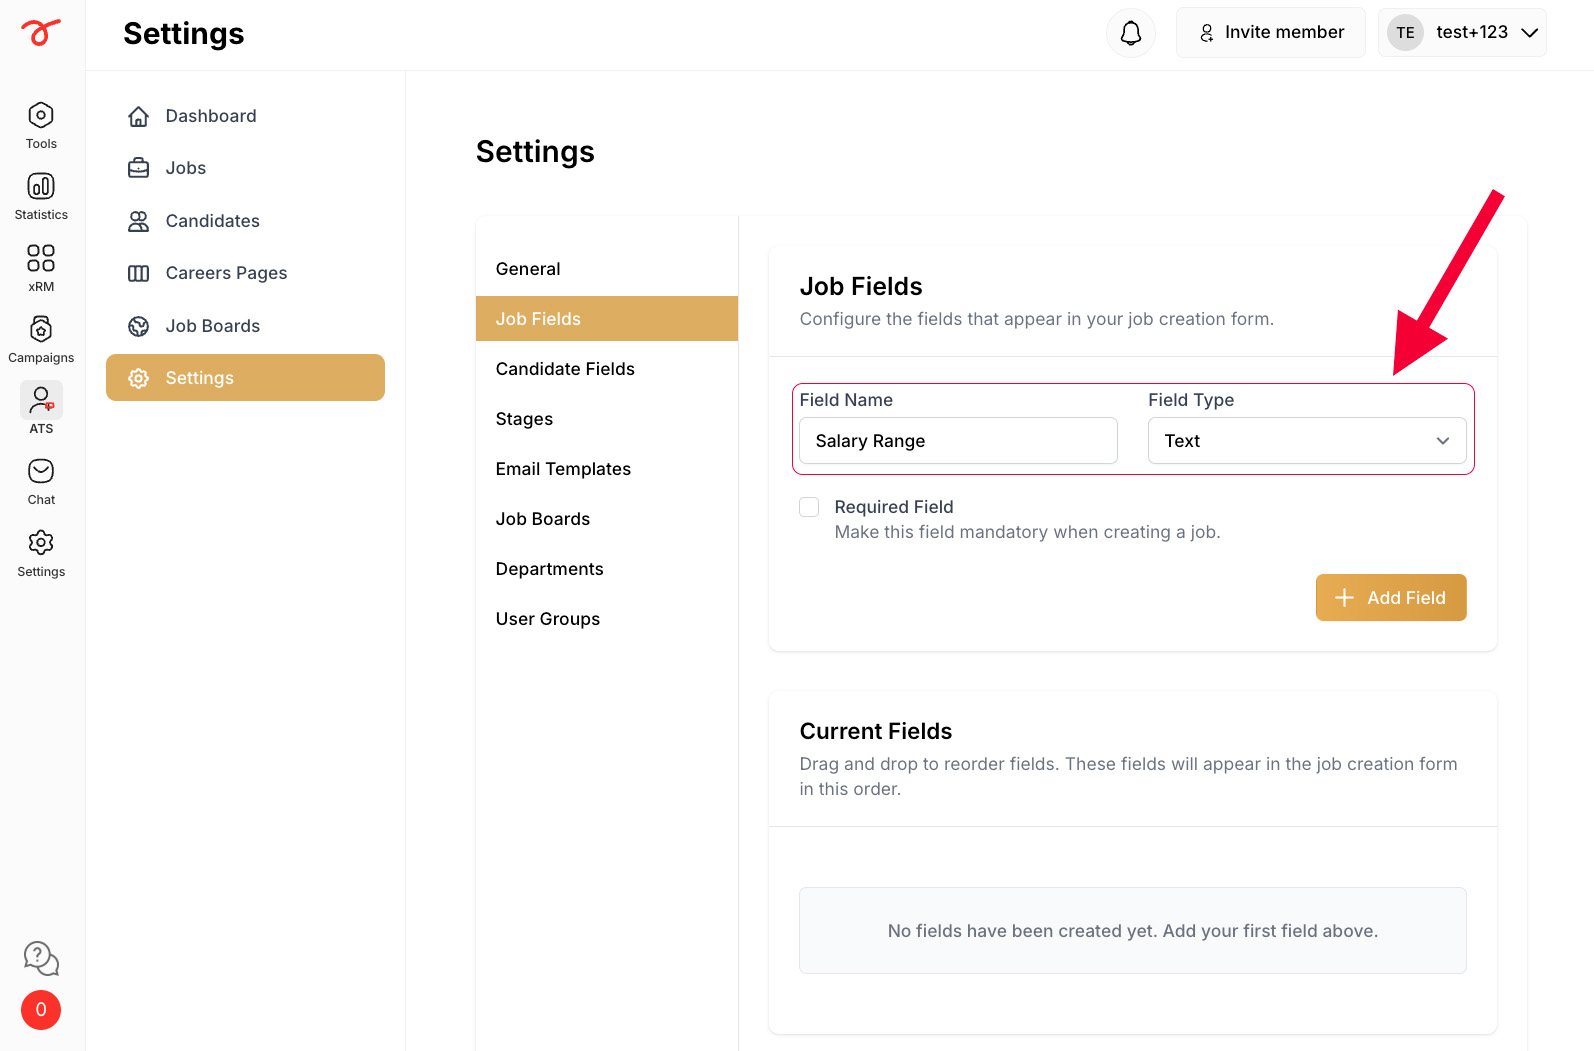
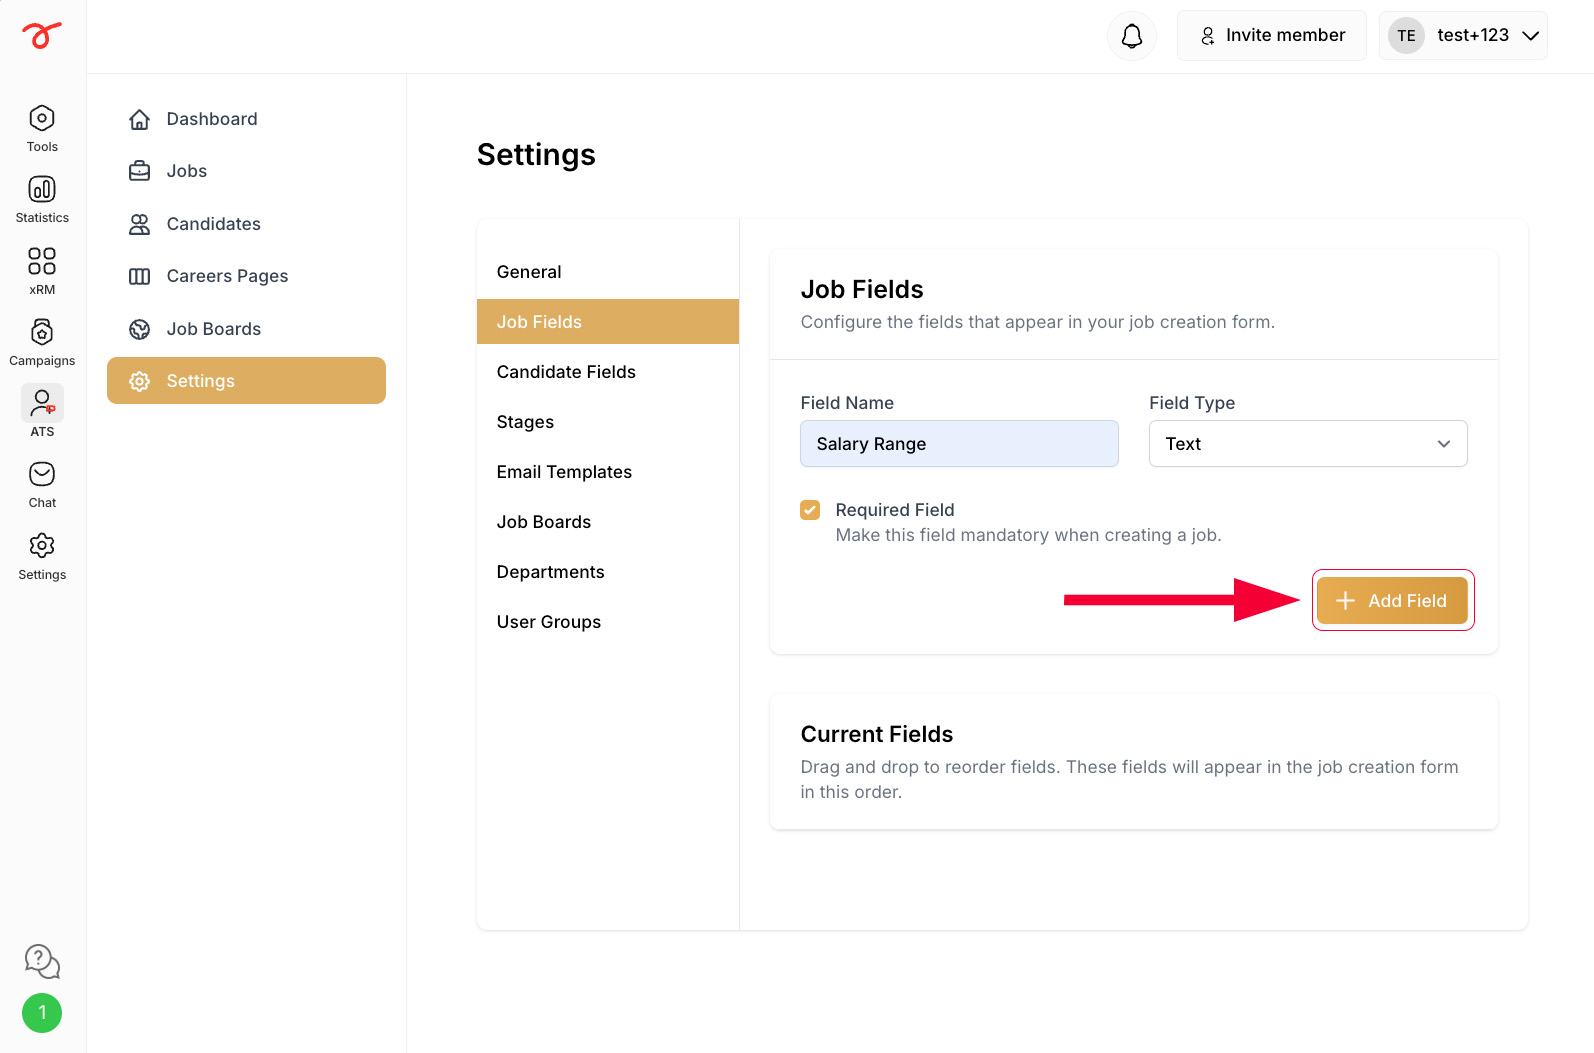
2. You can start by naming your field and select the type of the field. The field can be of following types:
- Text - Normal plain text.
- Text area - Expandable text area.
- Select - Select from multiple options.
- Number - Numerical values.
- Date - Date selector.
- Checkbox.
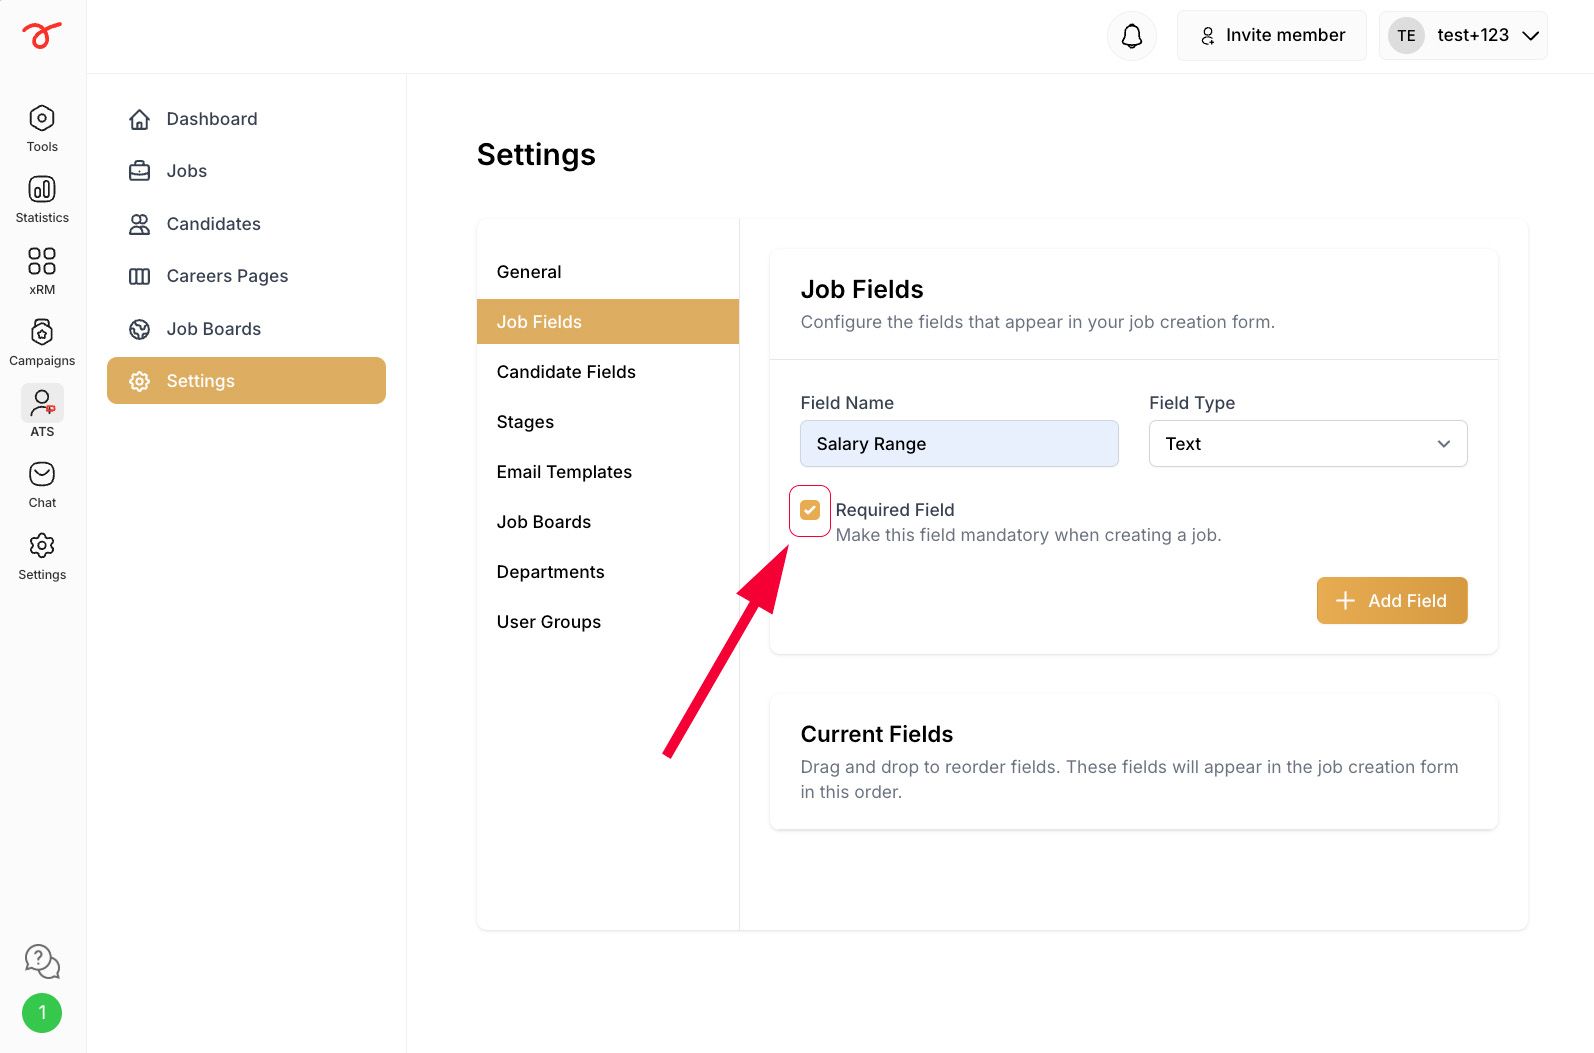
3. You can mark a field as mandatory by checking this box.
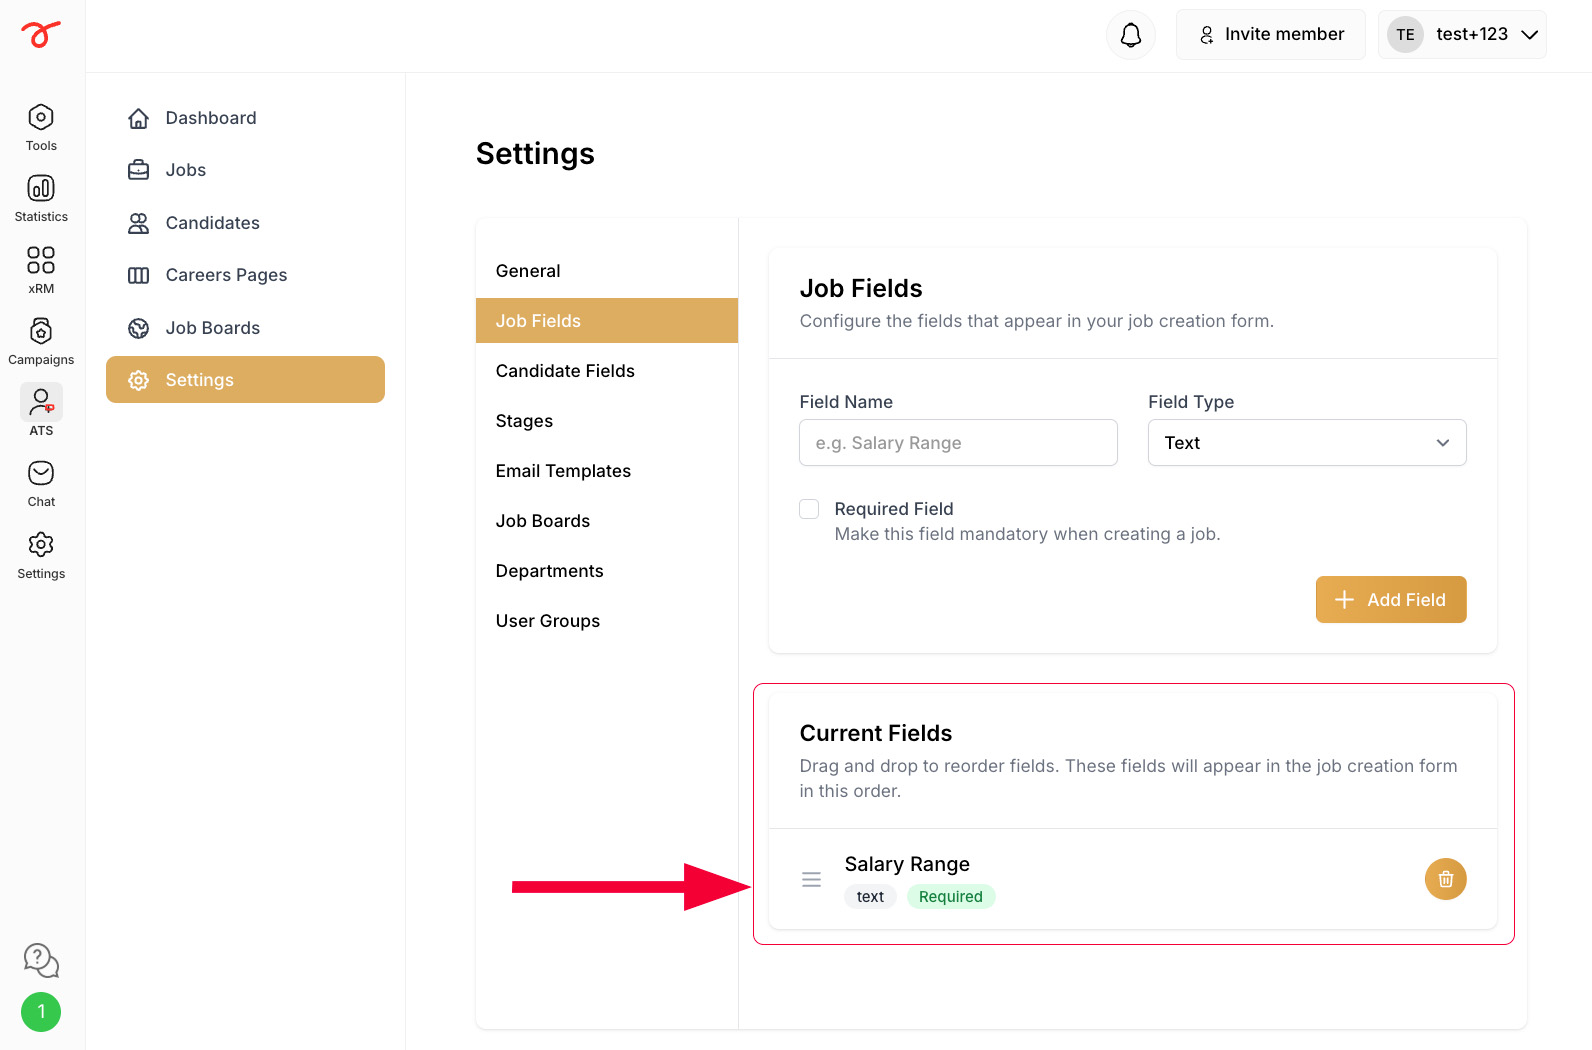
4. Once you are done you can add this field by clicking on ”+ Add field”. Easily drag-and-drop to reorder the job fields for easier input.
Additionally, you can also check the current fields that were added into the form.
Related articles
- Getting started Serviceform will help you in increasing lead generation on your website and your conversion rates with its power-packed tools.
- Cookies Get an insight about Serviceform's Cookies.
- Public API Our API documentation provides all the tools and information you need to seamlessly integrate with our platform.