



AI scraper
This article will guide you through the setup of AI scraper.
What is AI Scraper?
AI Scraper is an advanced tool that extracts website content and enables AI-powered responses. Simply provide a URL, and the scraper will collect textual data from the site.
The extracted content is then processed by AI to generate relevant answers.
AI Scraper Plans
AI Scraper offers three plans to suit different website structures:
• Basic: Optimized for static websites, ensuring fast and efficient content extraction.
• Advanced: Ideal for sites with high-security measures that prevent bot access. Designed for dynamic websites built with frameworks like React, Angular, or JavaScript-based elements.
Character Limit Considerations
AI Scraper supports up to 3,000,000 characters per extraction. If the content of a website exceeds this limit, the scraping process halts automatically. Users should ensure the extracted content remains within this constraint for optimal AI performance.
Users can configure exclusion parameters to avoid scraping unwanted content. By defining specific keywords, AI Scraper will exclude URLs containing those terms, ensuring only relevant data is extracted.
AI Models & Token Limits
AI Scraper currently uses Gemini 2.5 Flash AI model (1 Million context window, handling around 3 Million characters in English)
Users must ensure the total character count (including AI Scraper data and custom prompts) does not exceed the model’s token limit.
Example Token Limit Scenario:
• AI Scraper extracts 2,990,000 characters
• AI Training section (Prompts) has 50,000 characters
• Total: 3,040,000 characters → This exceeds Gemini 2.5 Flash model’s limit
Gemini 2.5 Flash is best for large datasets due to its high context window. For better reasoning and comprehension, OpenAI models like GPT-5 are also superior.
To use OpenAI models, users can integrate their own OpenAI Assistant by providing an Assistant ID and API key to use models with higher context windows. Refer this article to know more.
Setting Up AI Scraper
On your Serviceform dashboard,
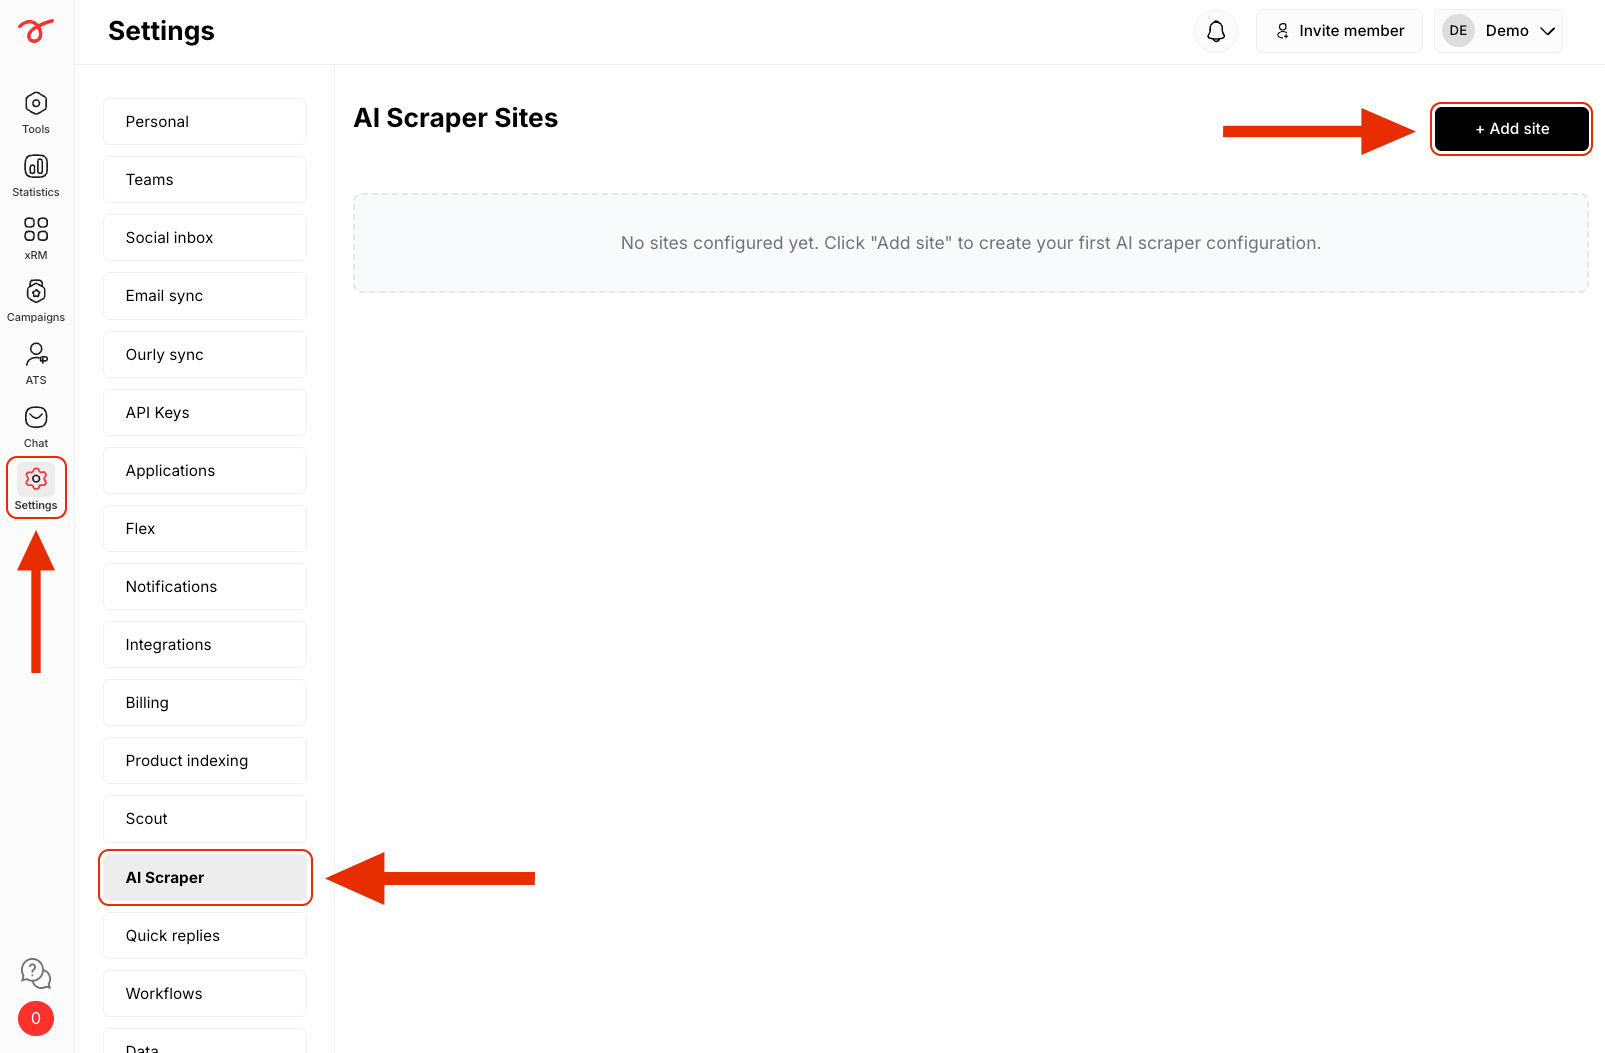
1. Click on Settings -> AI Scraper and then click on + Add site.
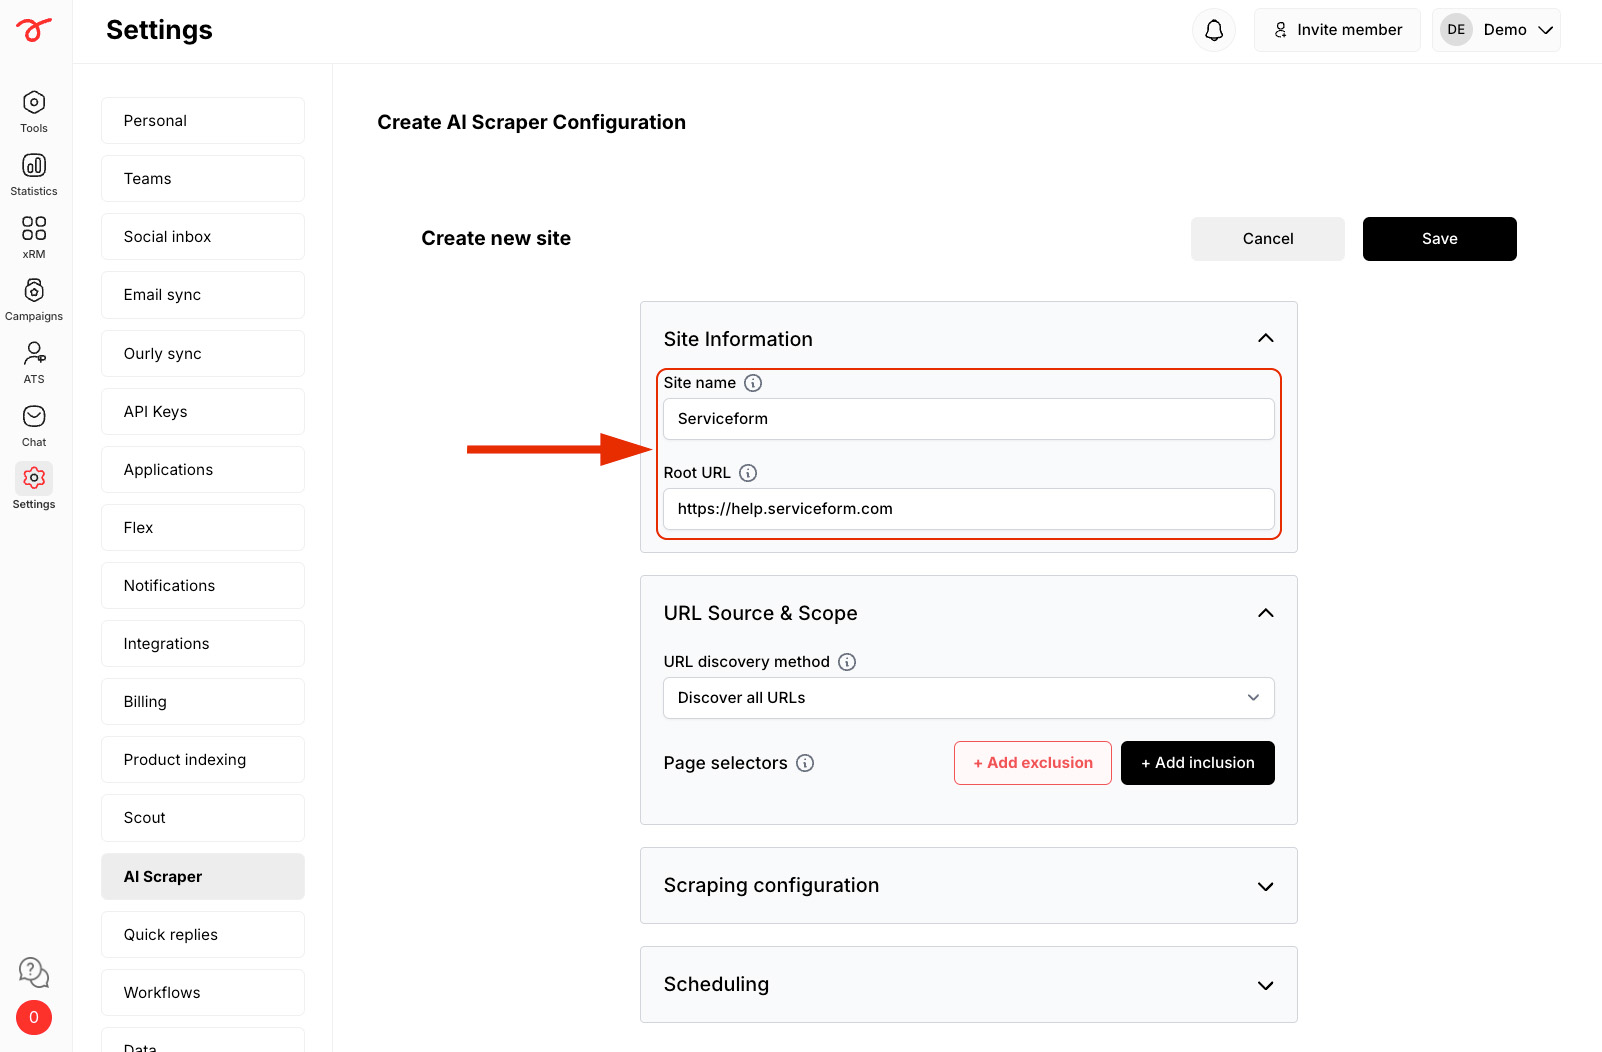
2. Name your site and enter the Root URL (this is where the AI scraper starts from).
URL Source and Scope
URL Discovery Method
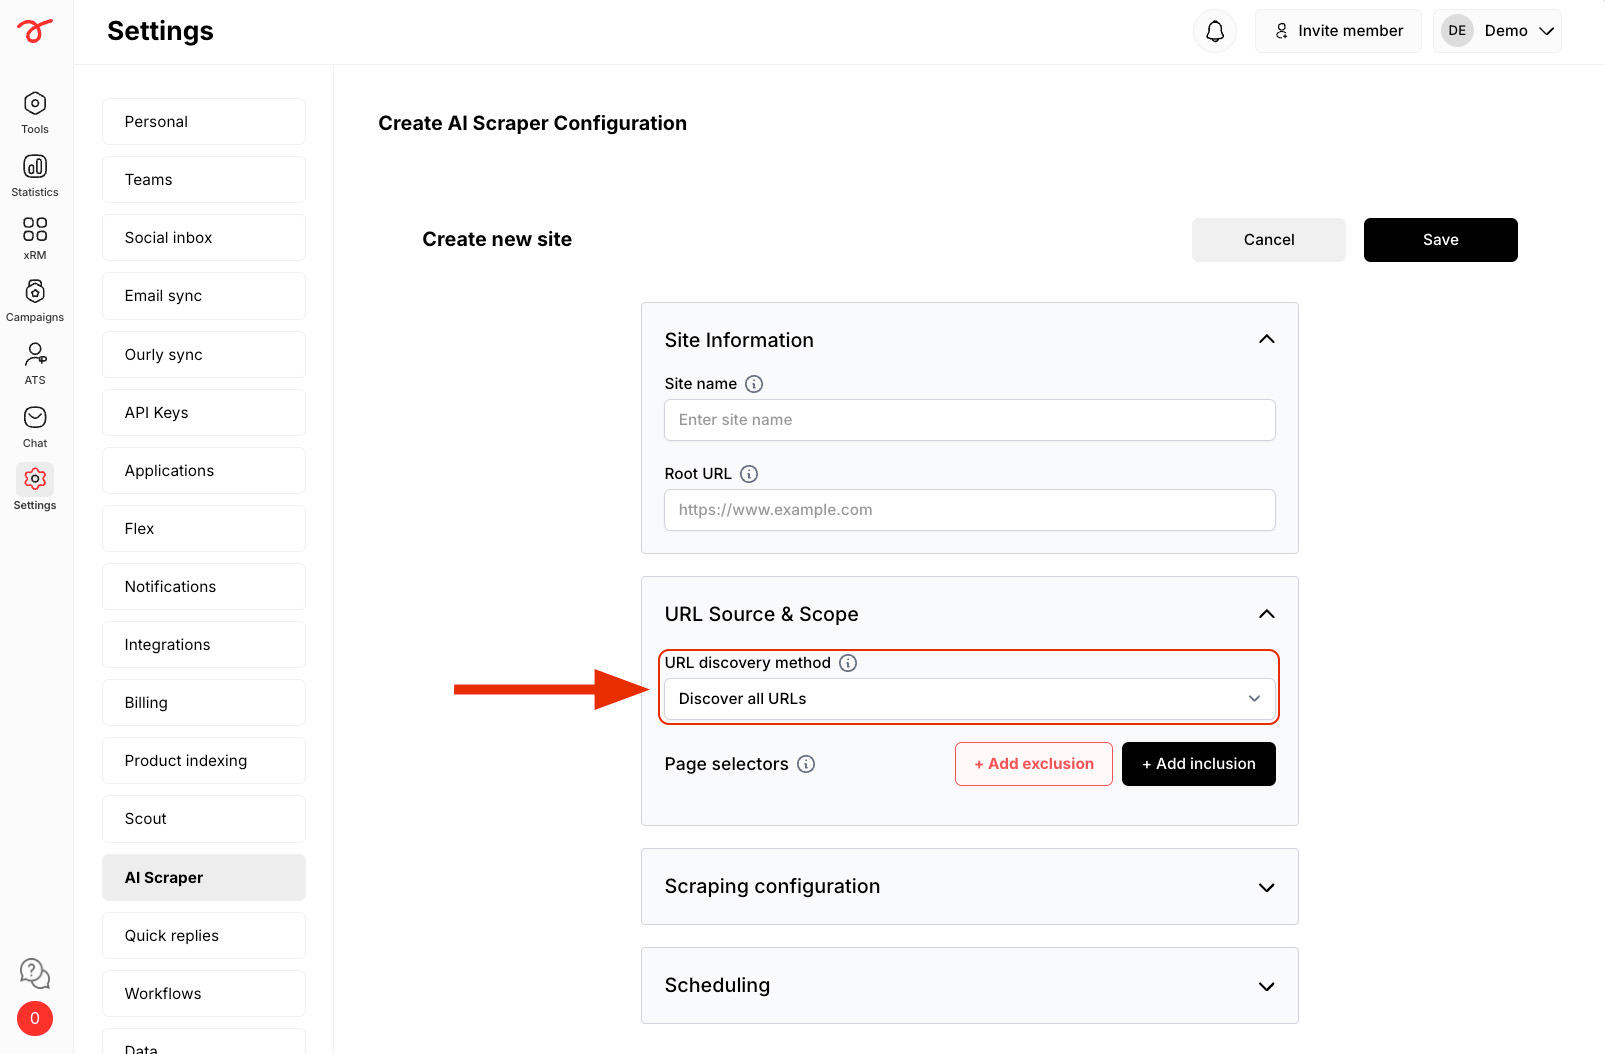
Select how you want the scraper to discover URLs under URL source and scope section.
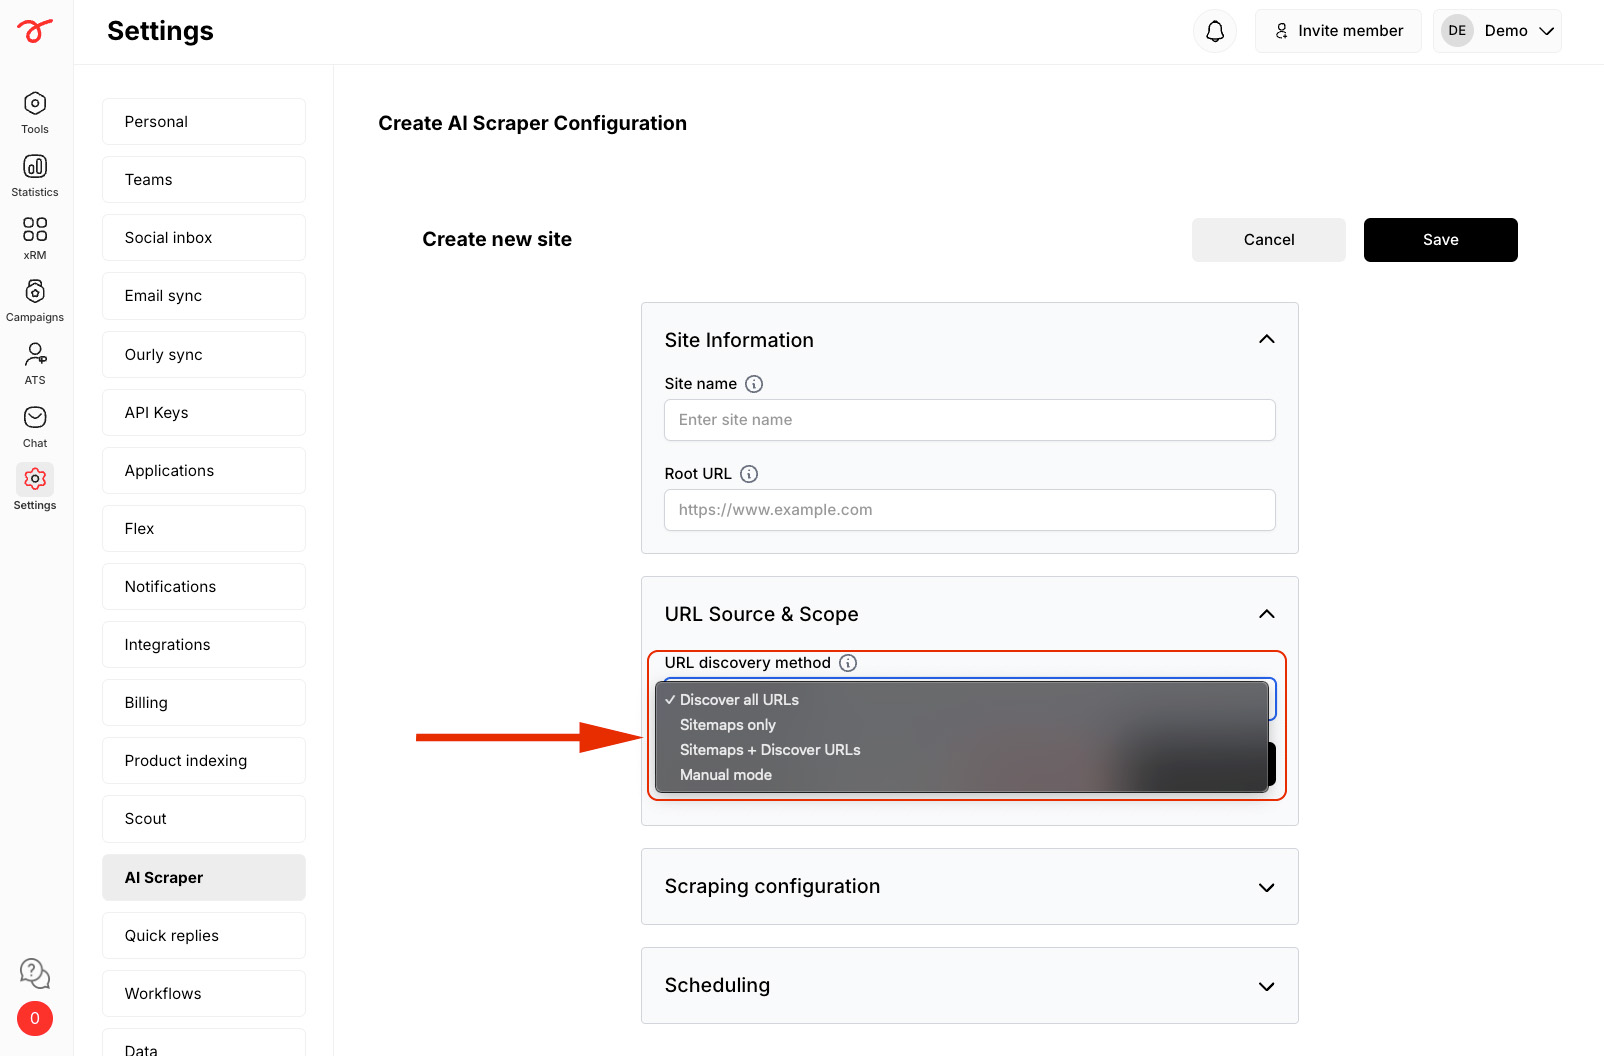
Options include:
• Discover all URLs: Scrapes all pages on the website. By default, this option is enabled.
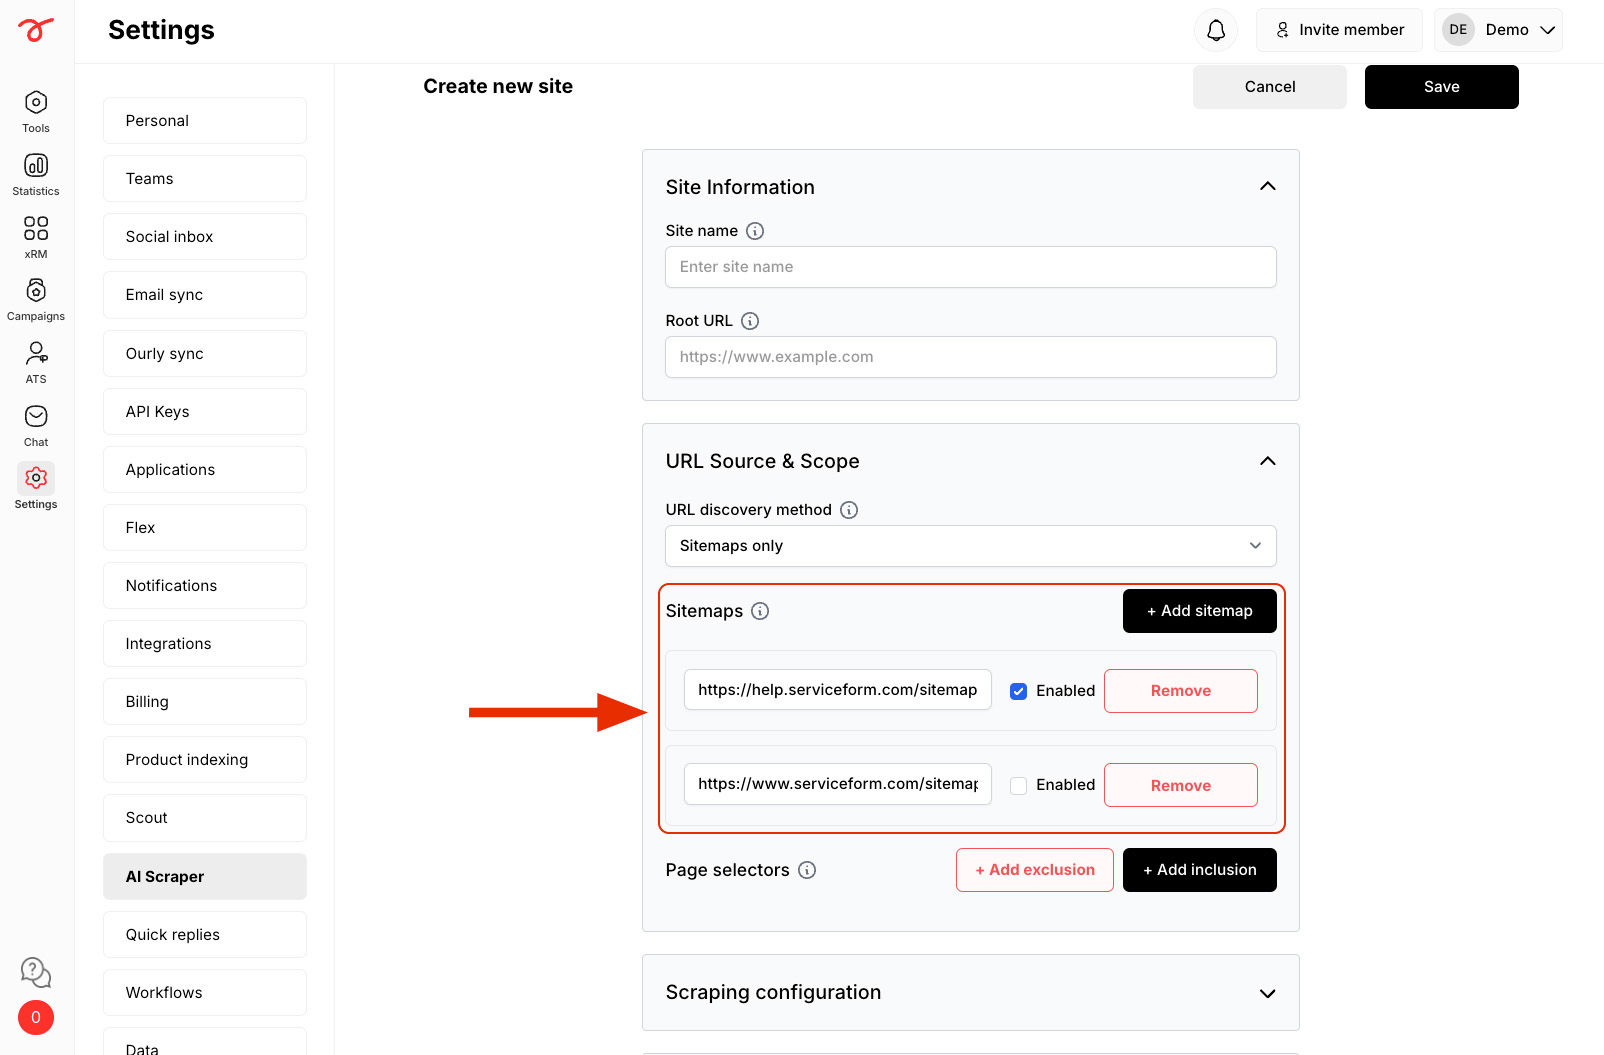
• Sitemaps only: Allows you to manually add sitemap links. Click + Add sitemap to include multiple links. Each sitemap entry has a checkbox to enable or disable scraping for that specific sitemap.
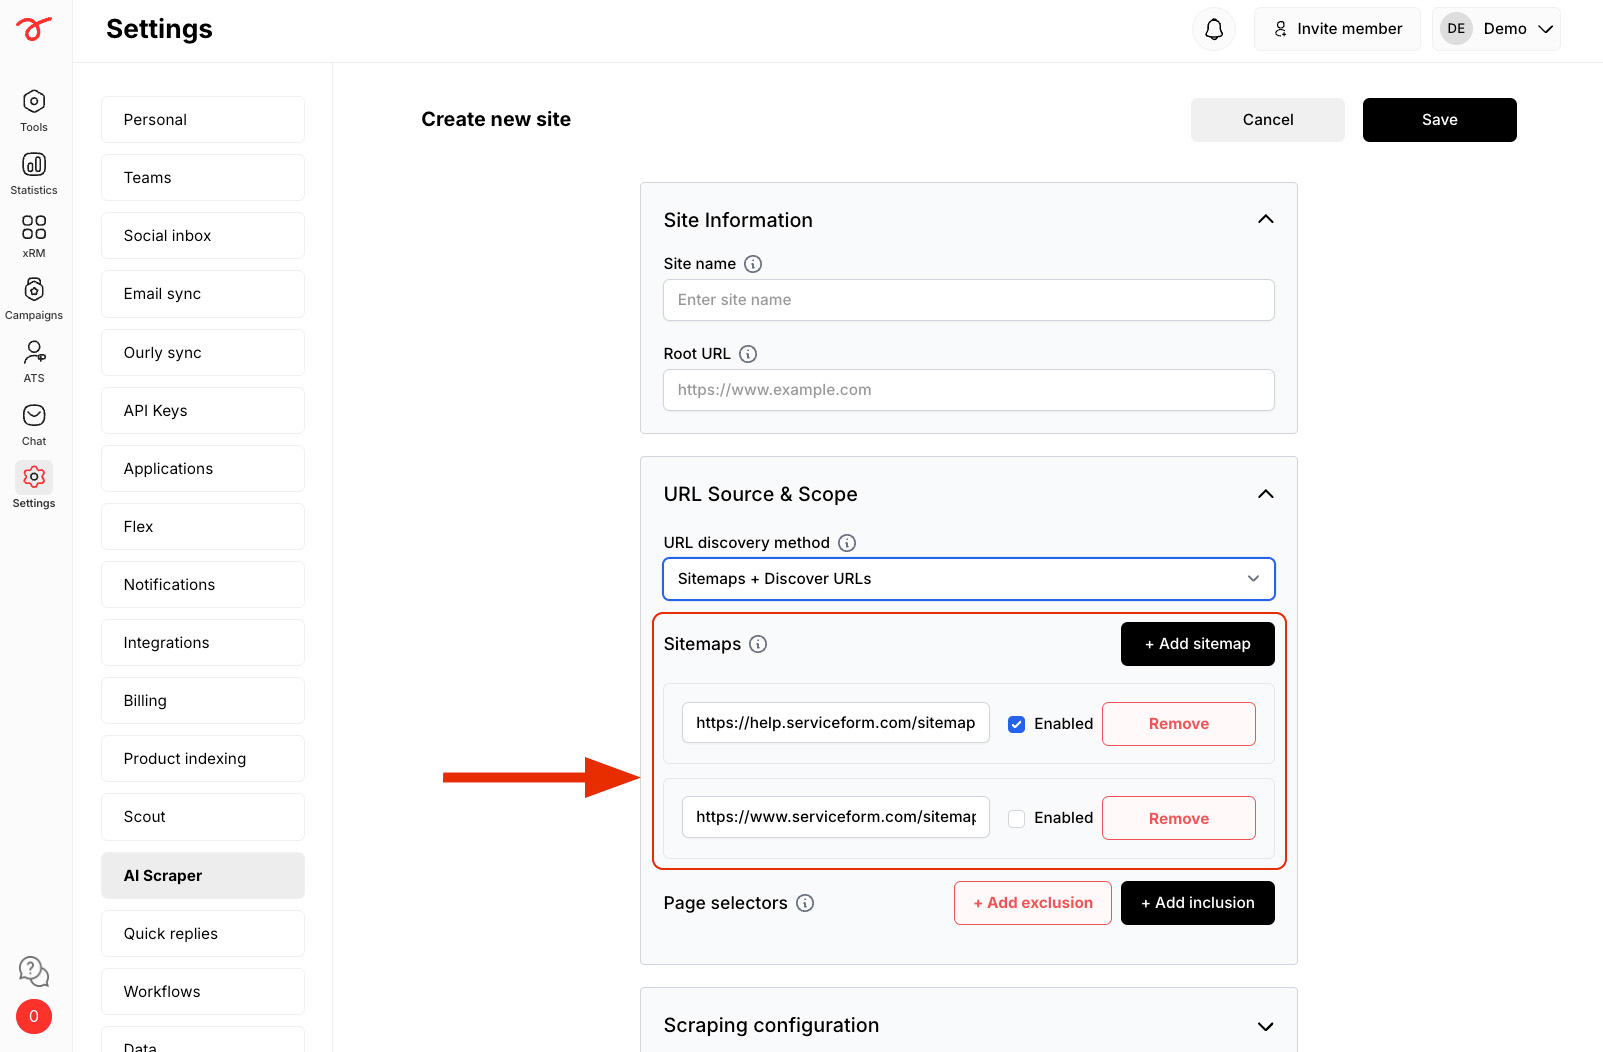
• Sitemaps and Discover URLs: Same as Sitemaps only but also automatically discovers all other URLs.
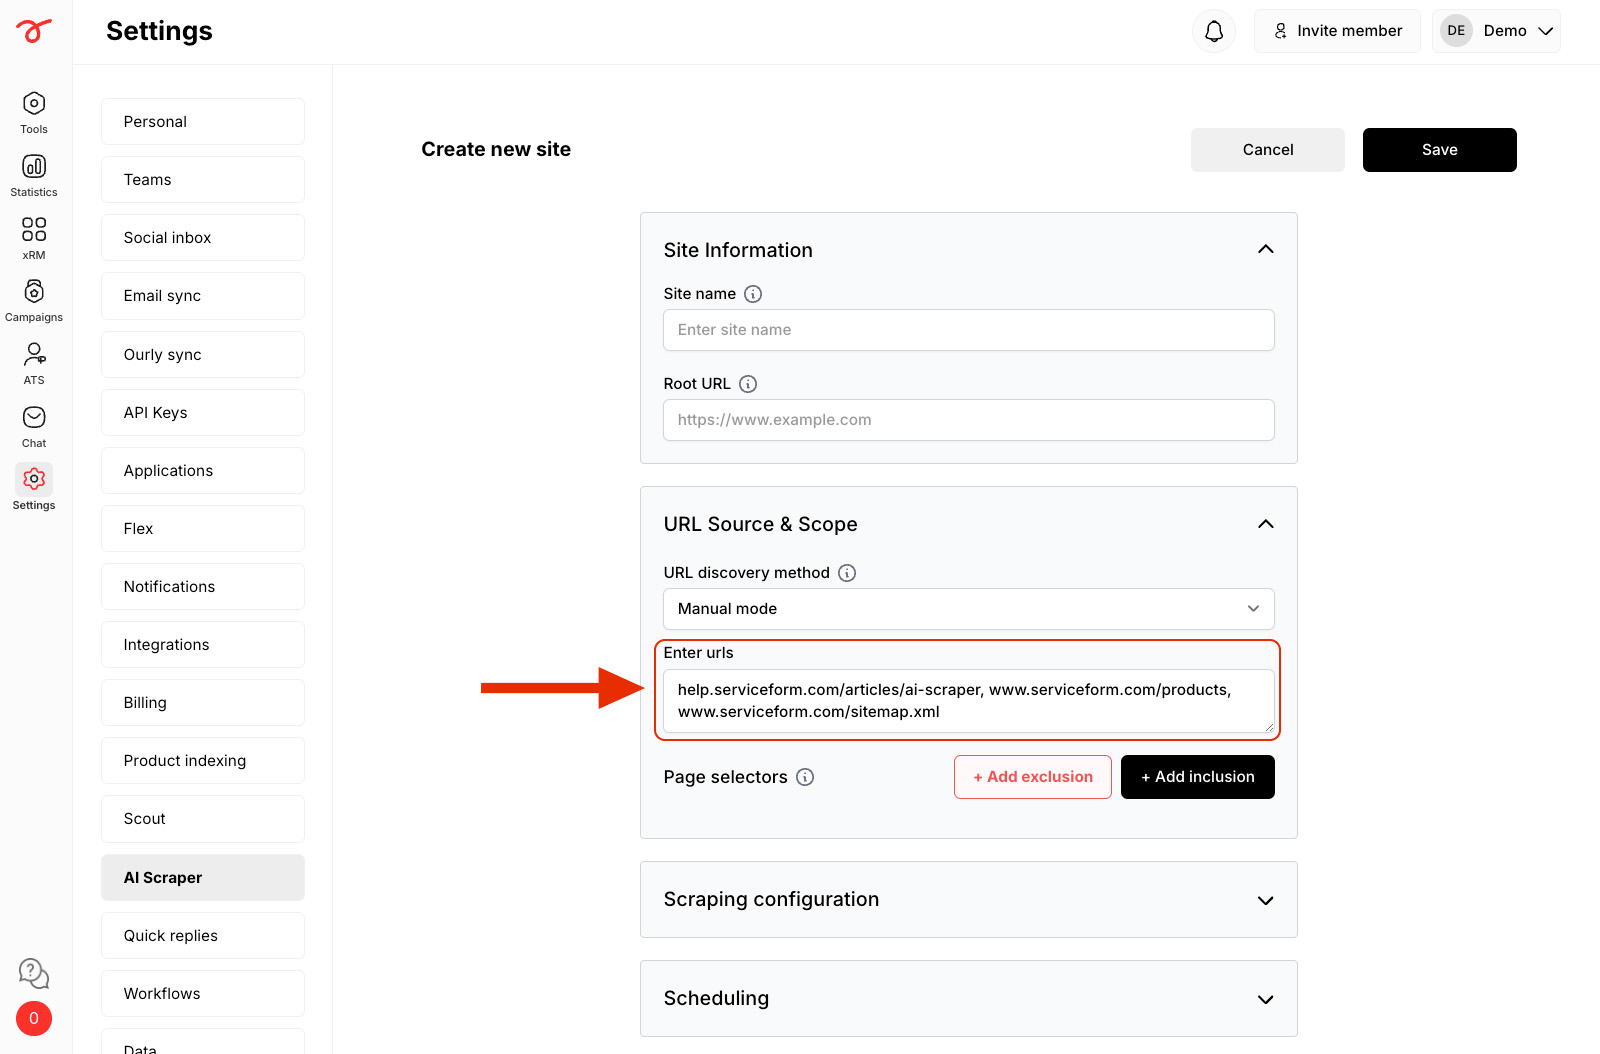
• Manual mode: Enter URLs manually, separated by commas.
Filtering URLs for scraping
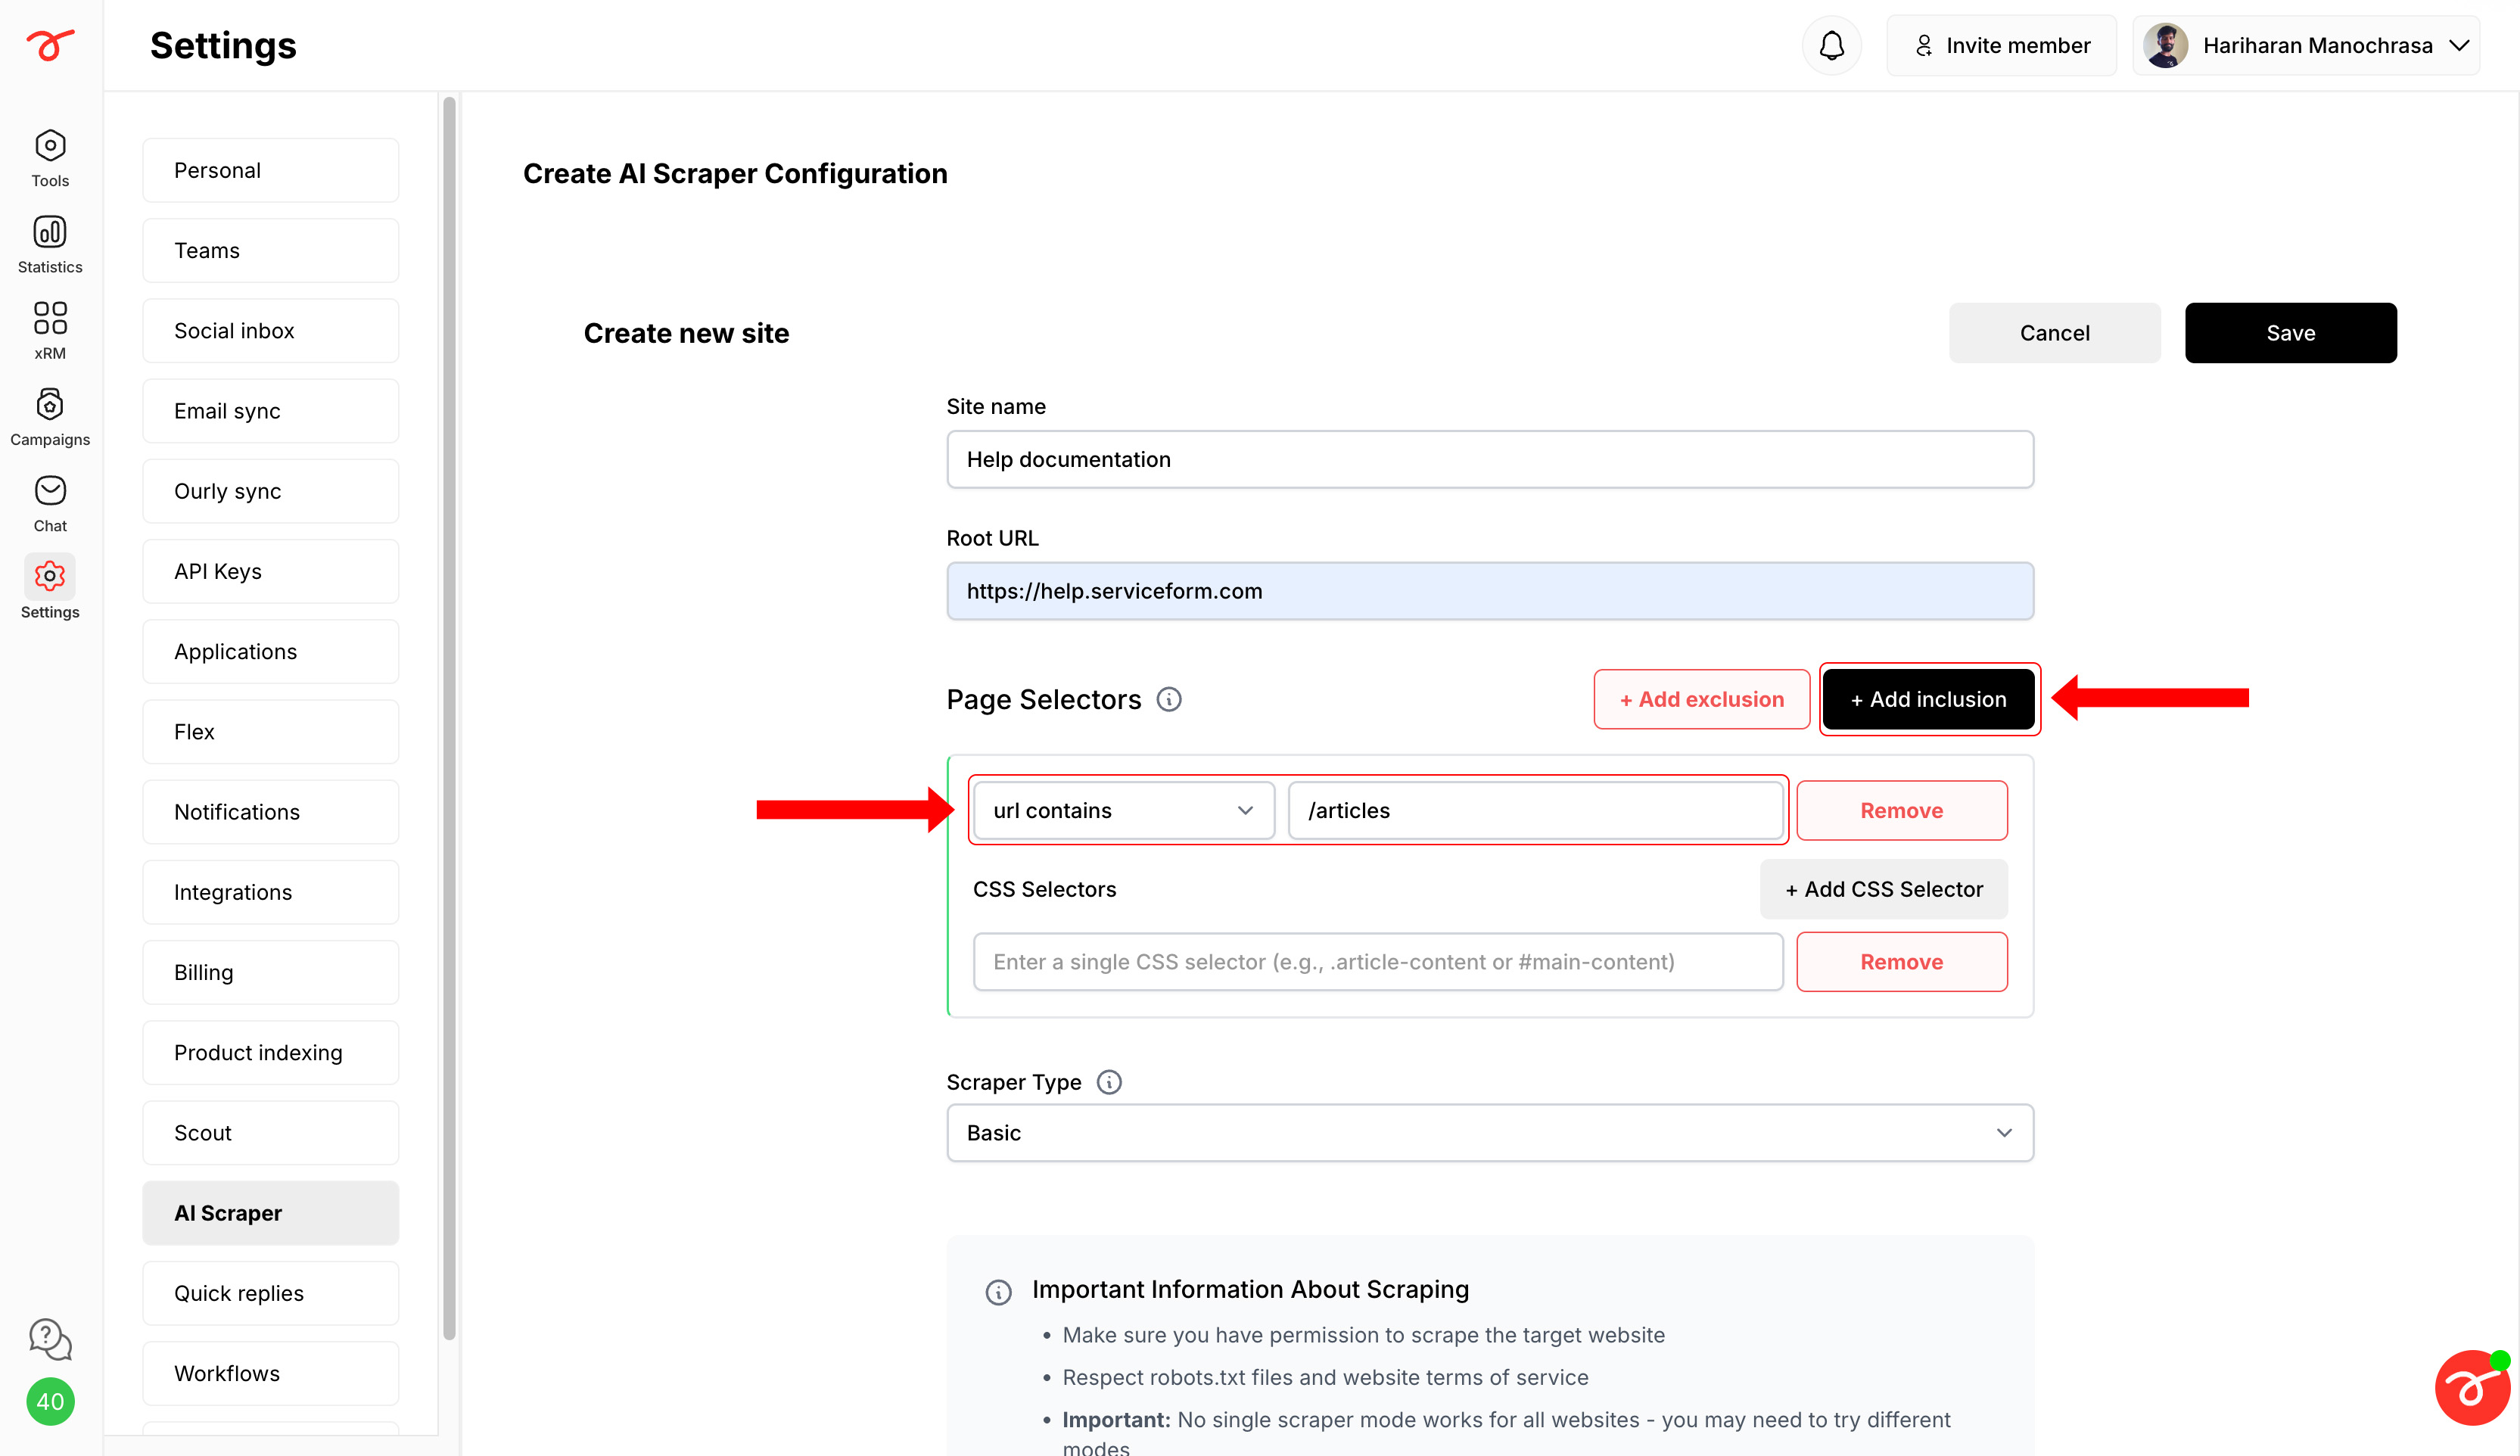
• Inclusion
1. Click + Add inclusion and enter a keyword from the URLs you want to scrape. For example, if your articles are under help.serviceform.com/articles/getting-started, enter “/articles” to include all related pages.
You can multiple selectors as required.
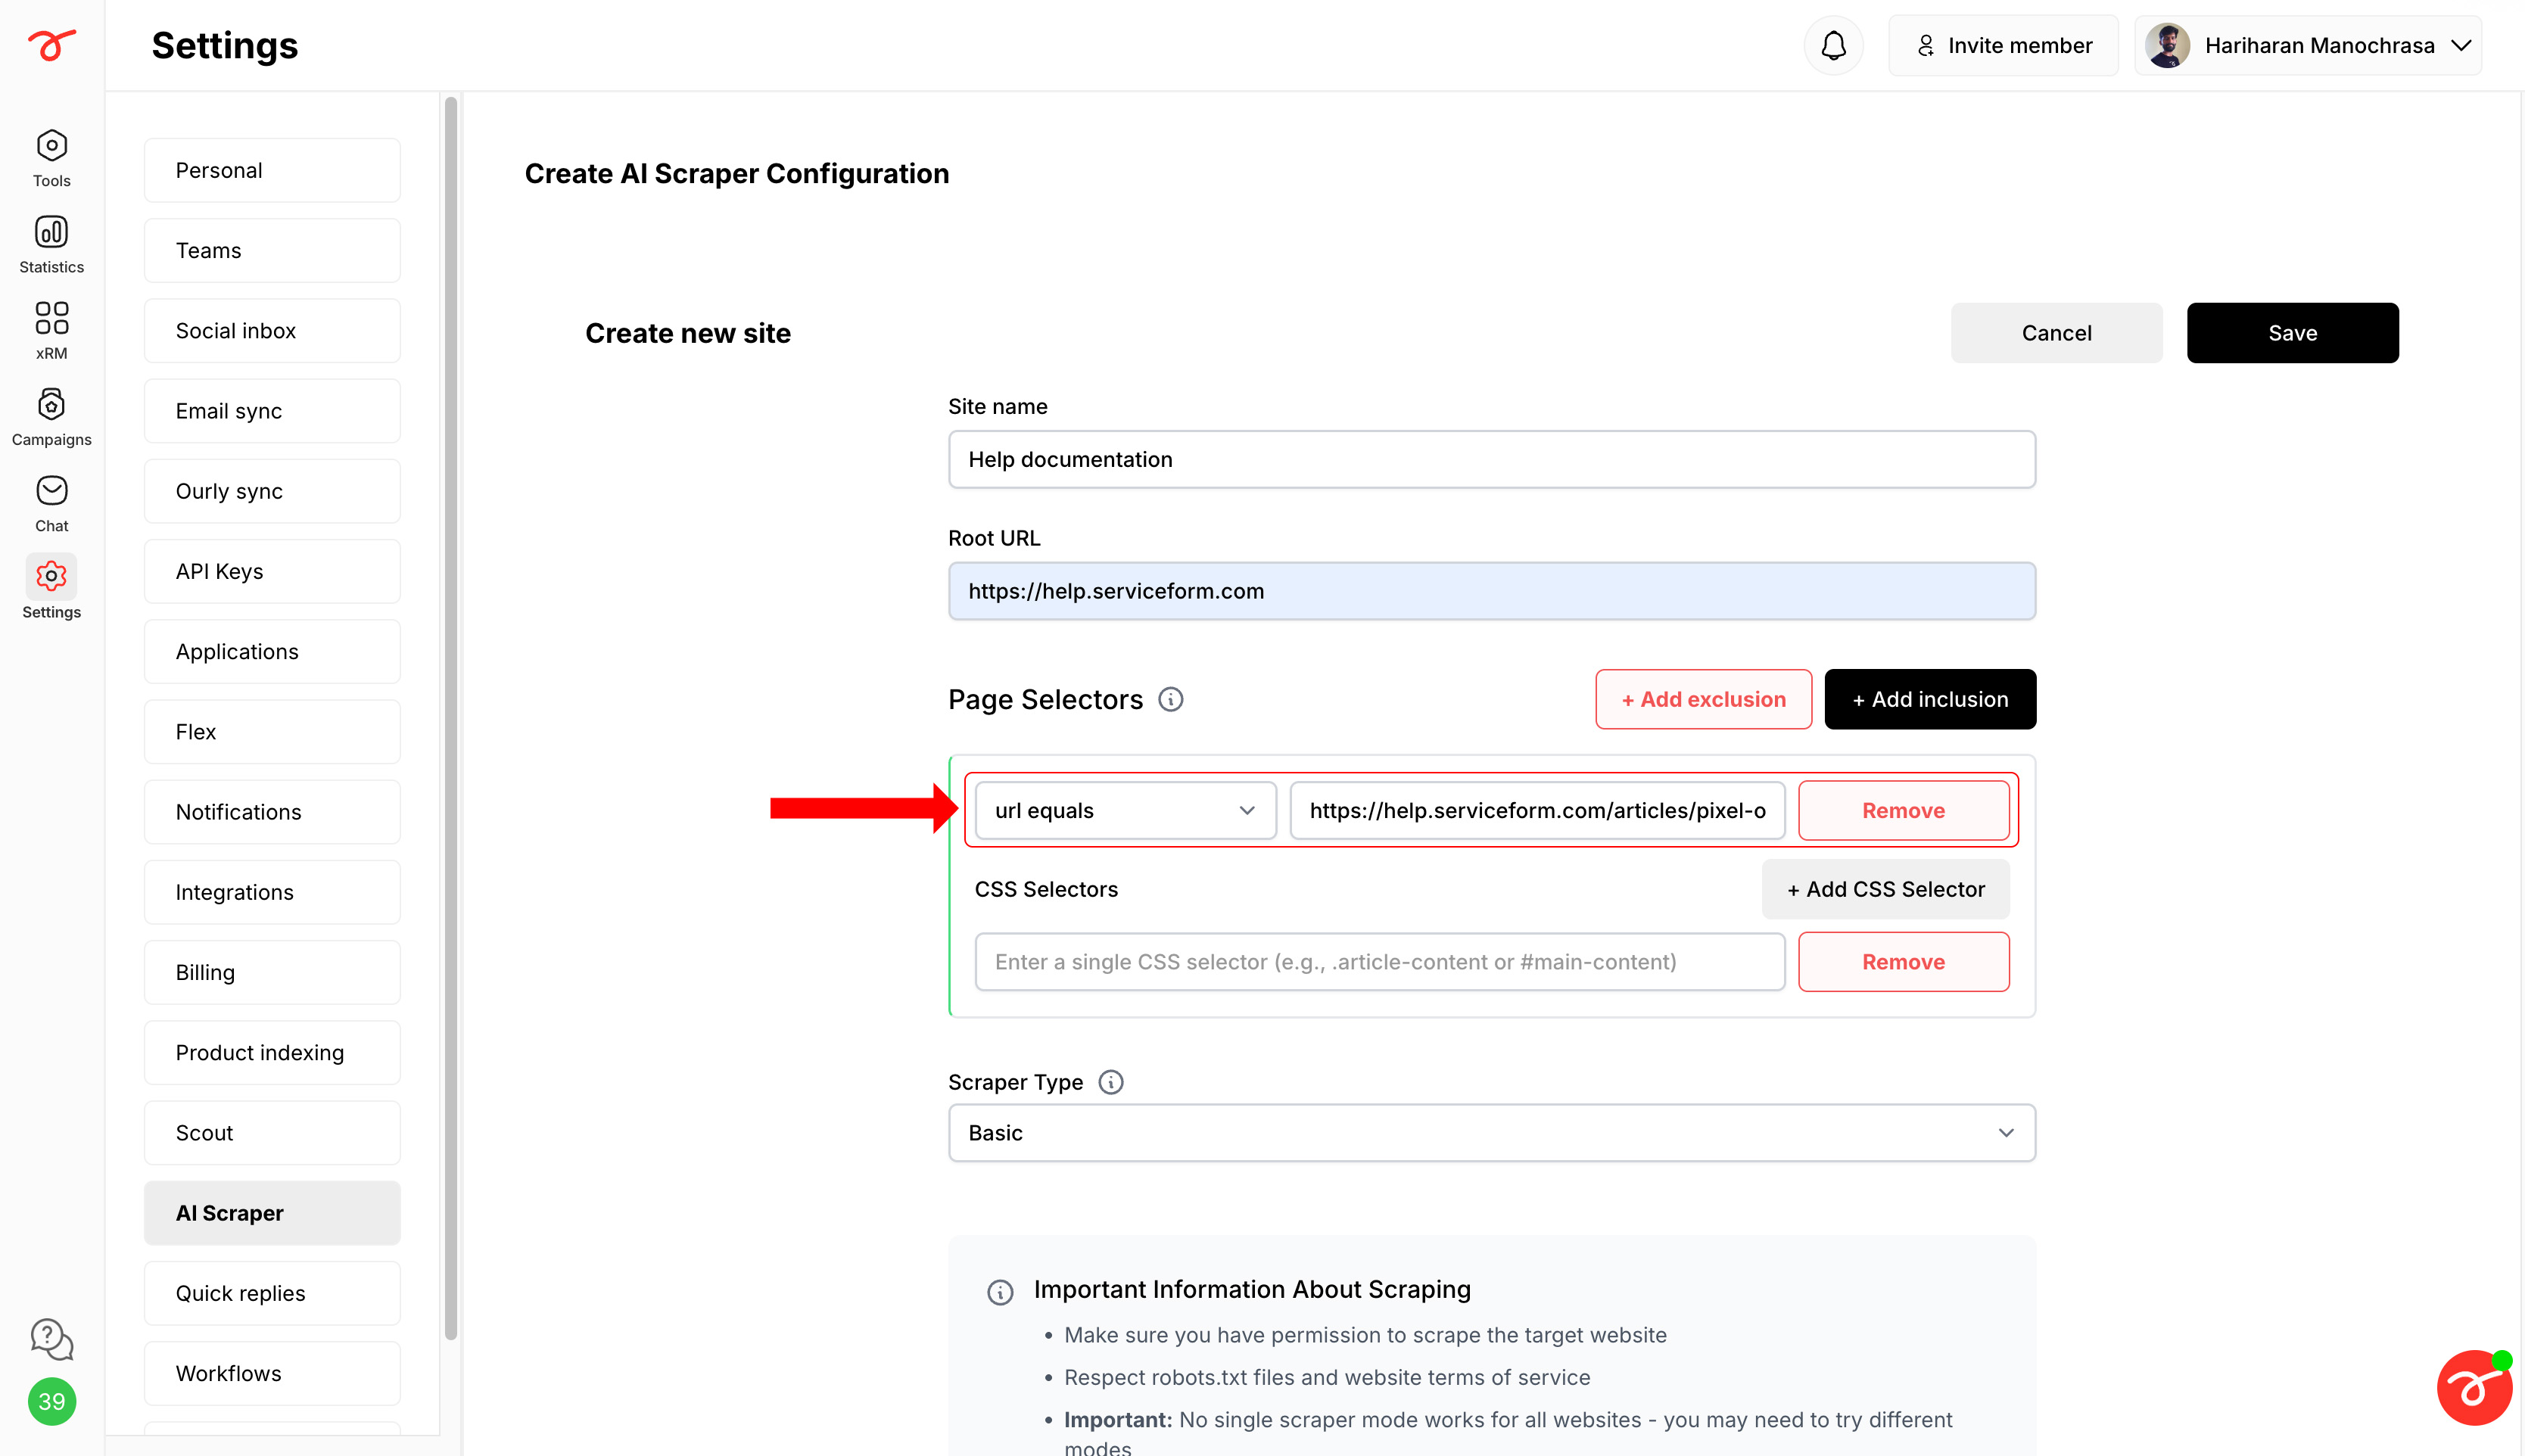
Alternatively, switch from URL contains to URL equals to specify exact URLs.
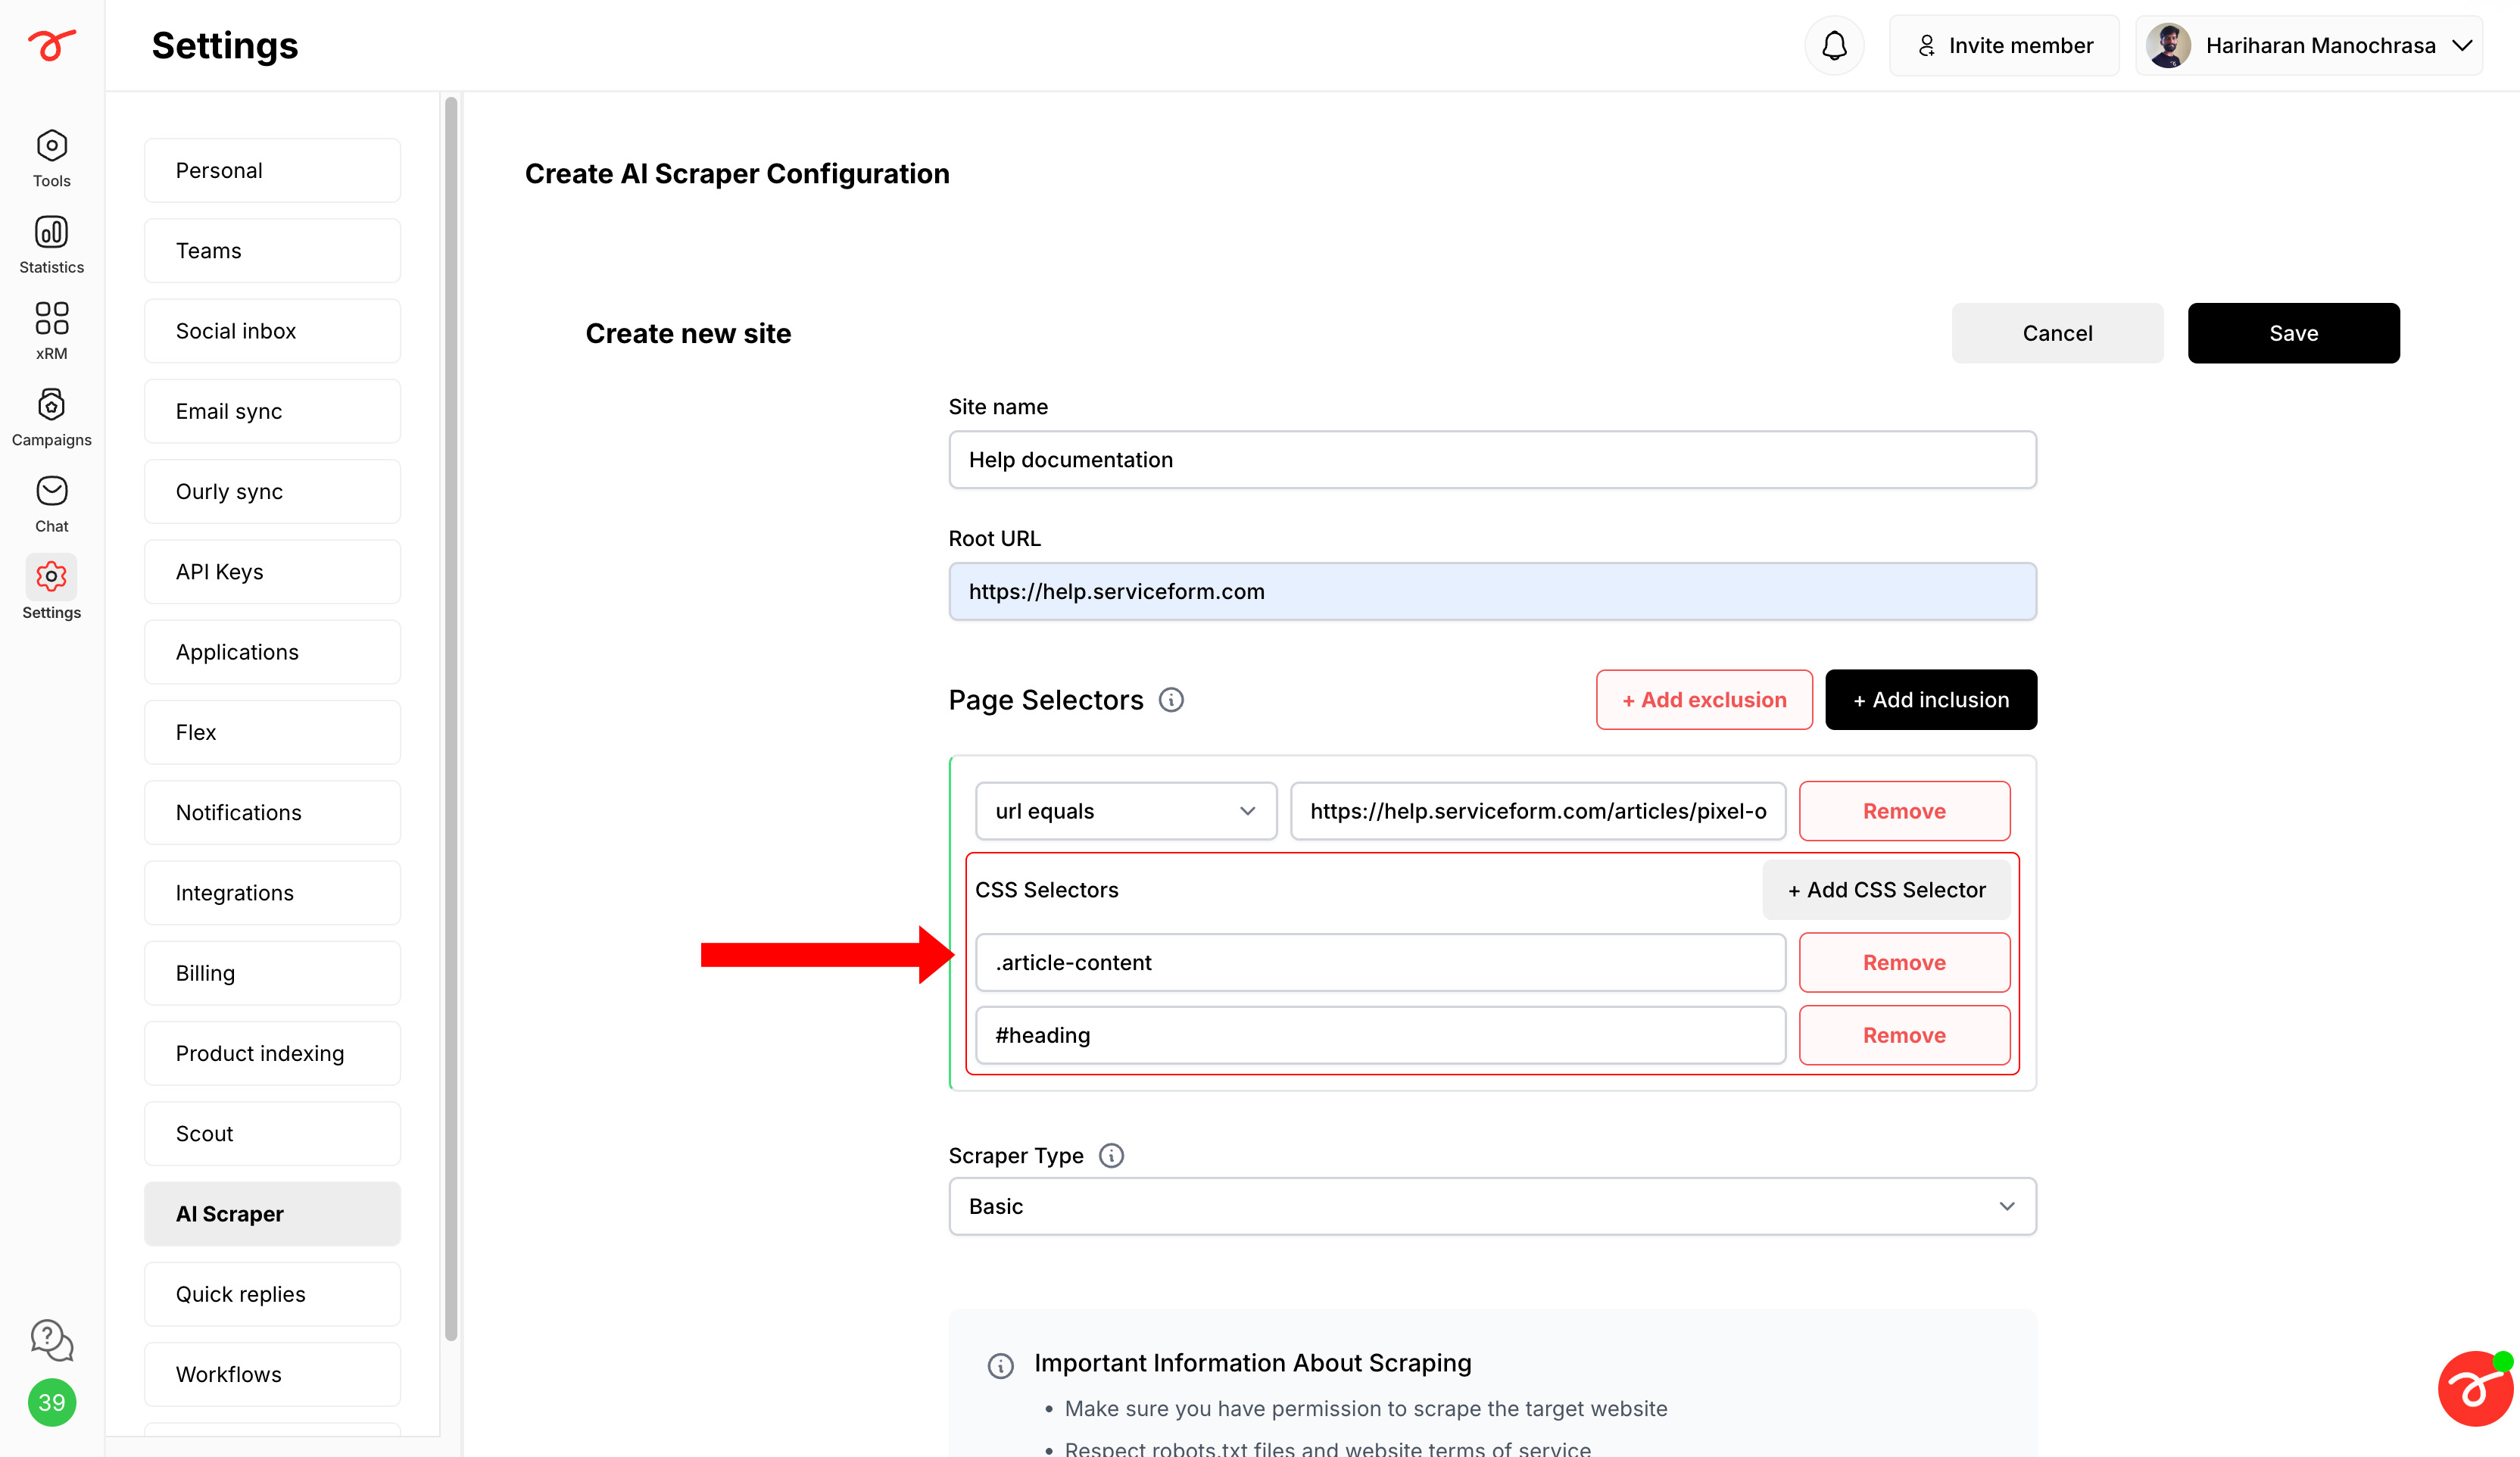
2. Enter the CSS selectors of the HTML elements you want to scrape. Example: .article-content, #heading. You can add multiple selectors by clicking on + Add CSS selector.
If you want to scrape the entire page, enter “body”.
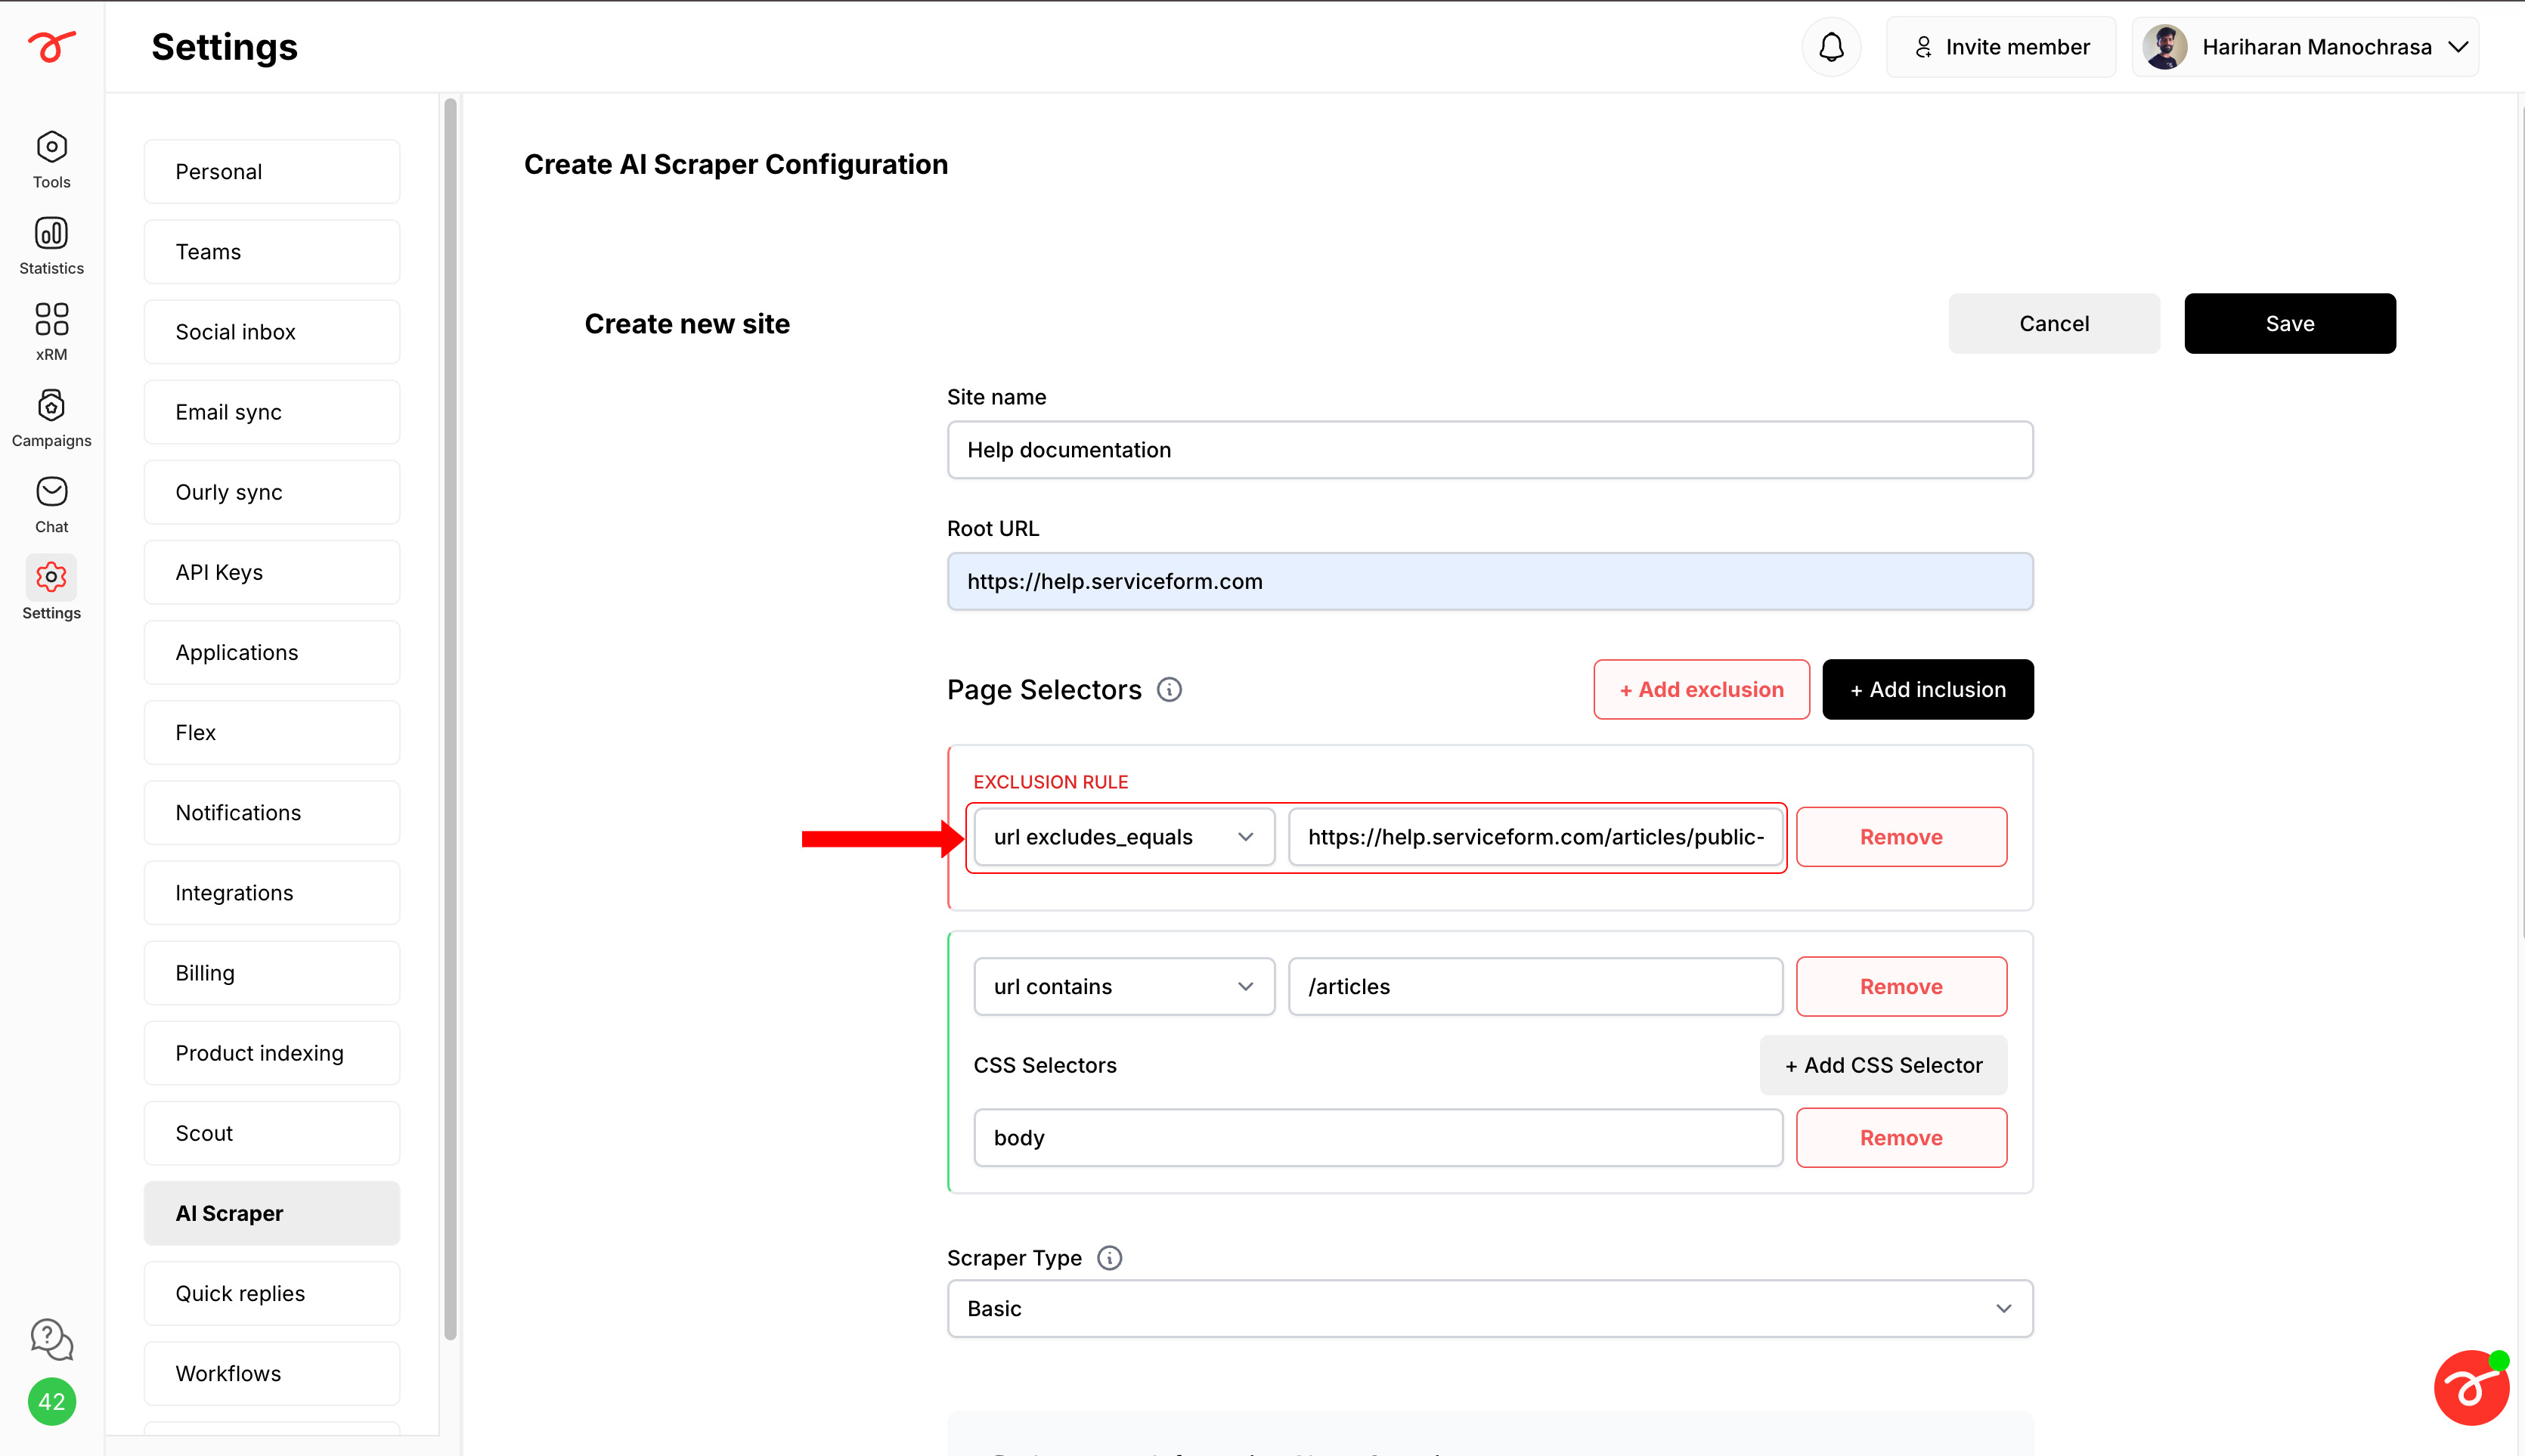
• Exclusion
1. Click + Add exclusion and enter a keyword from the URLs you do not wish to scrape.
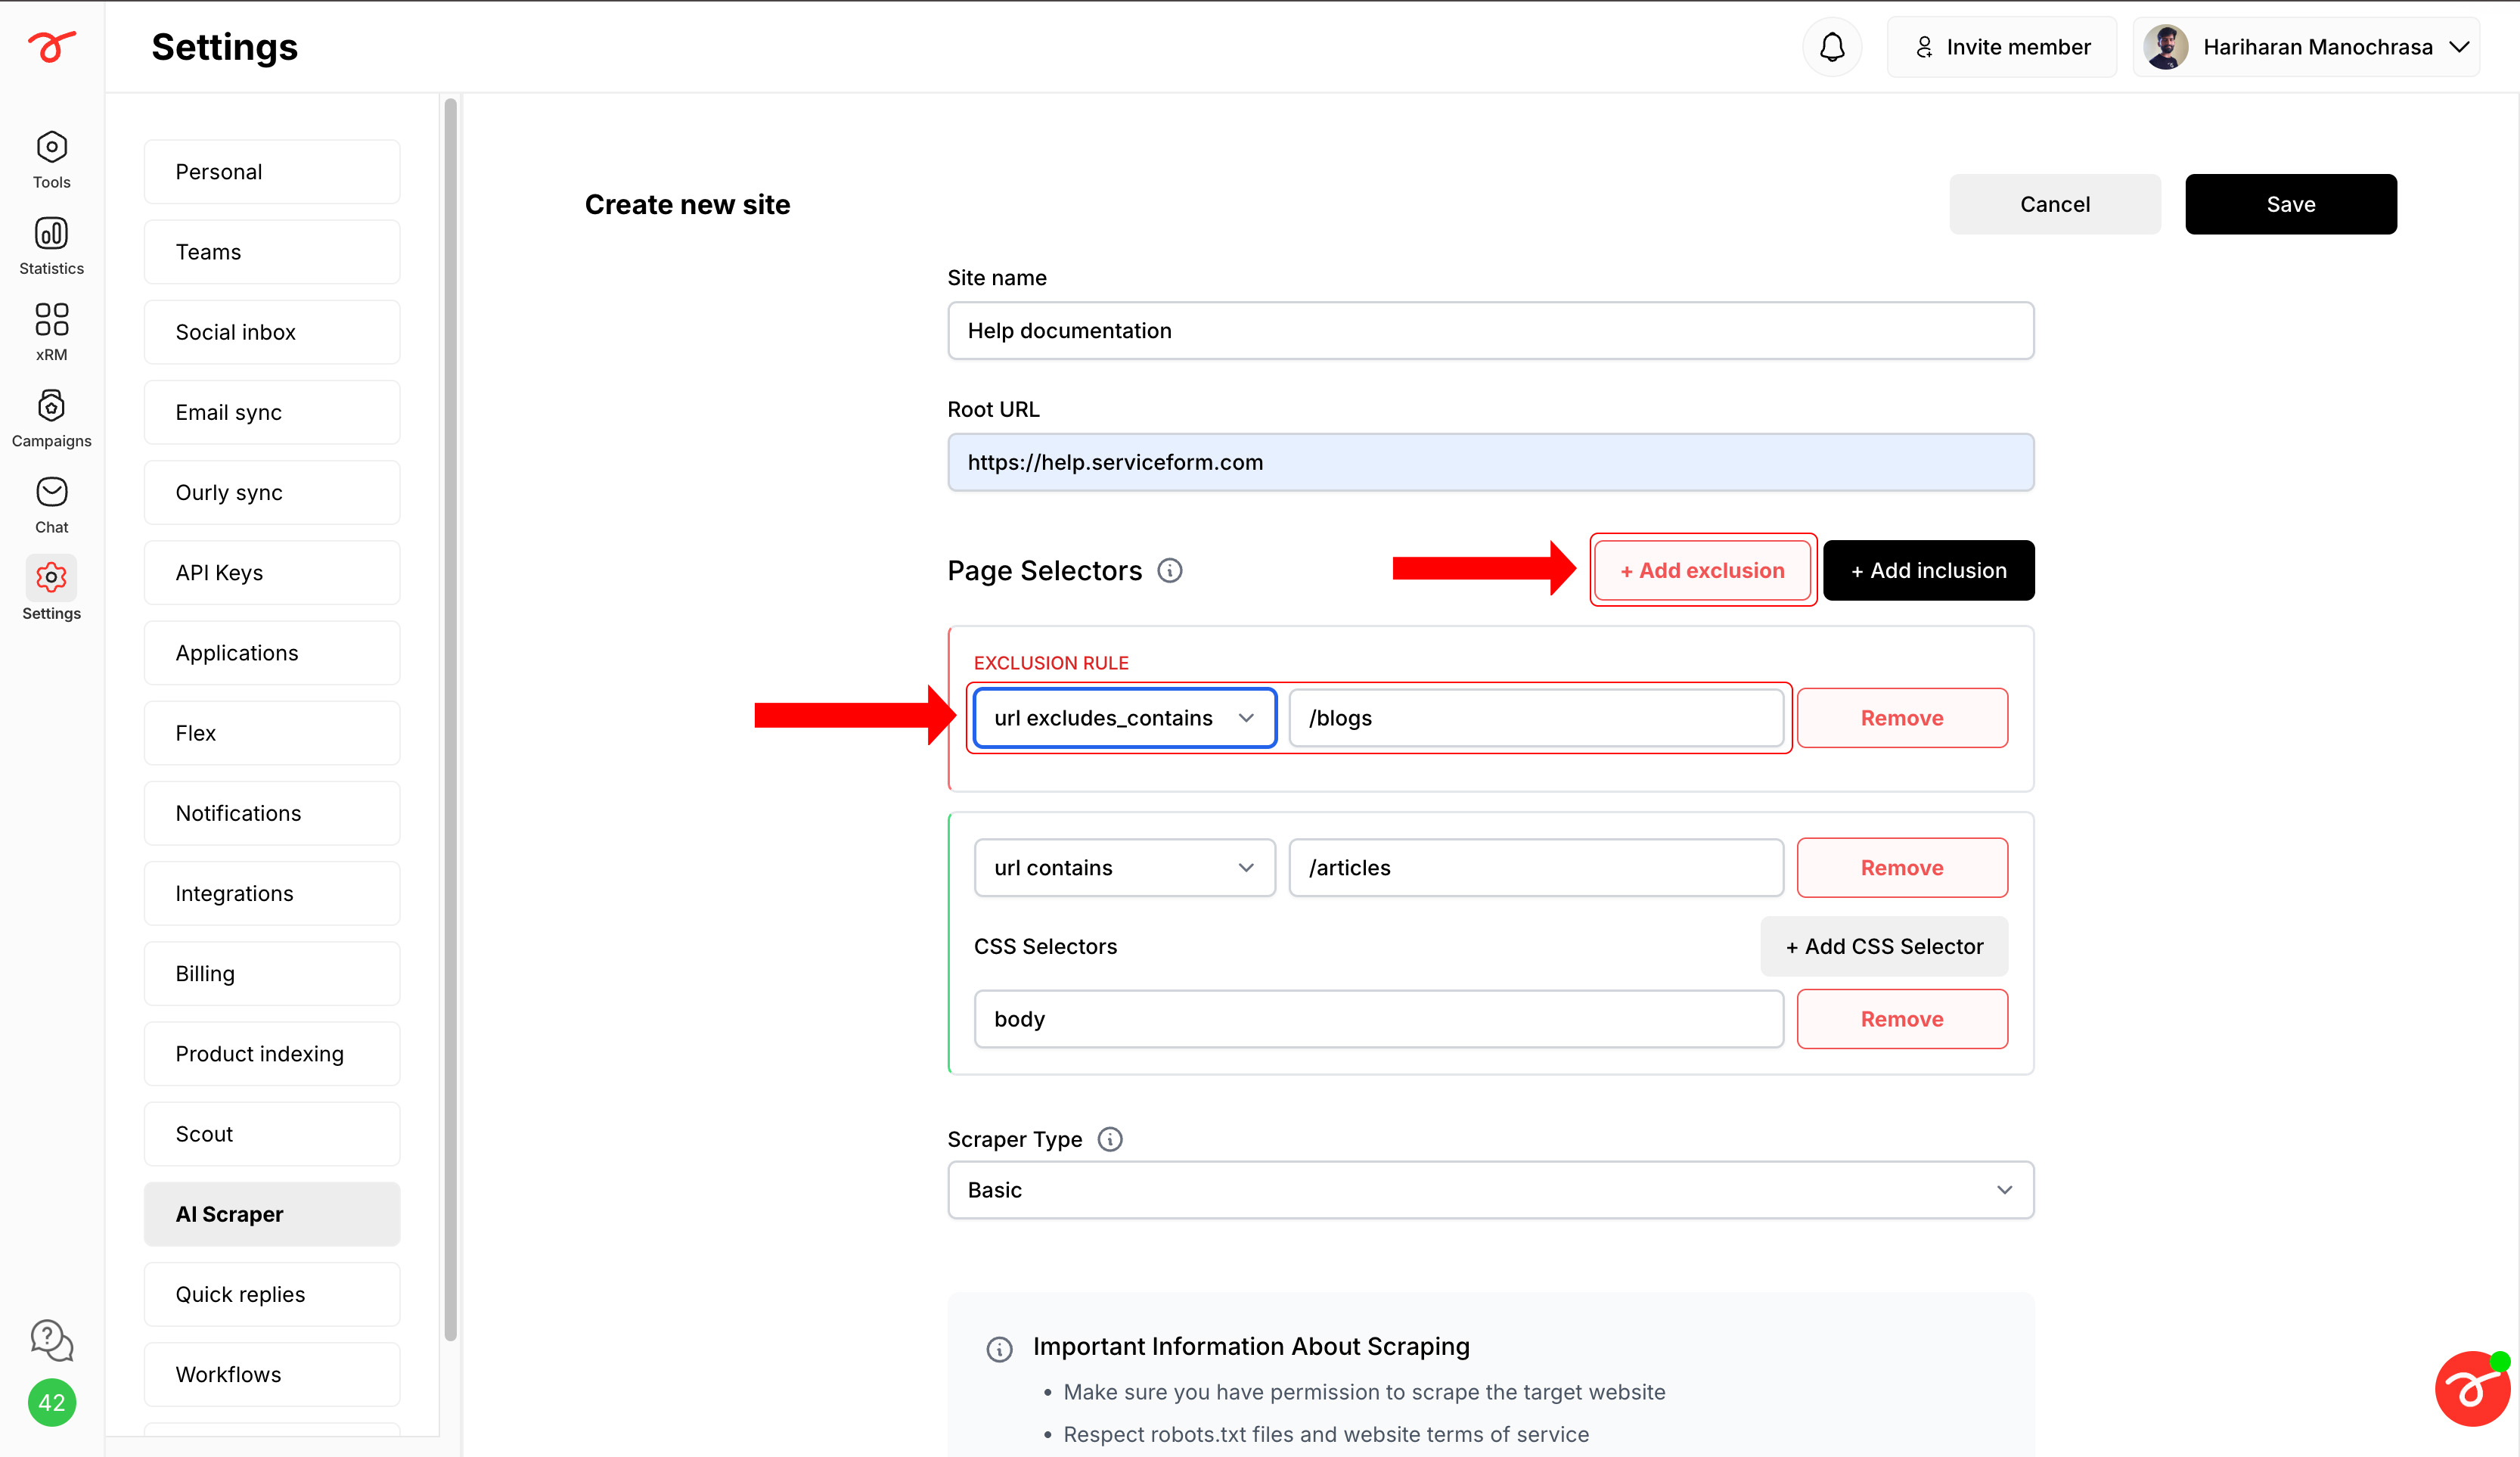
Alternatively, switch from URL contains to URL equals to specify exact URLs.
AI scraper type
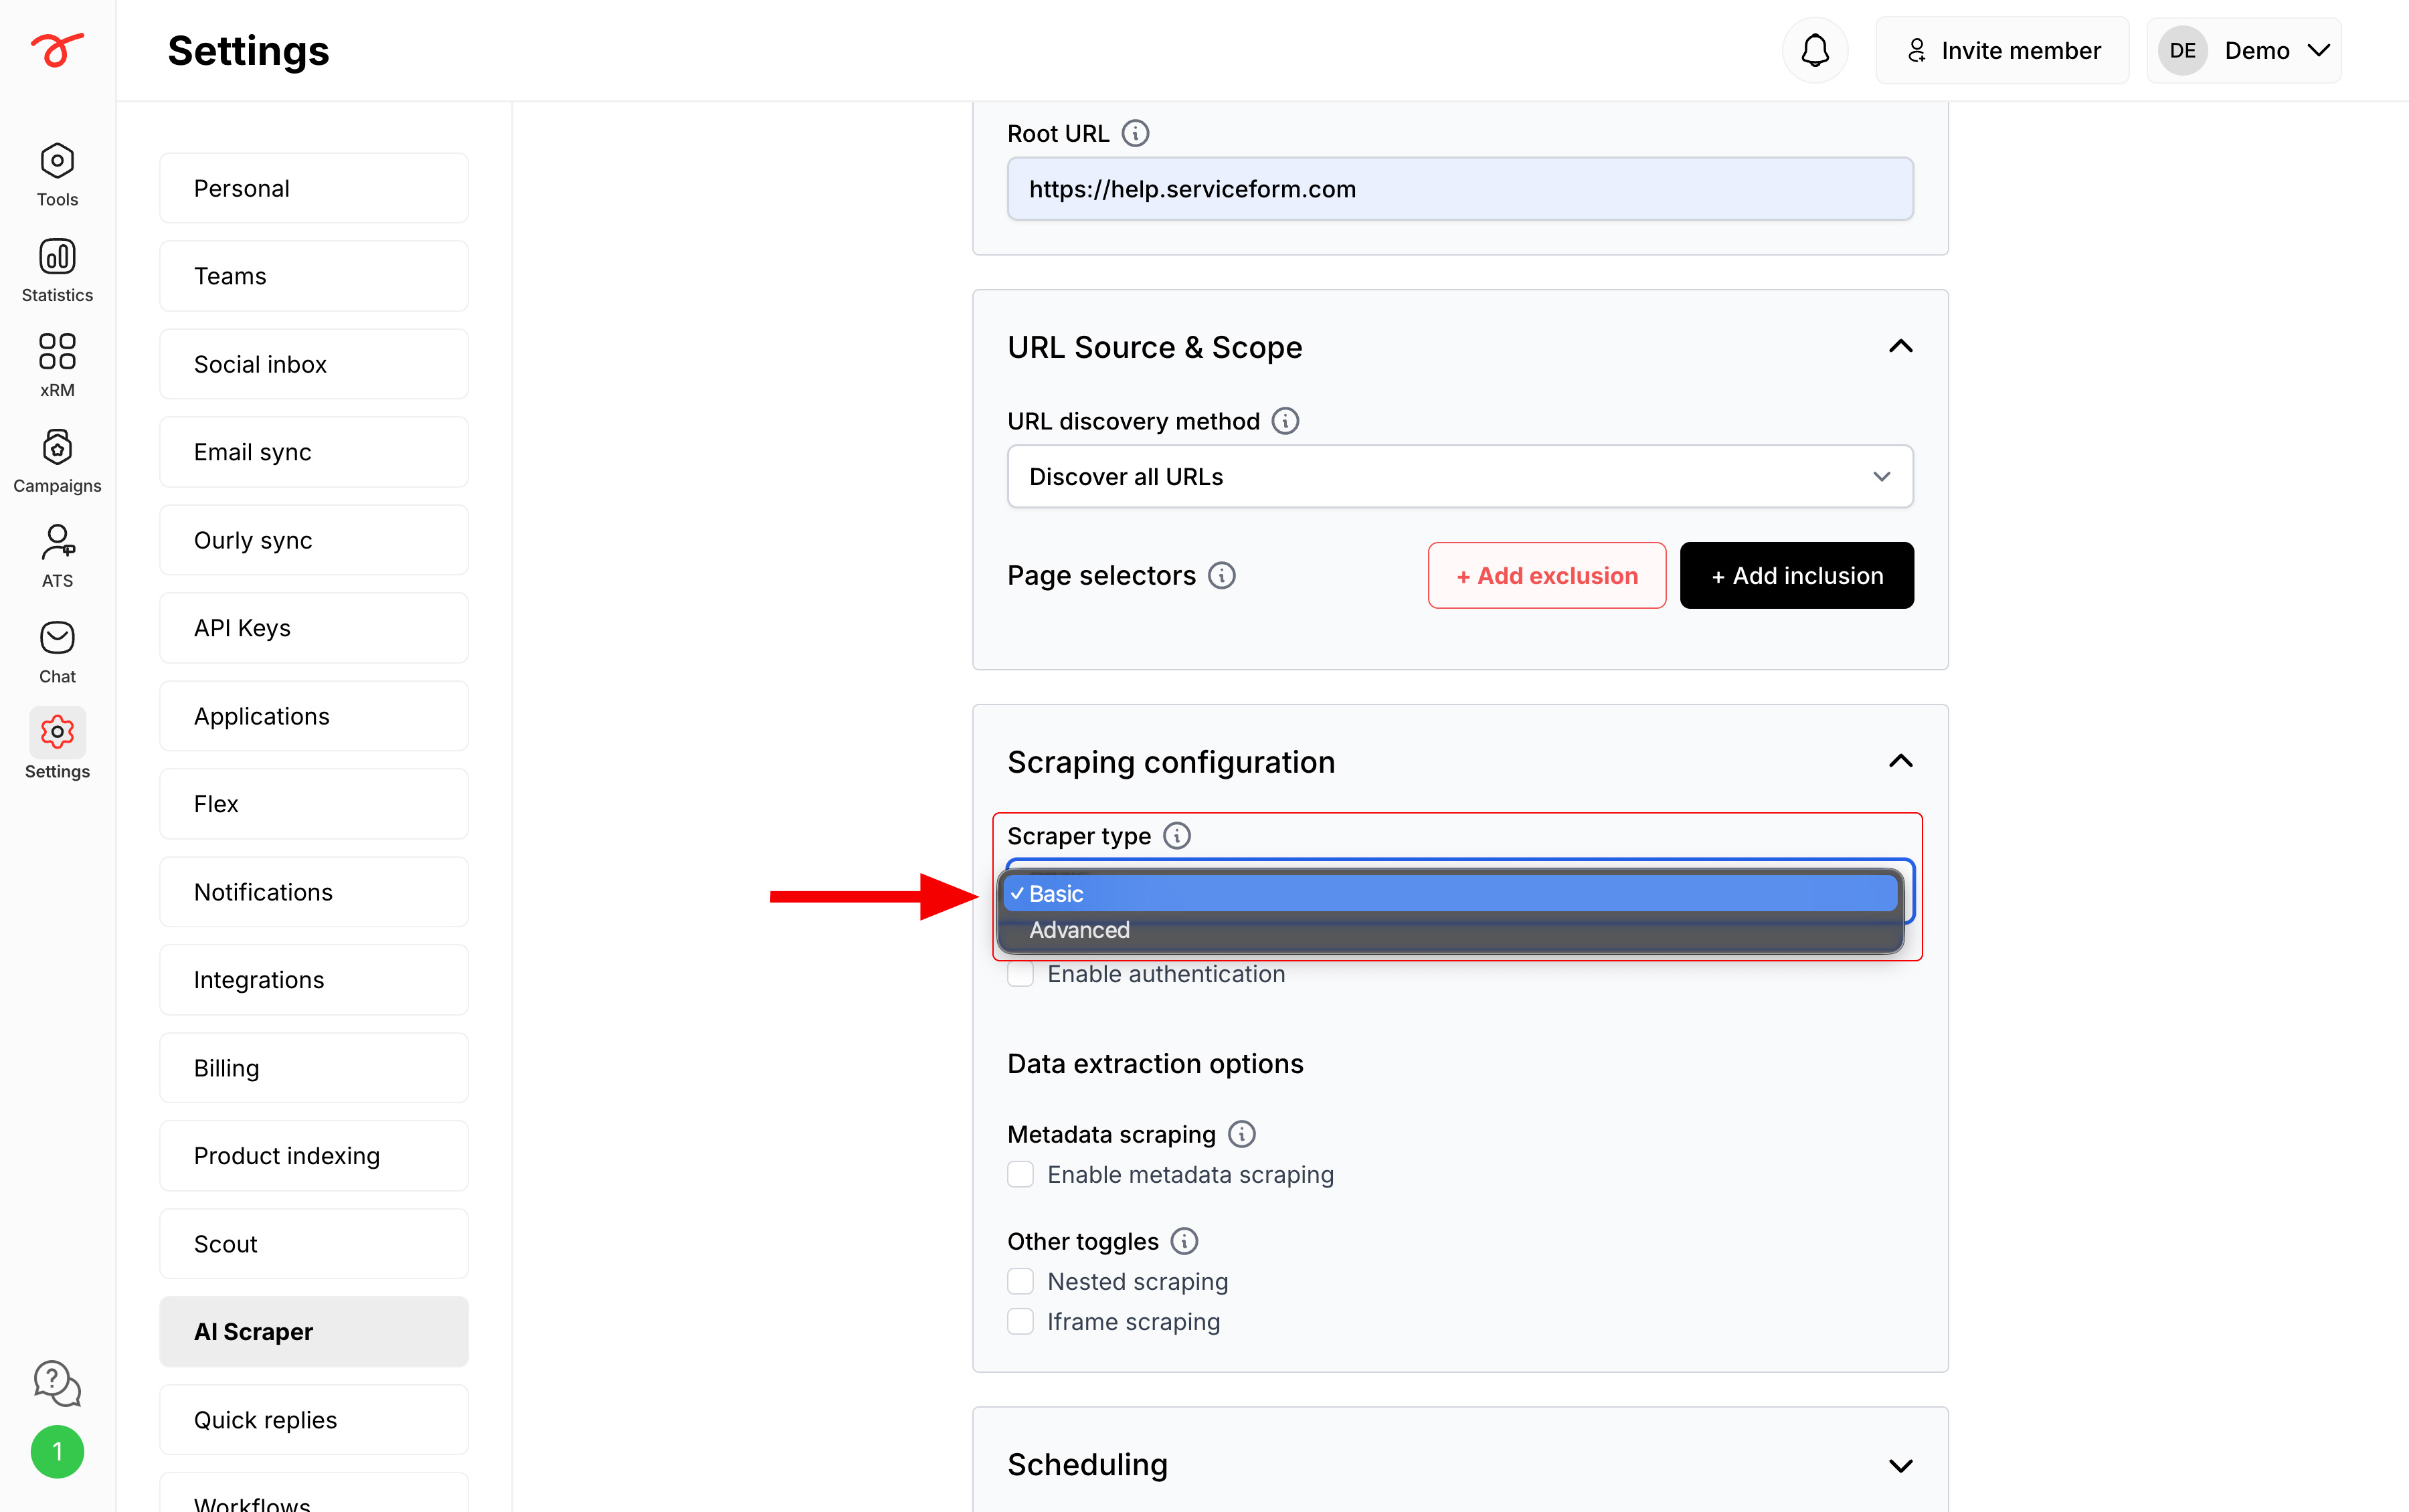
Based on your website structure, you can select the required plan.
1. Select your preferred Scraper type based on your requirements.
Authentication Settings
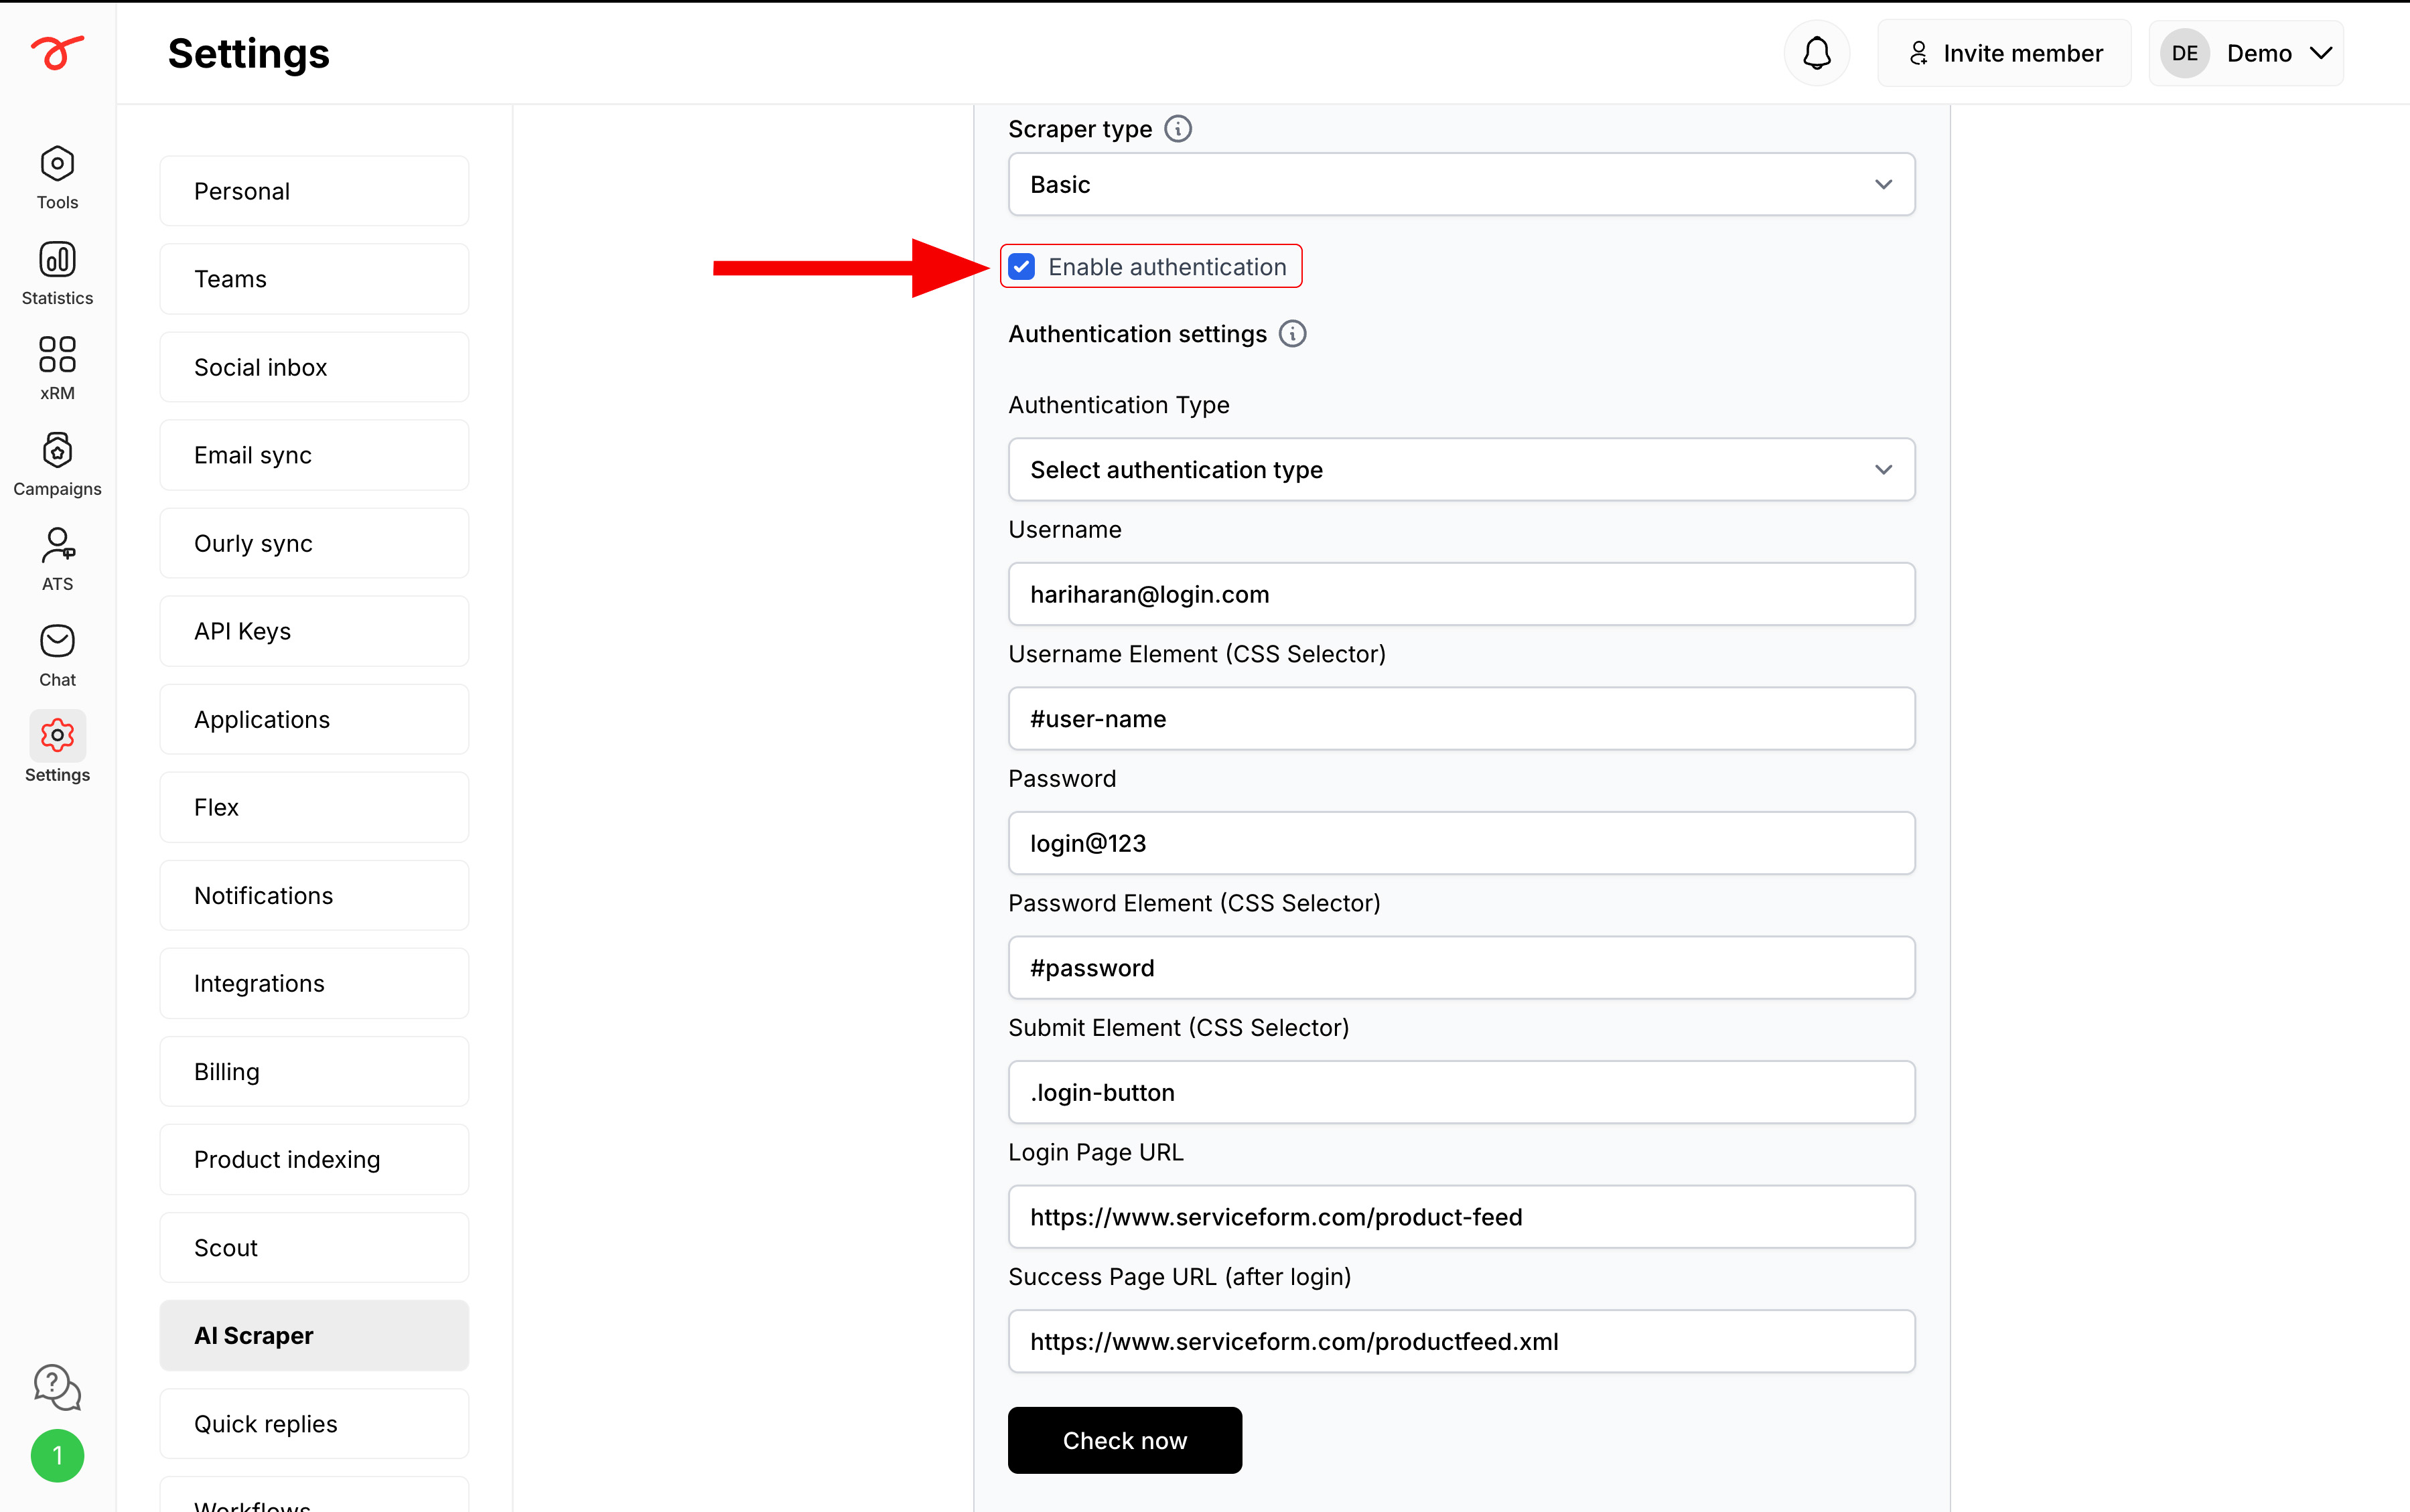
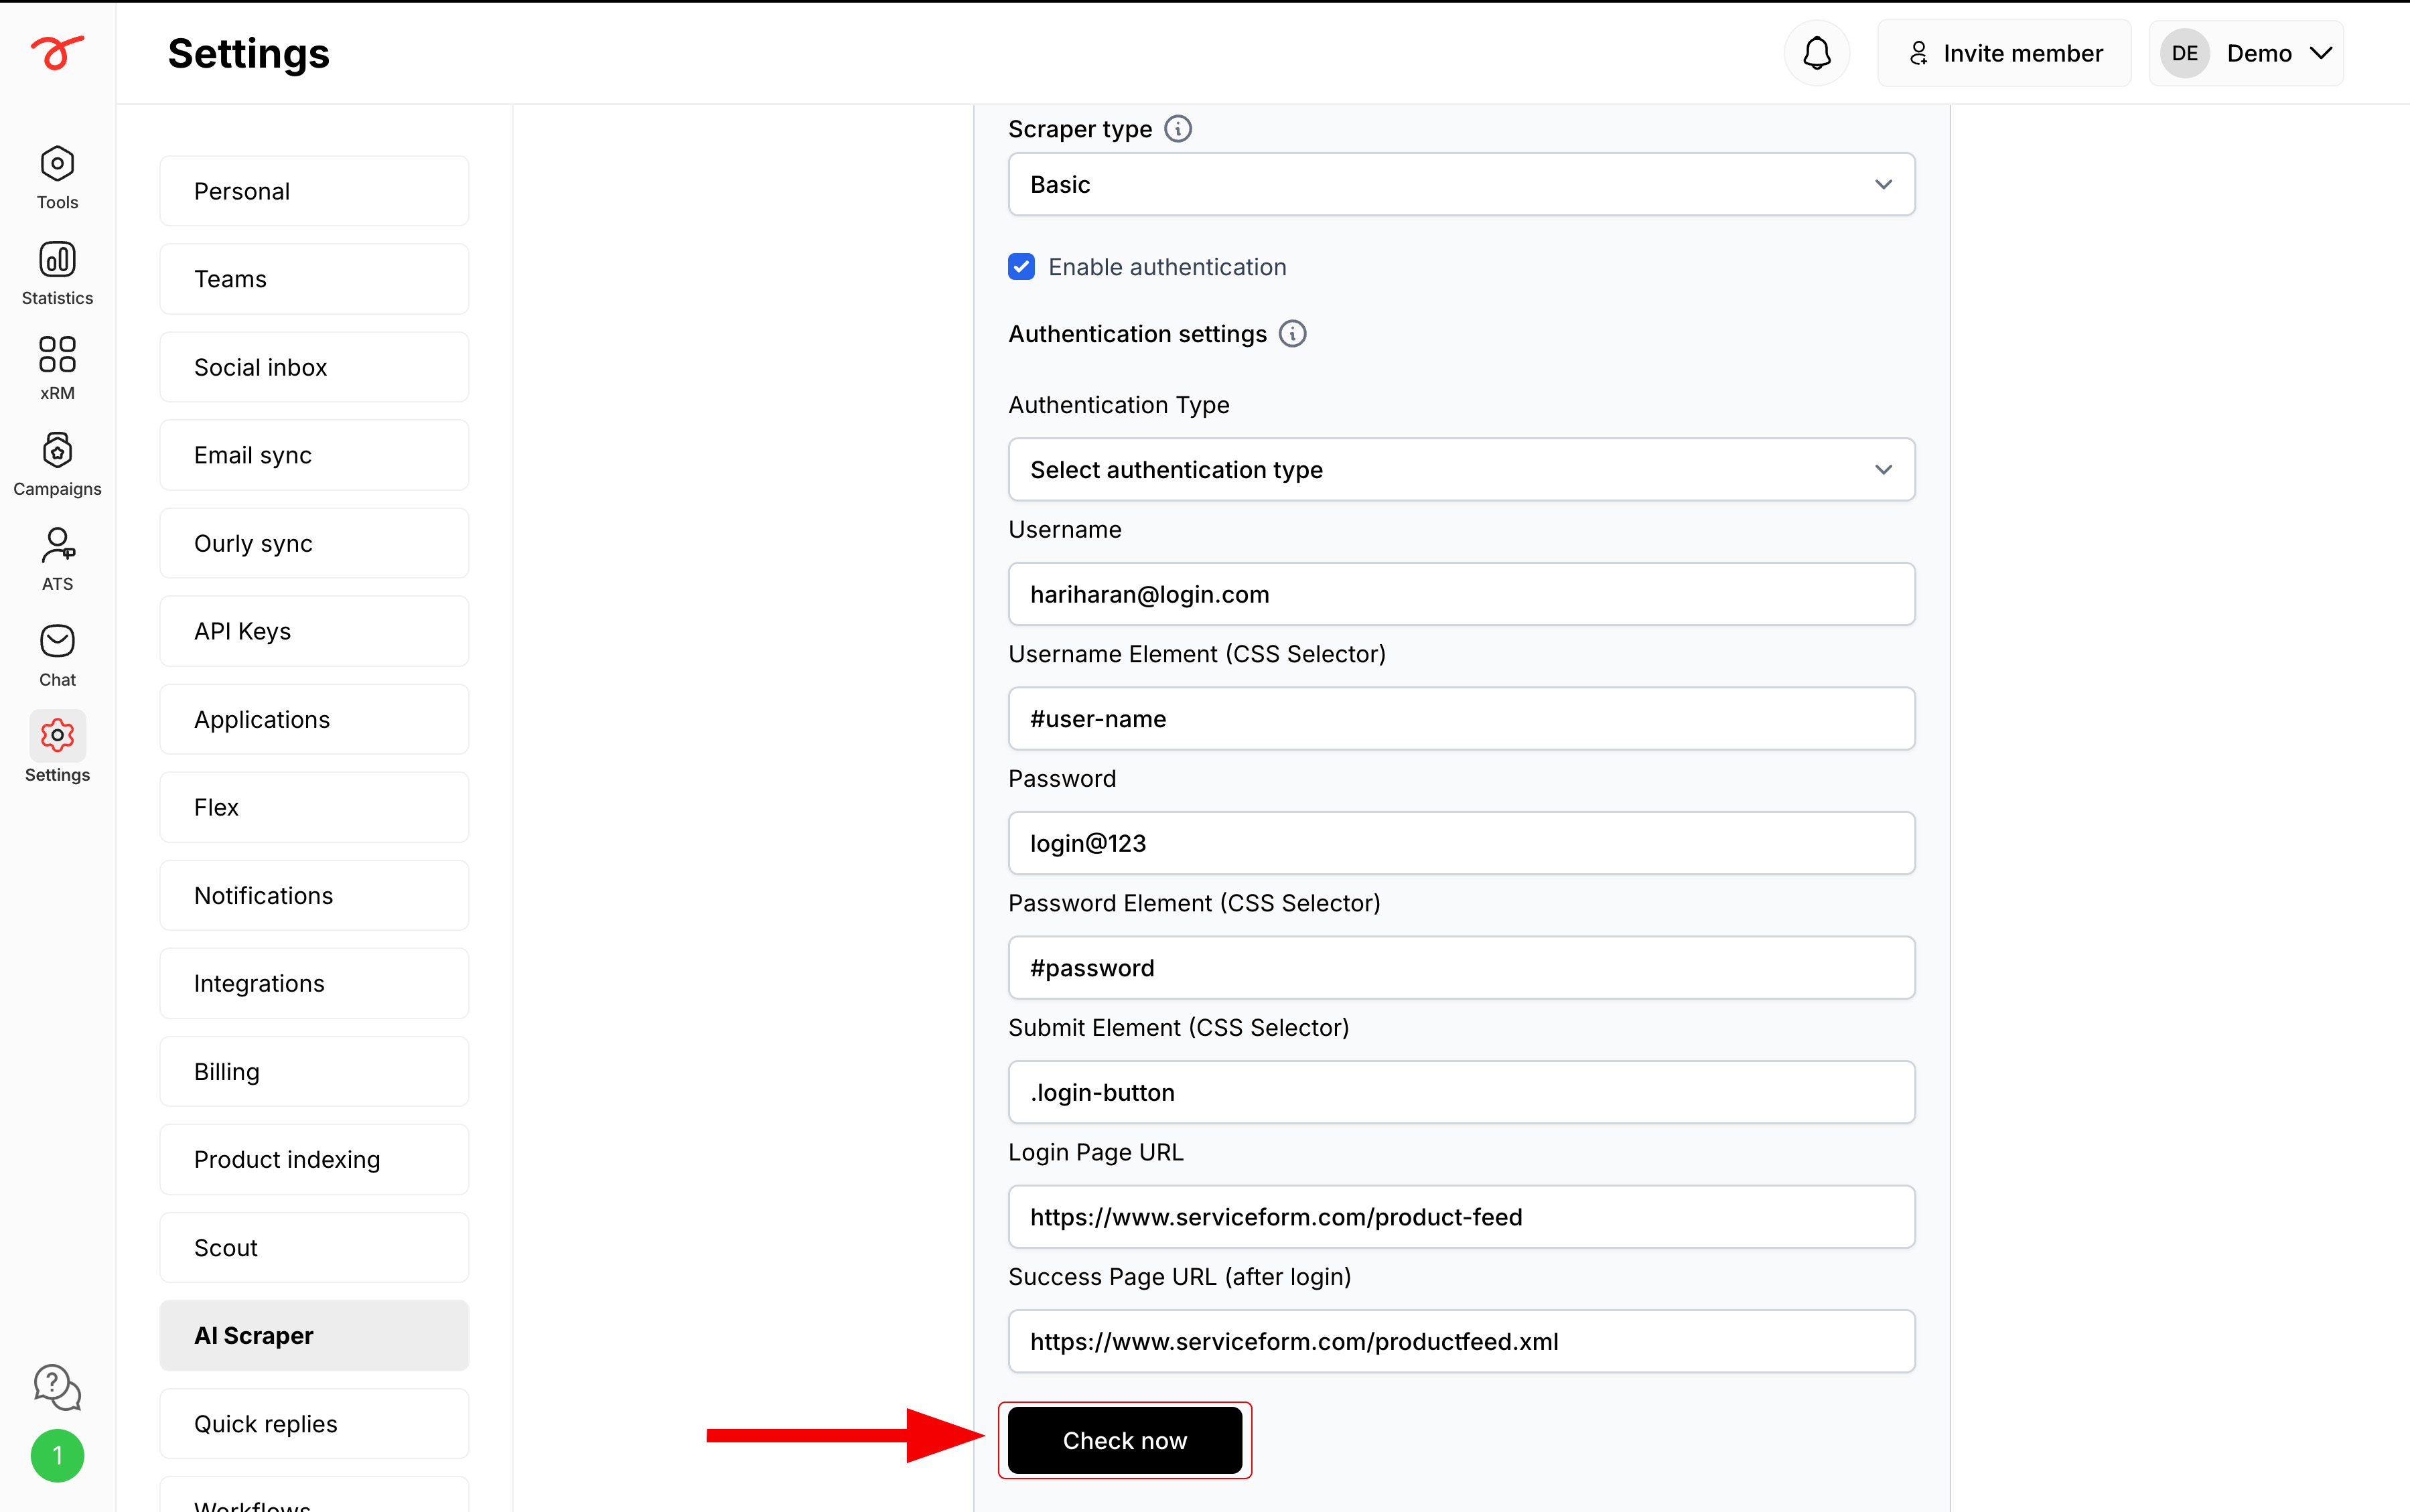
If your website requires login (for example, to access a product feed XML file), you can enable authentication under the scraper type selection.
1. Enable the Authentication by clicking on the checkbox.
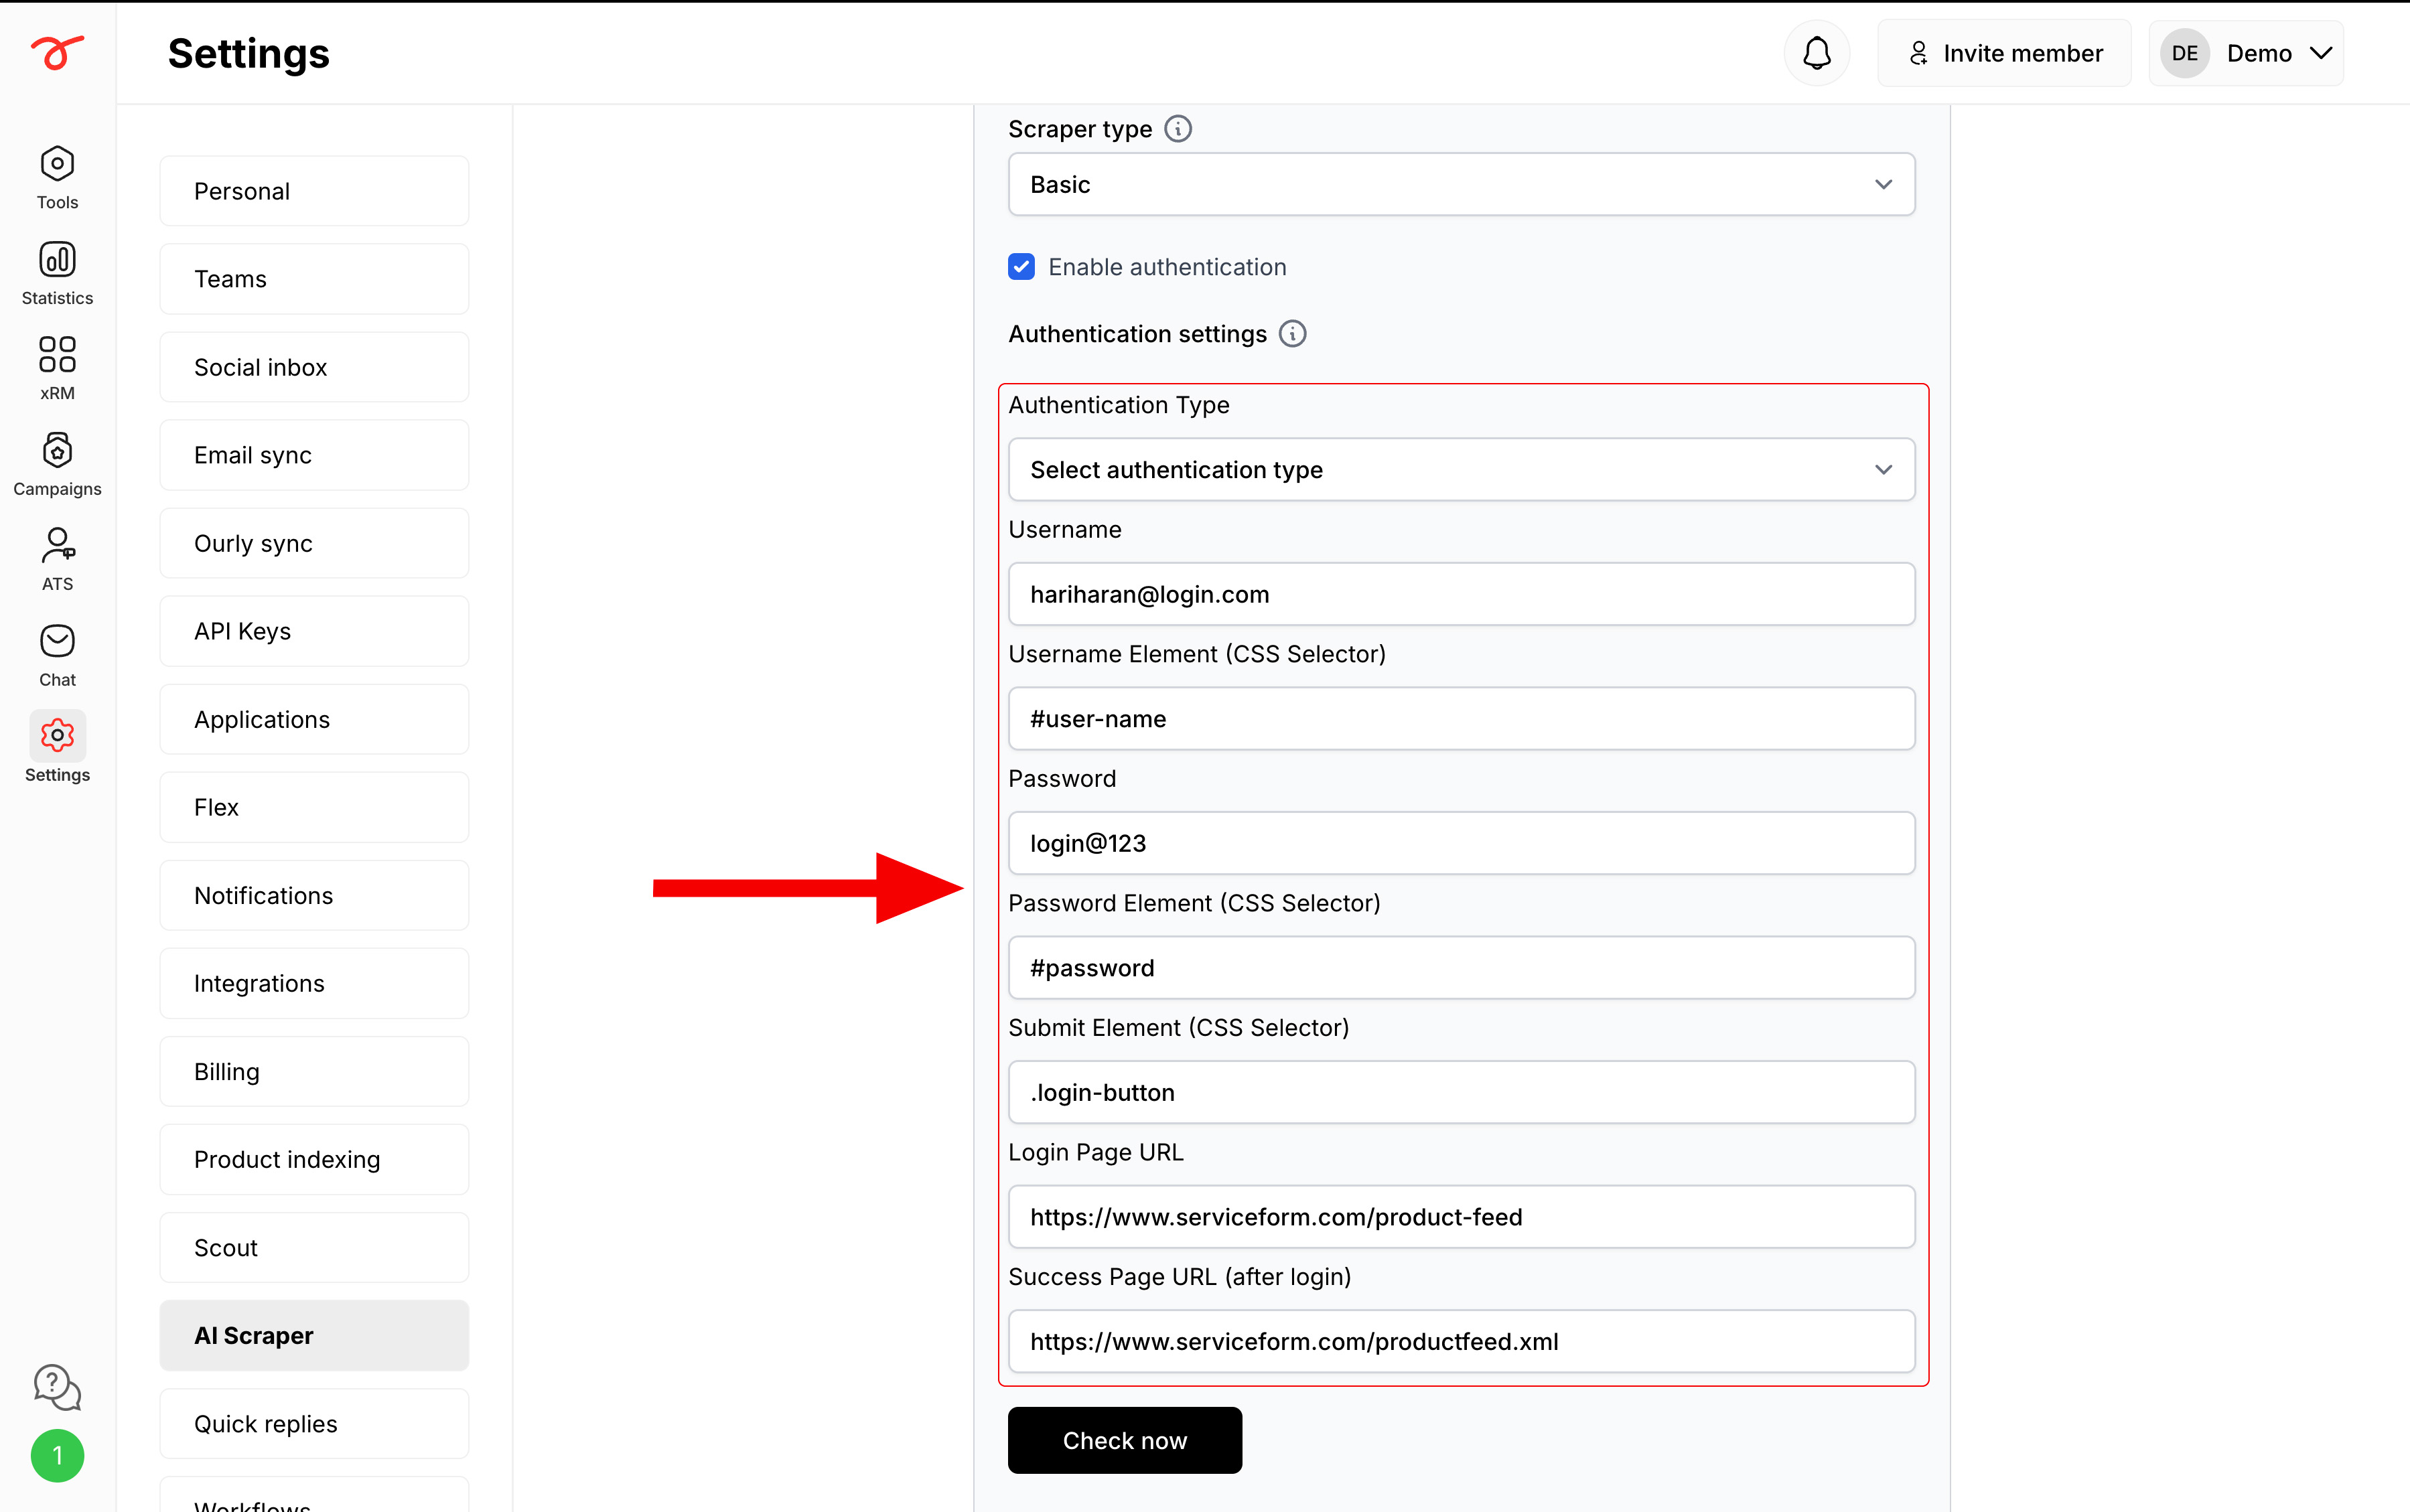
2. Fill in the following fields:
- Authentication Type: Choose the required method.
- Username: Enter your login username.
- Username Element (CSS Selector): Example –
#usernameor.login-input. - Password: Enter your login password.
- Password Element (CSS Selector): Example –
#passwordor.login-password. - Submit Element (CSS Selector): Example –
button[type='submit']or.login-button. - Login Page URL: The login page (e.g.,
https://example.com/login). - Success Page URL: The page you’re redirected to after login (e.g.,
https://example.com/dashboard).
3. Once configured, click Check now to test the login functionality.
Data Extraction Options
You can configure additional scraping options to capture more detailed content:
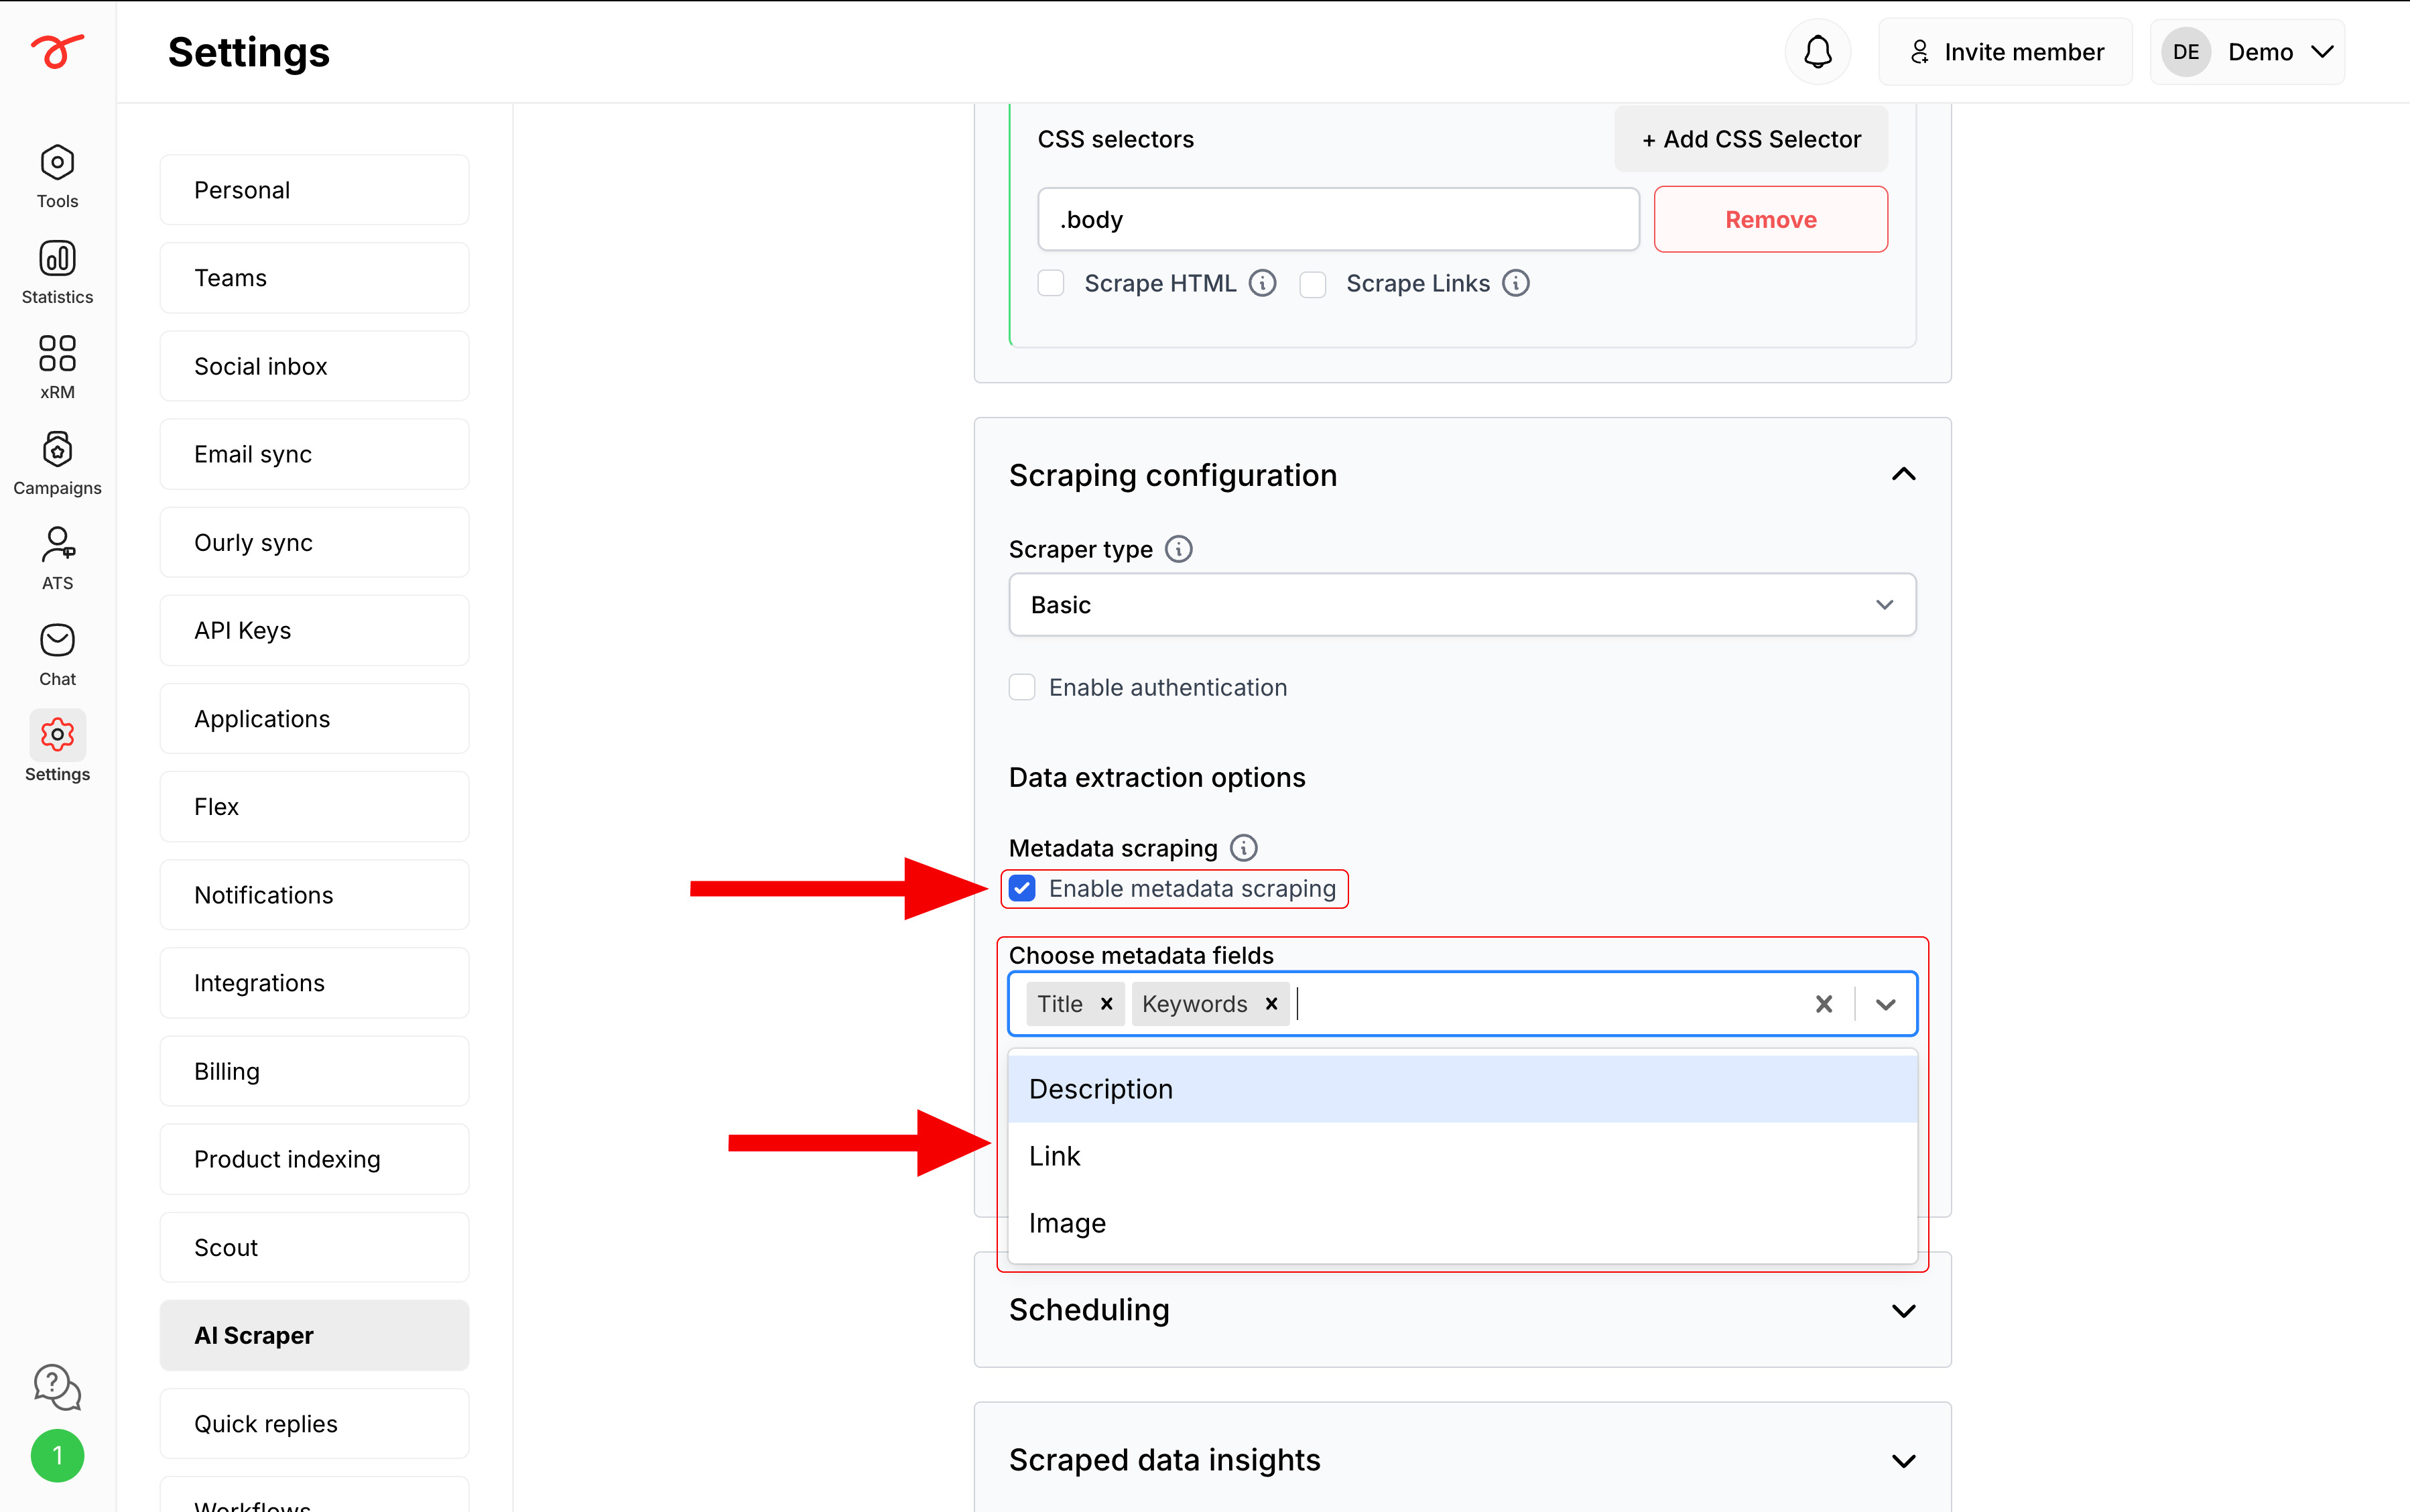
- Metadata Scraping: Extracts metadata fields from each page, including:
- Title: Page title tag content
- Description: Meta description content
- Keywords: Meta keywords content
- Link: Page URL
- Image: pen Graph Image
You can enable this by clicking the checkbox and selecting the required metadata fields to be scraped.
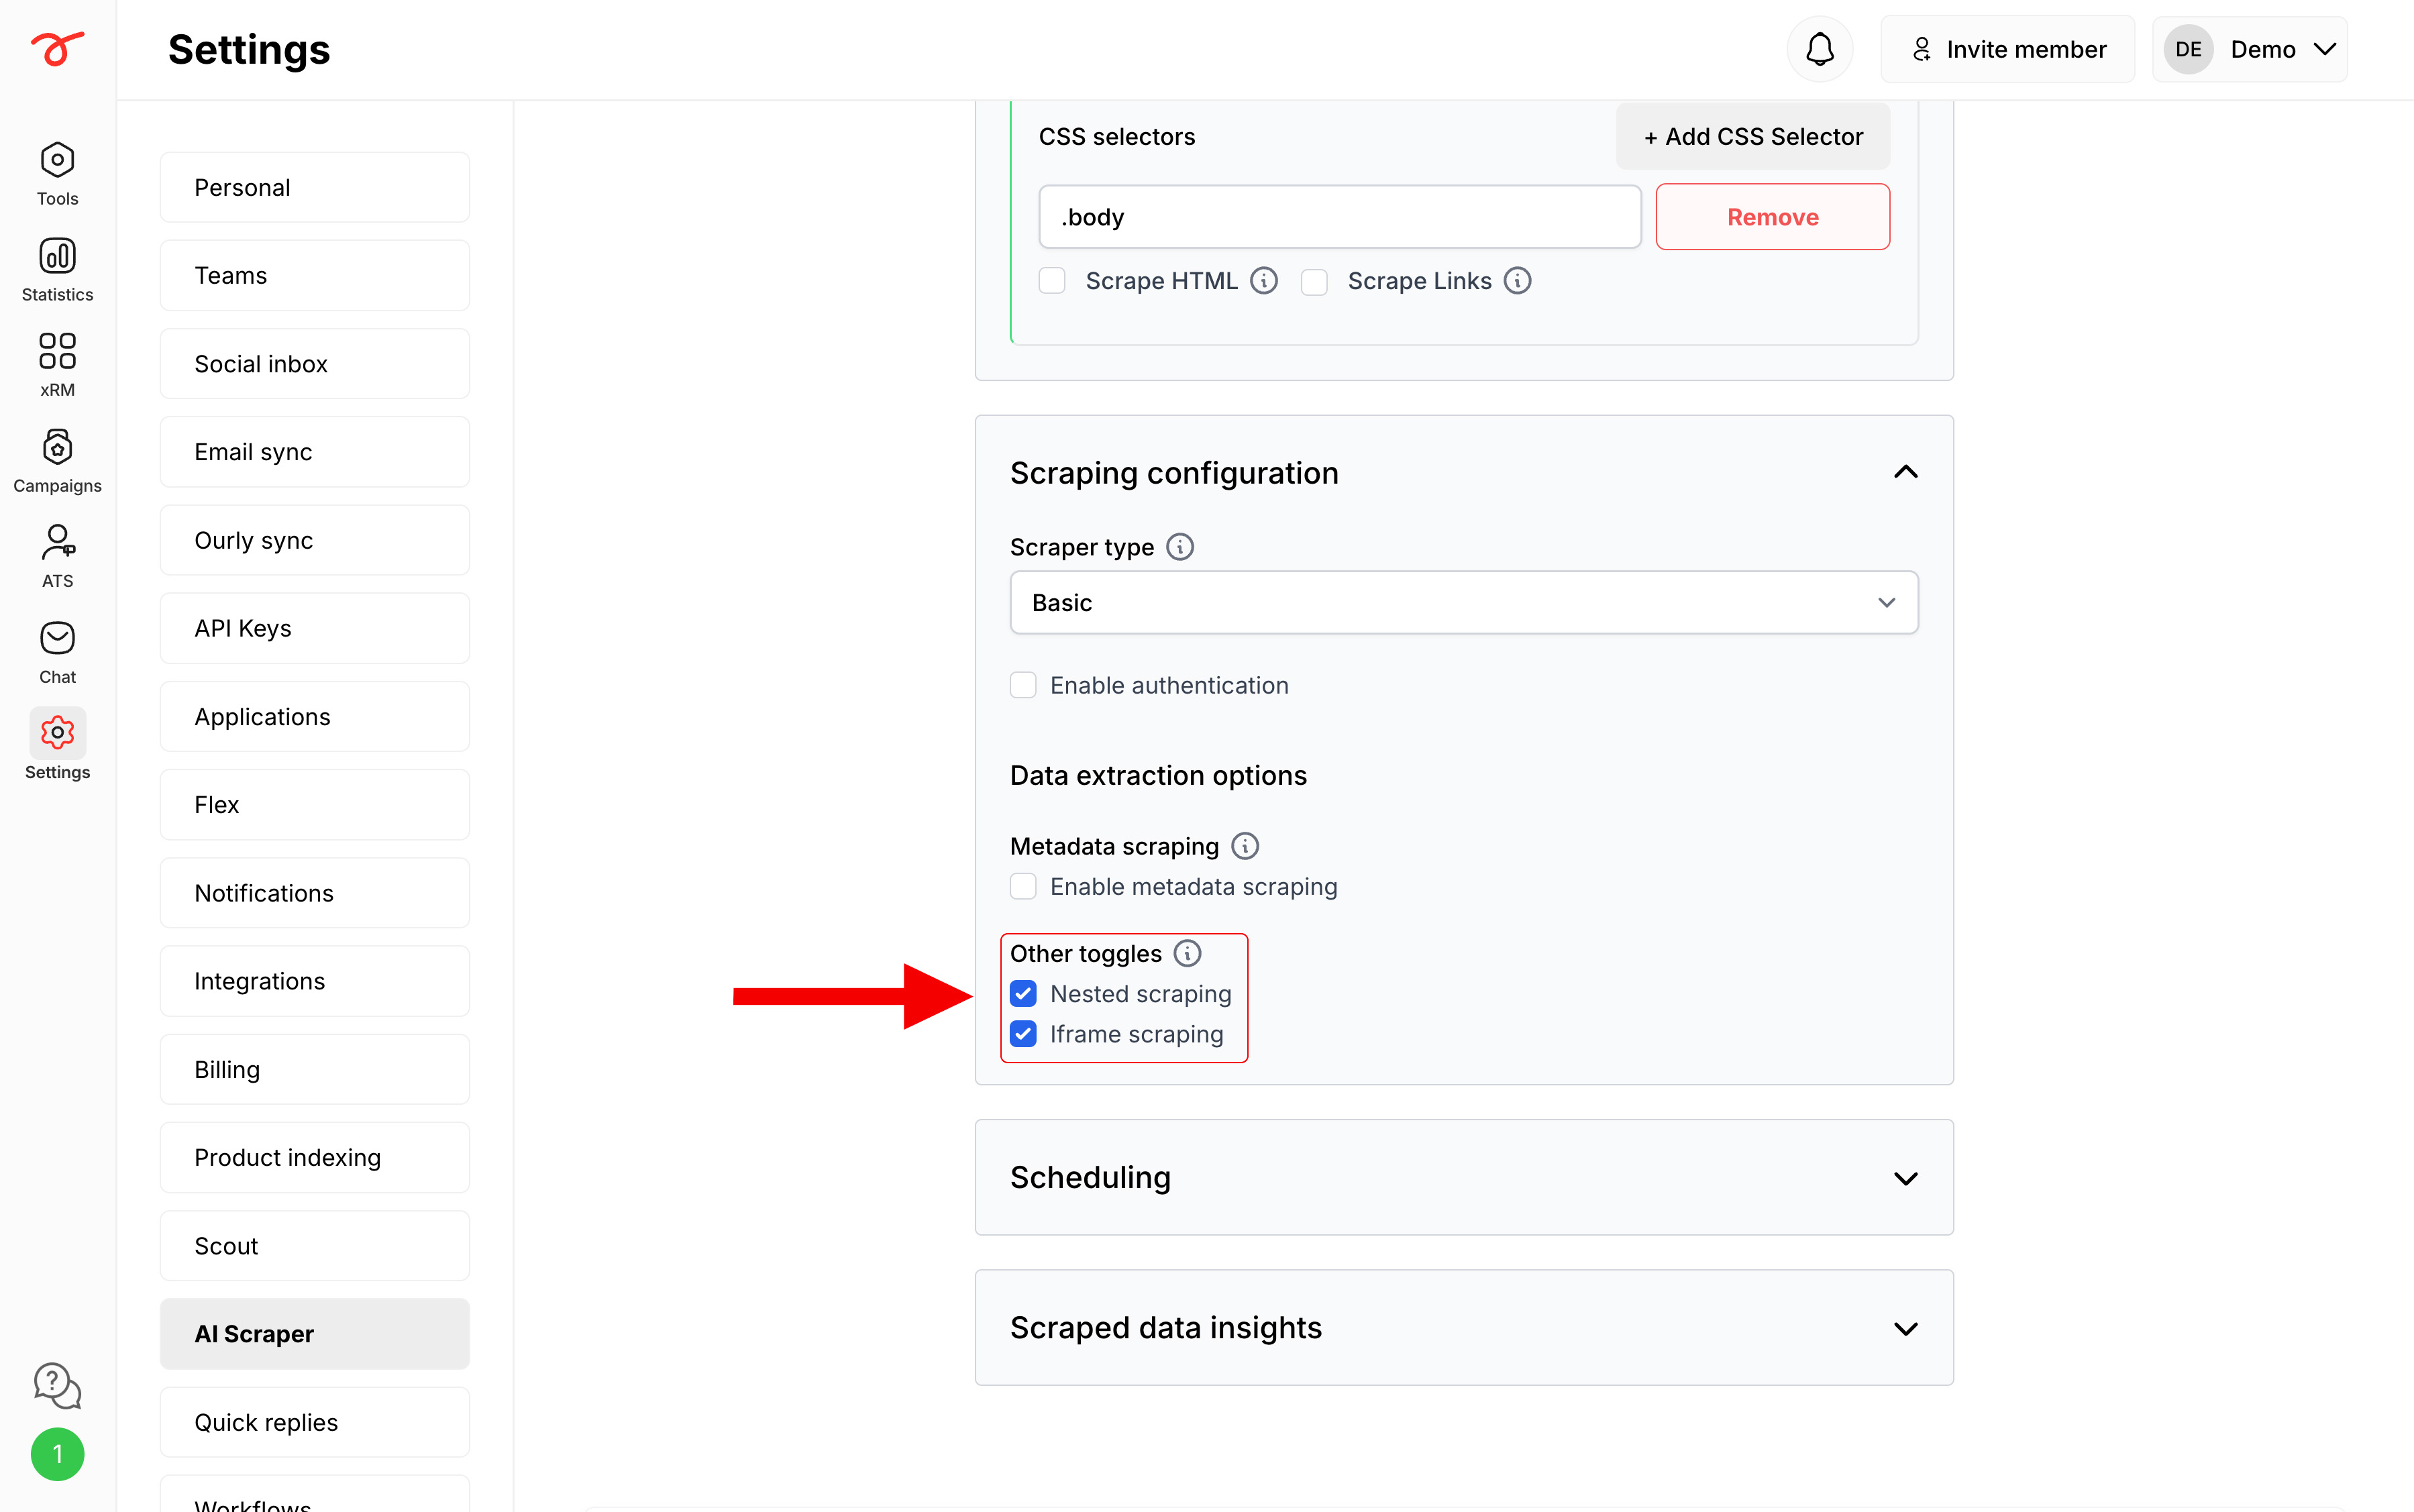
- Other Toggles:
- Nested Scraping: Enables scraping of nested structures inside a page.
- Iframe Scraping: Allows scraping of content within iframes.
You can click on the checkbox(es) to enable the options as required.
Scheduling the AI Scraper
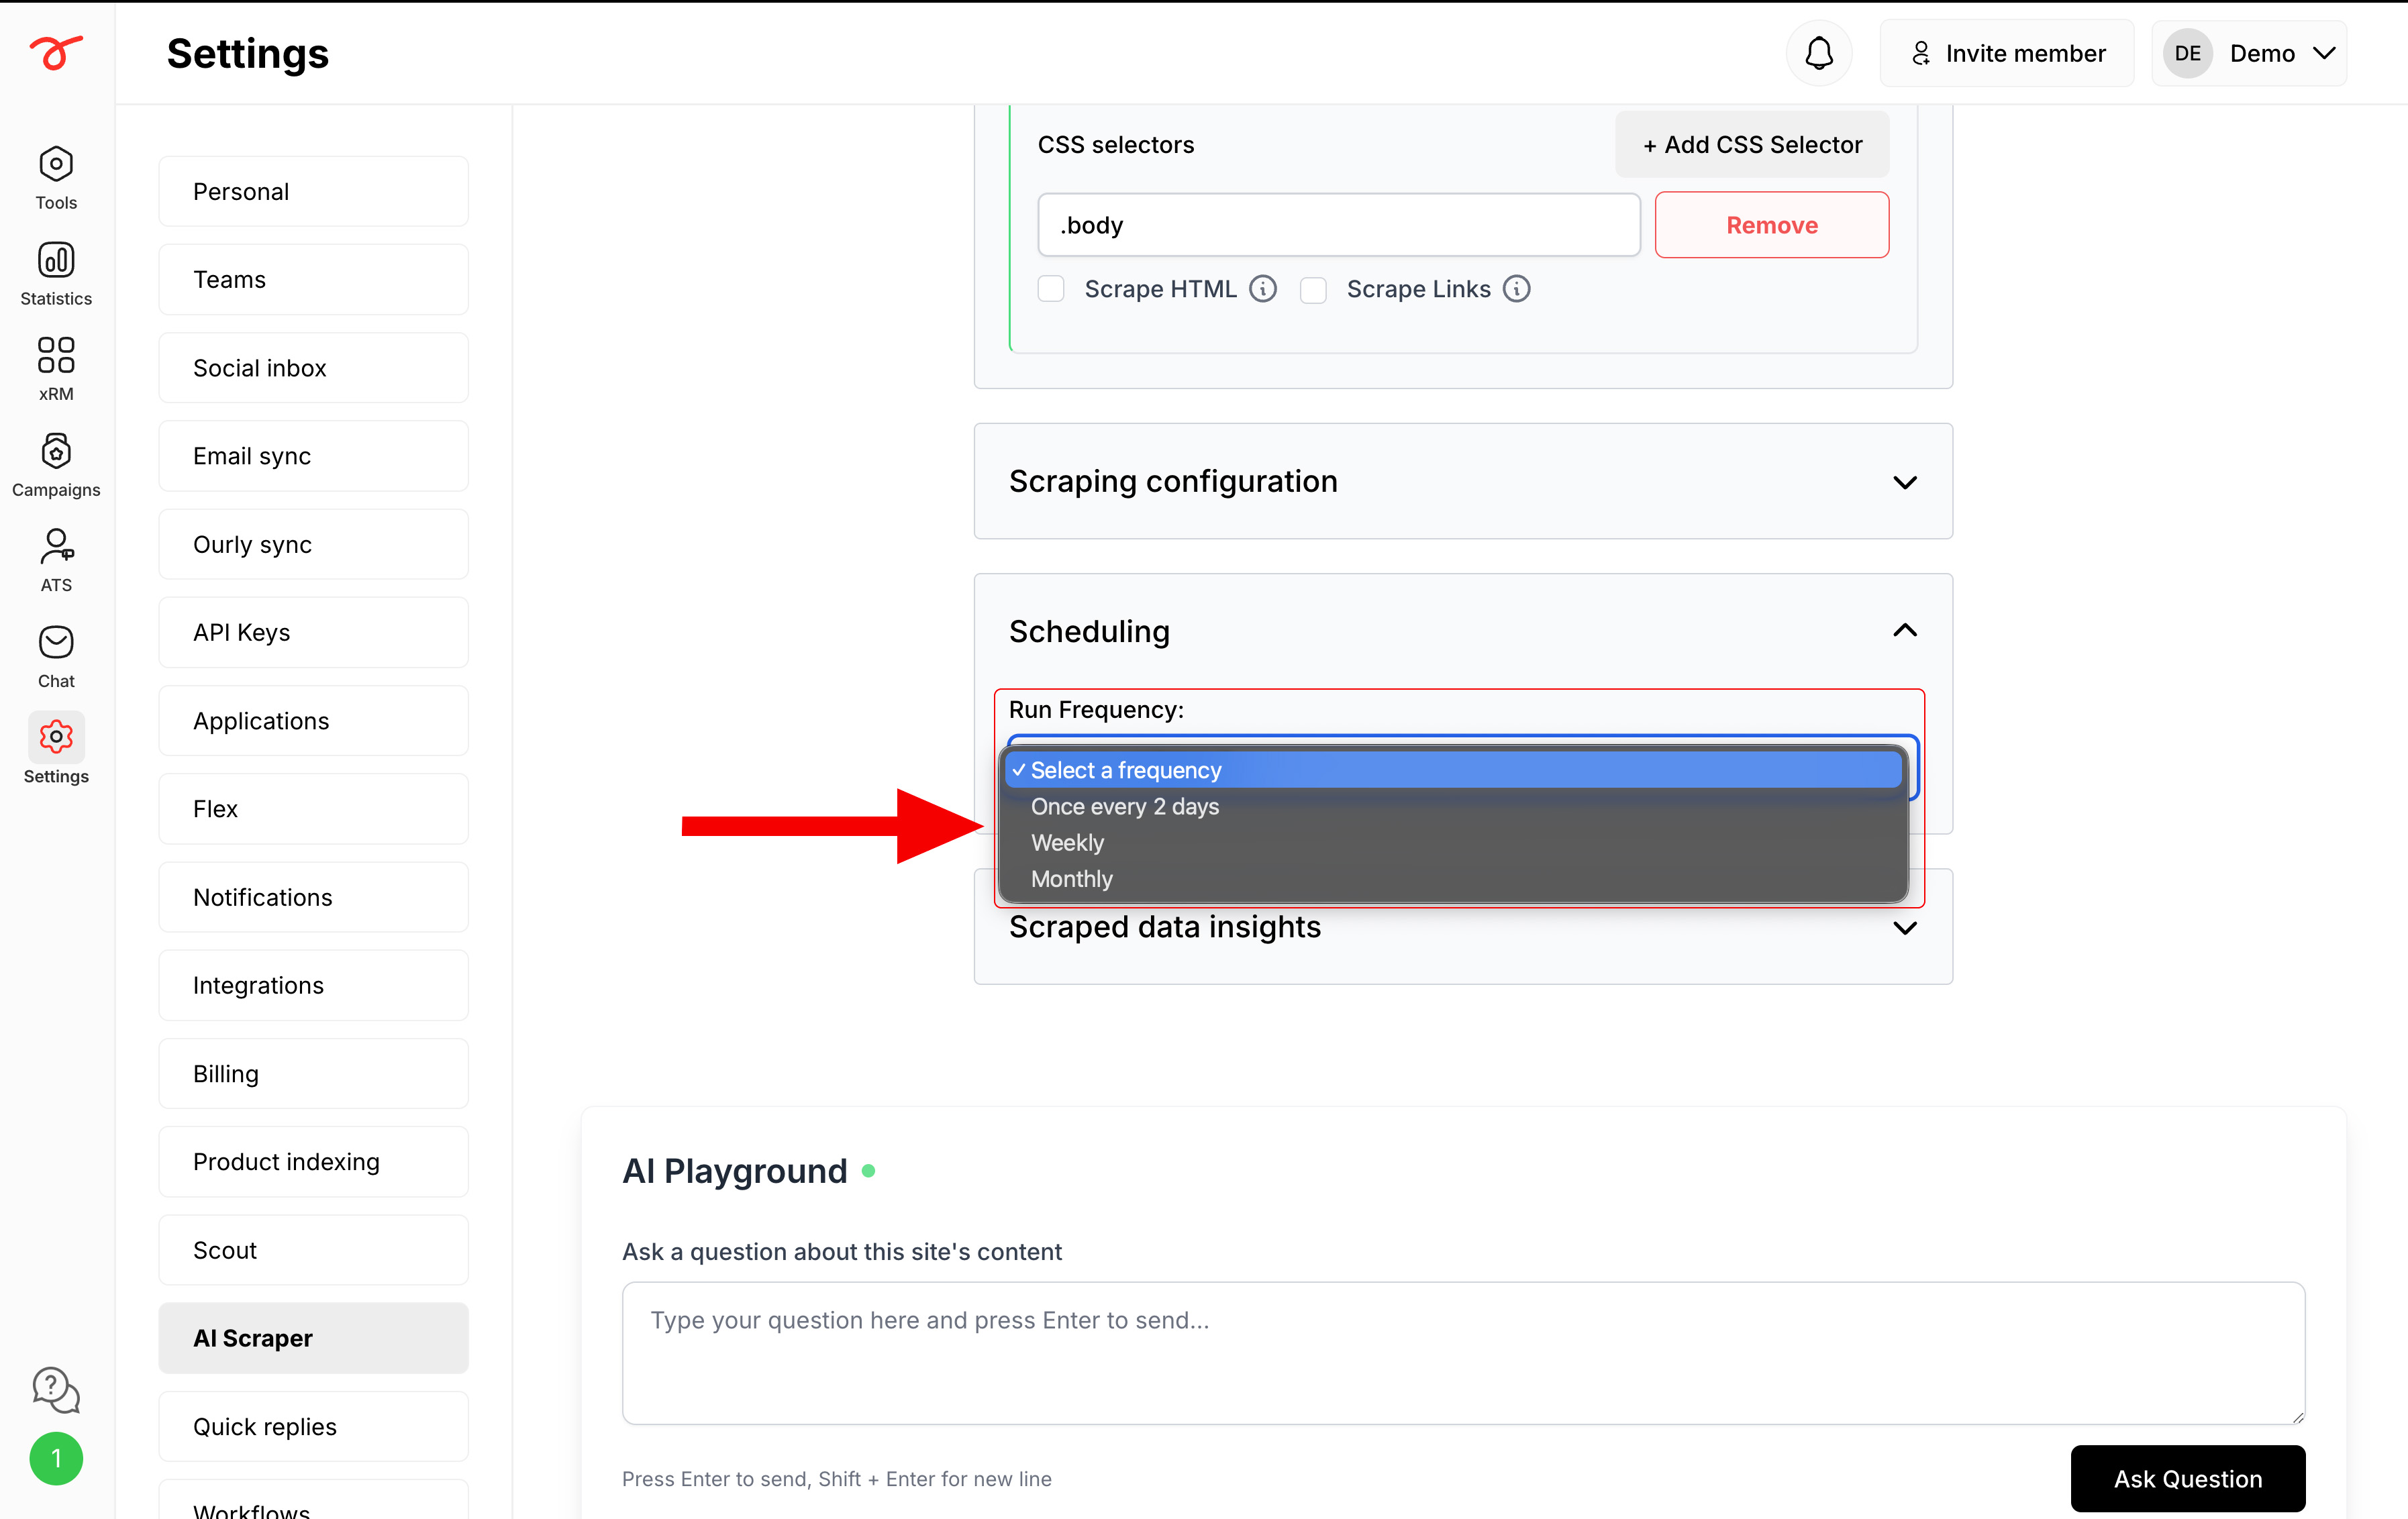
You can schedule how often the AI Scraper should run and re-extract content from your site.
Available options:
- Once every 2 days
- Weekly
- Monthly
To set the frequency, head over to the Scheduling section and select your preferred option.
This ensures your scraped data stays updated automatically without needing to run the scraper manually each time.
AI Scraper Insights
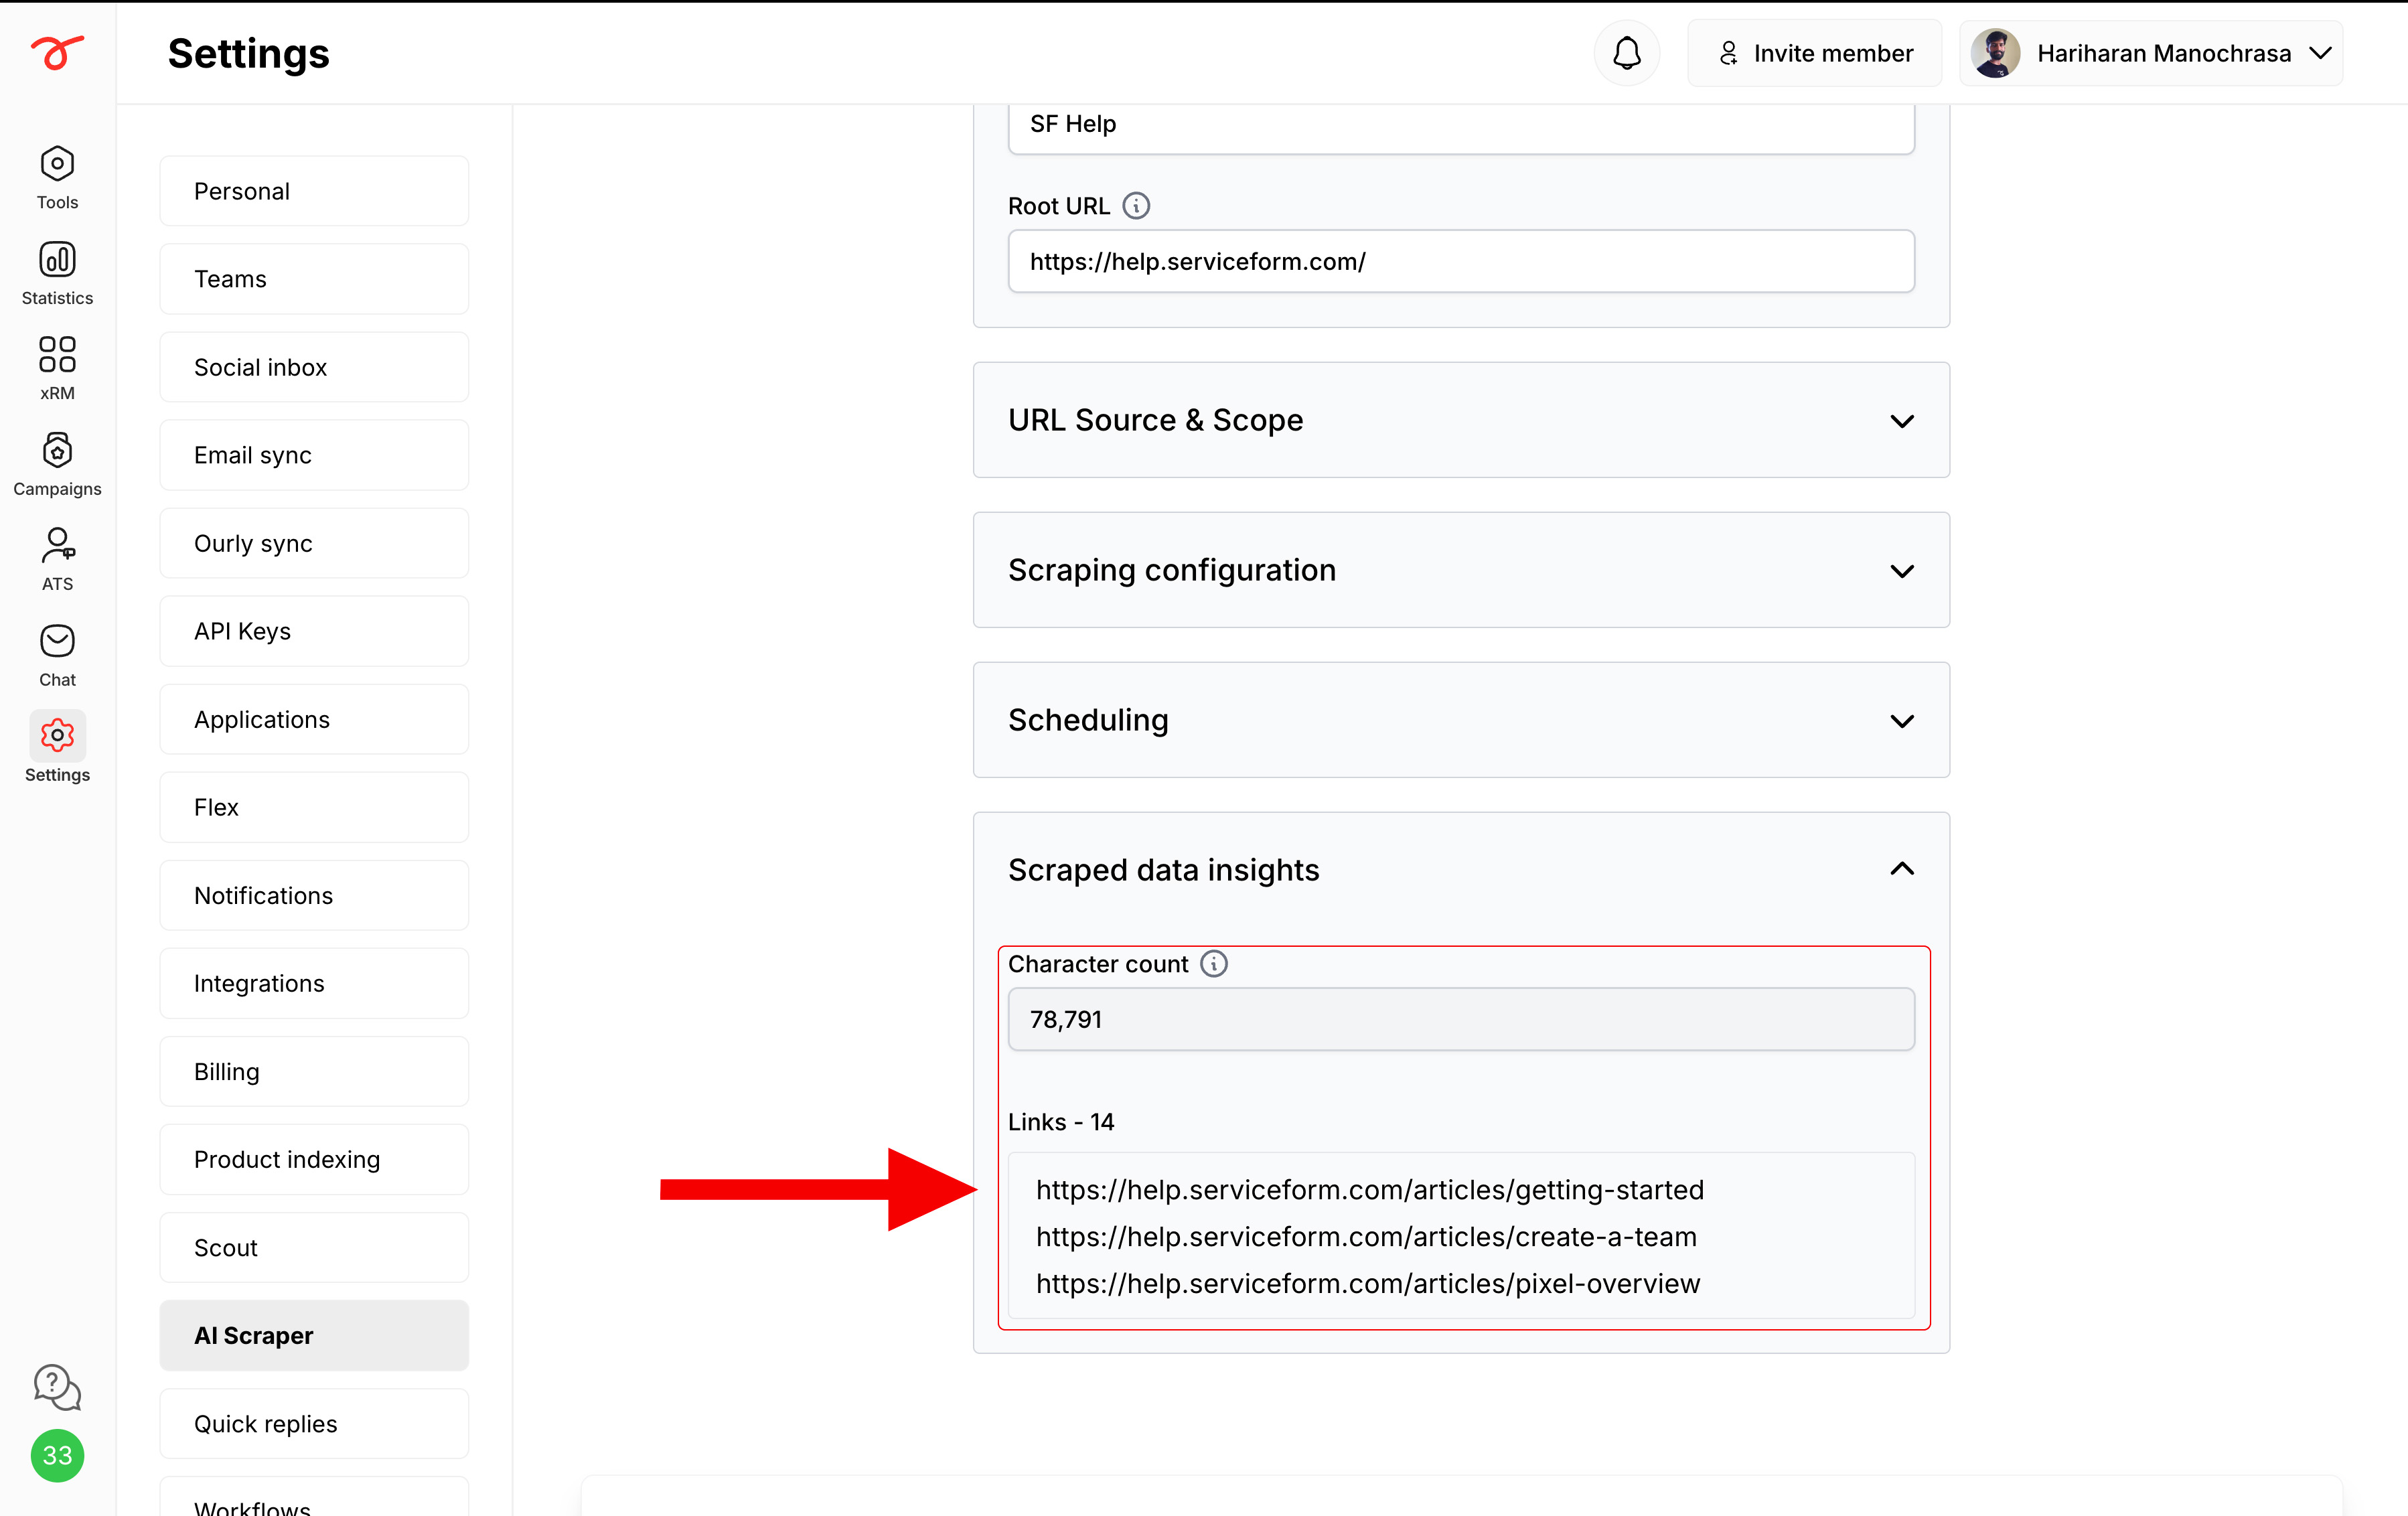
You can check the AI Scraper insights under the Scraped data insights section. Insights are only visible once the site has been indexed. See the indexing guide.
The Insights section shows:
- Character count: Total number of characters scraped.
- Links: List of URLs the scraper went through.
Save & Start Indexing
Congratulations! 🎉 You’re done with the configurations.
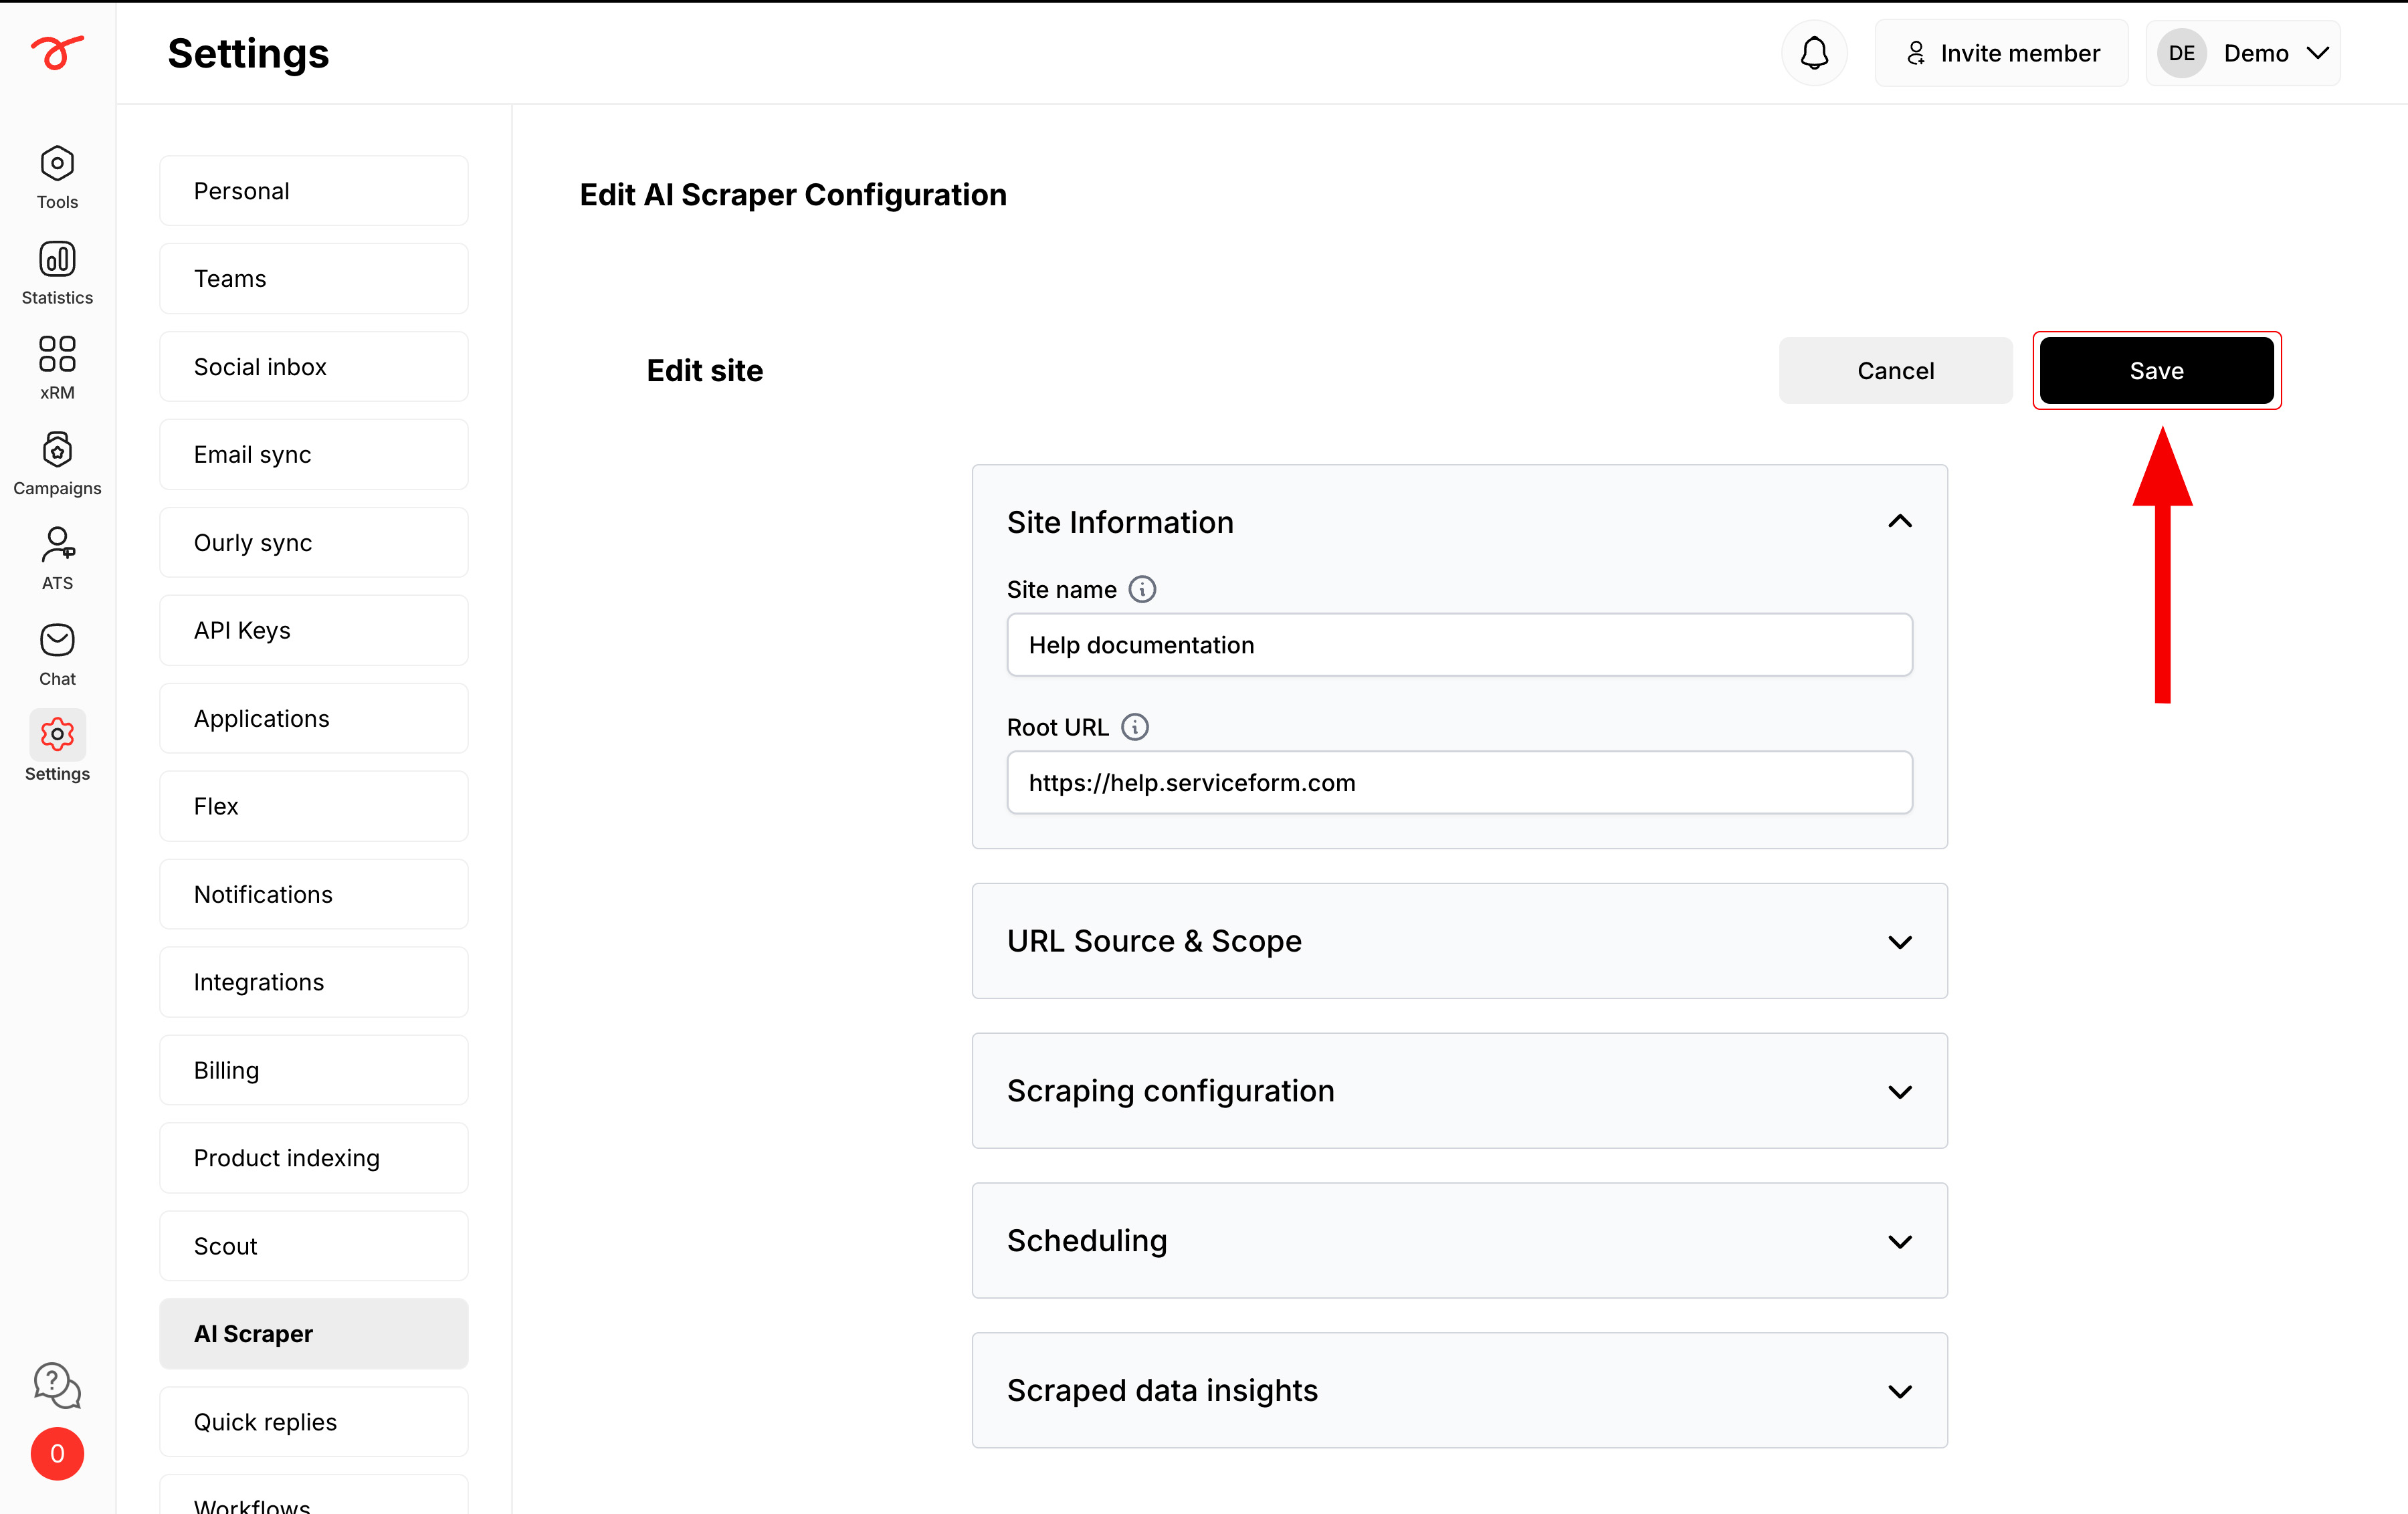
Now, Save and then Index Now to start scraping your data.
1. Save your configurations by clicking on Save.
2. Click Index now to start indexing.
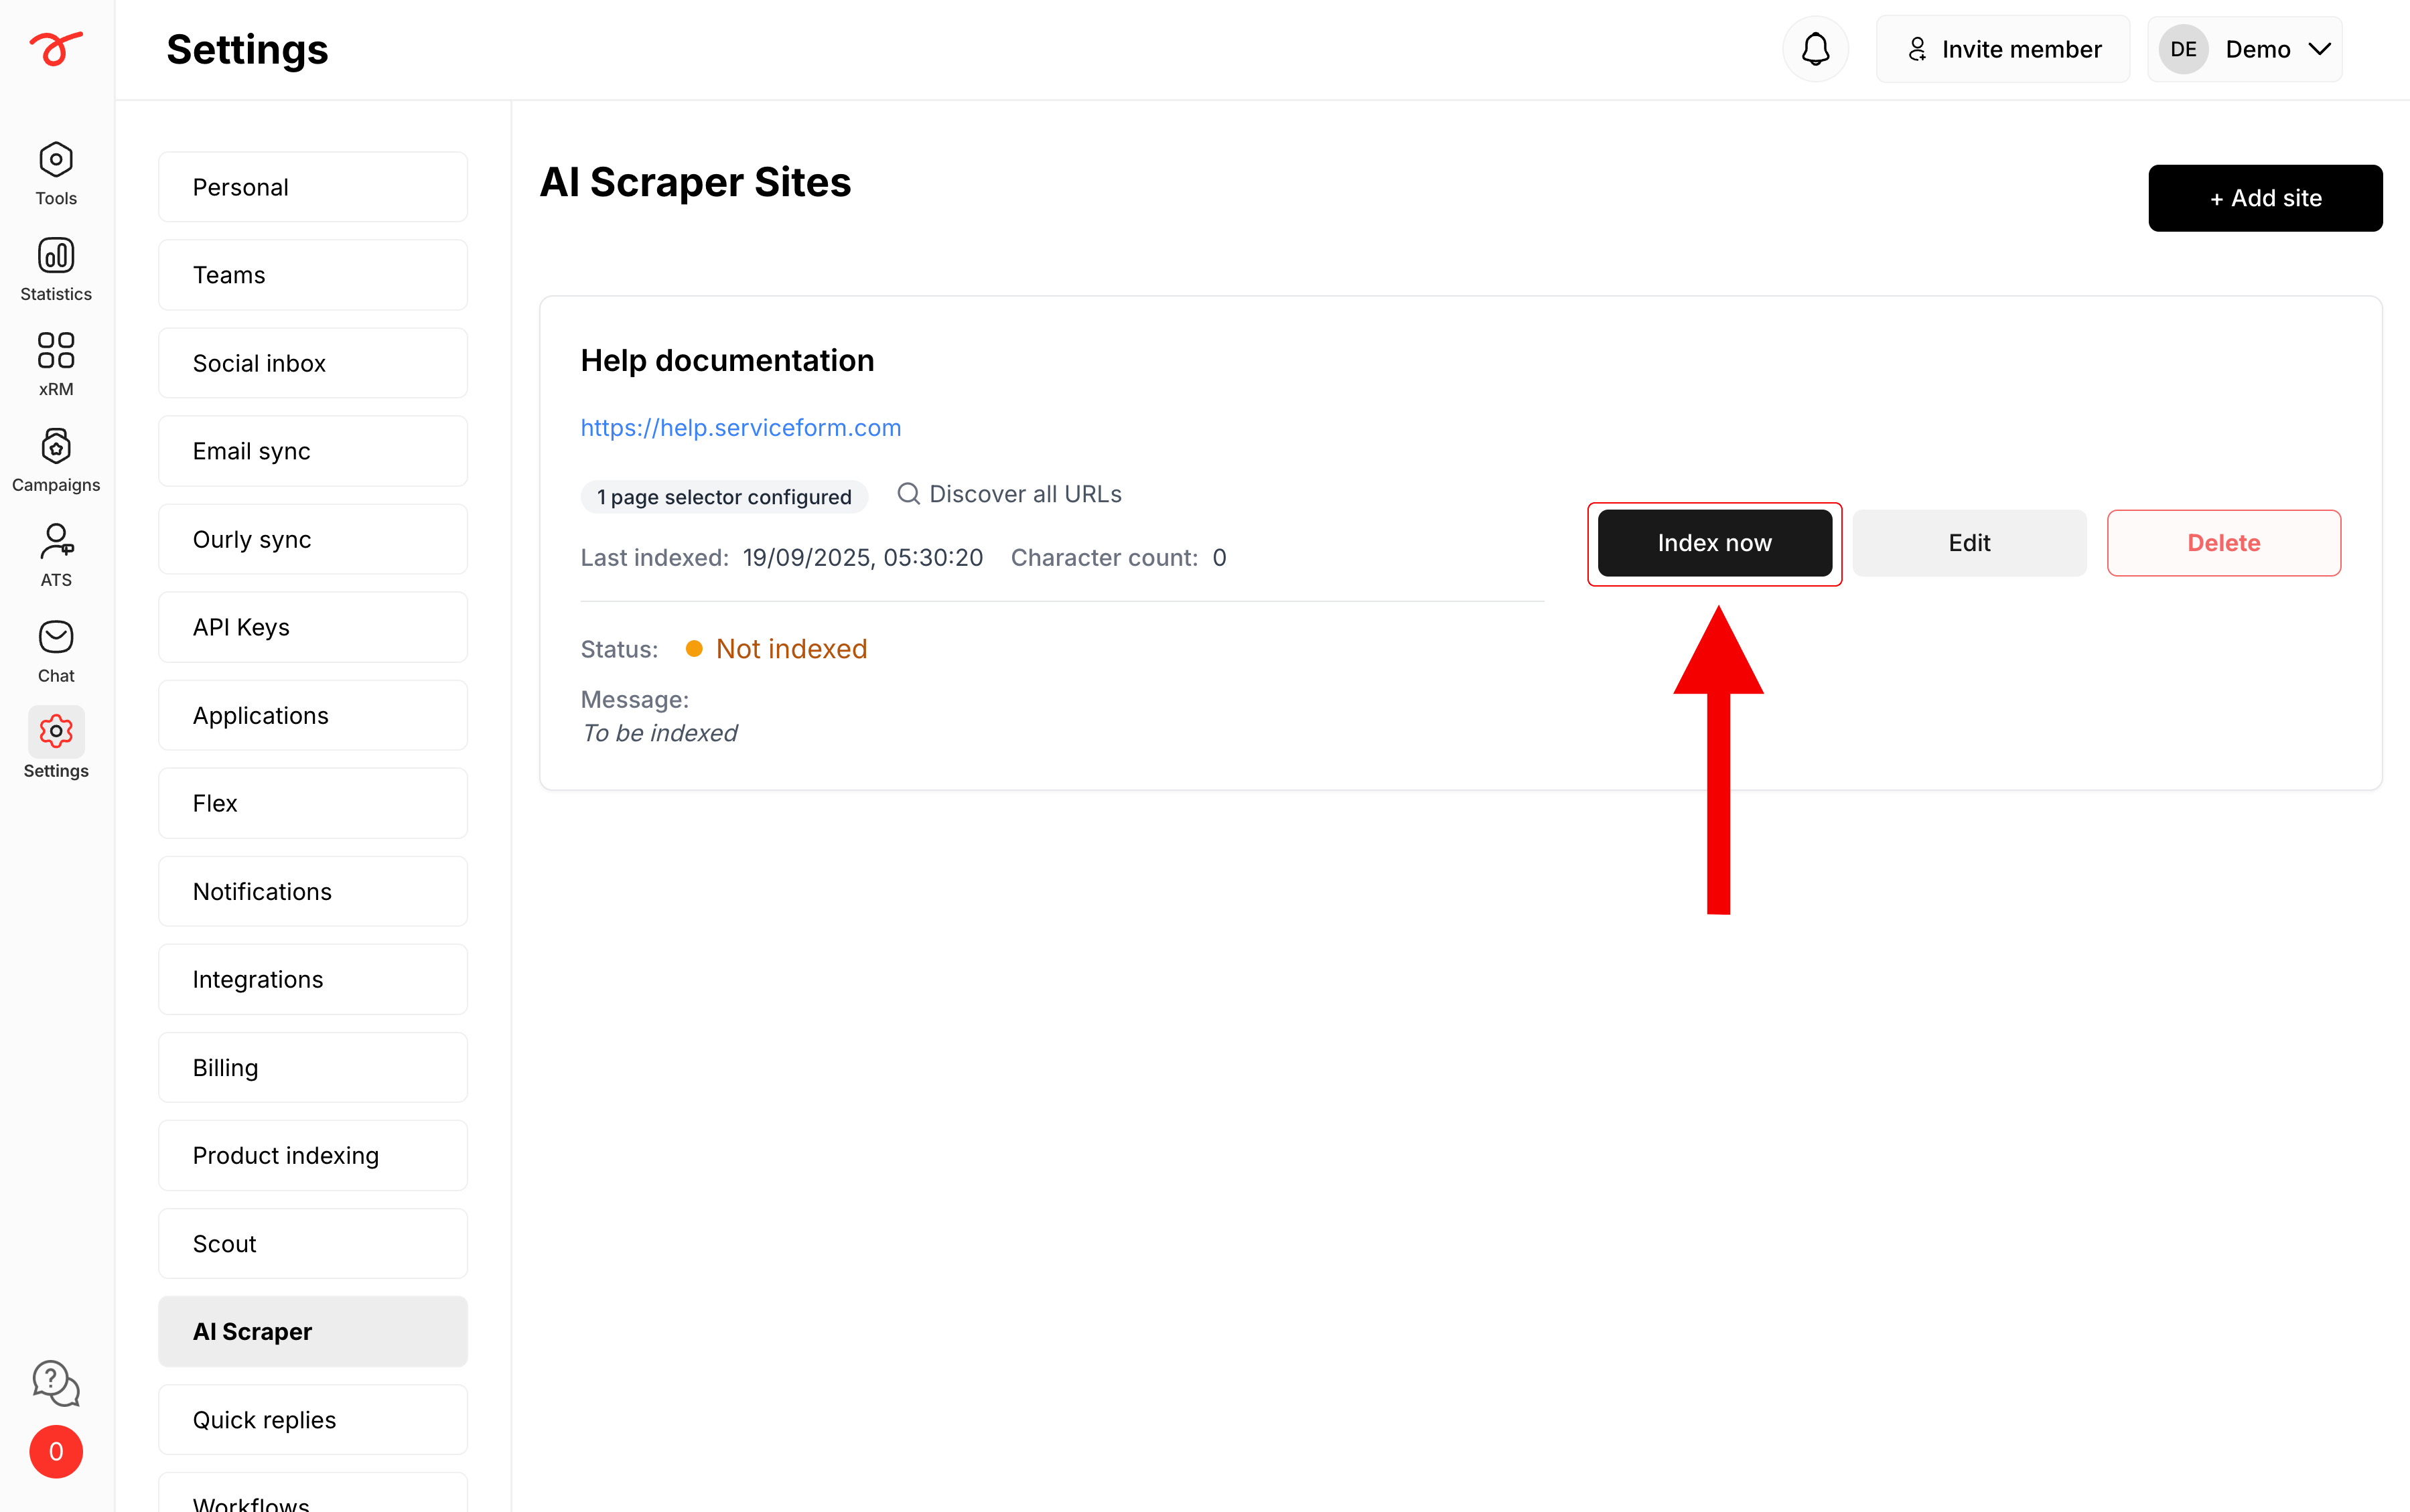
Note: Indexing might take some time depending on the size of your website, chosen configurations, and the amount of content to be scraped.
AI Playground
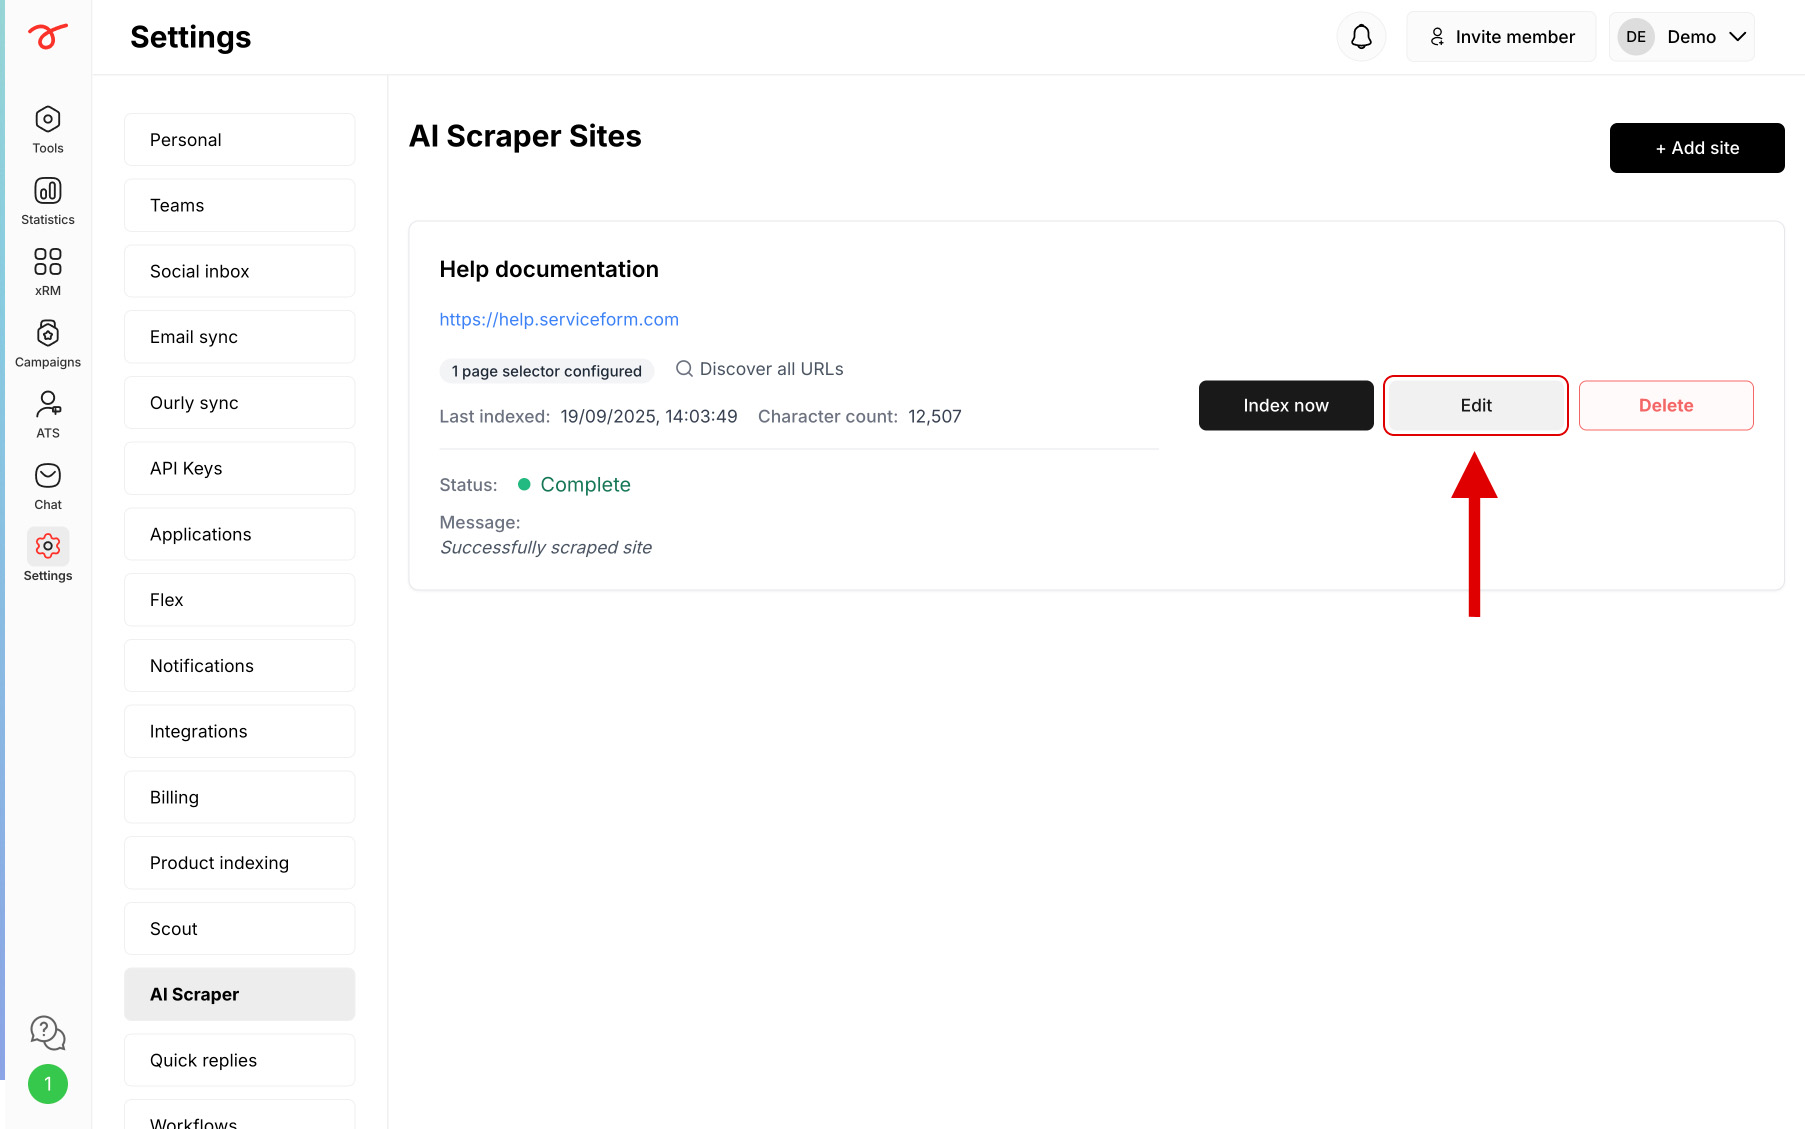
To test how the scraped data works with AI before connecting it to your chatbot, you can:
1. Click Edit.
2. Type your question in the text box under AI Playground.
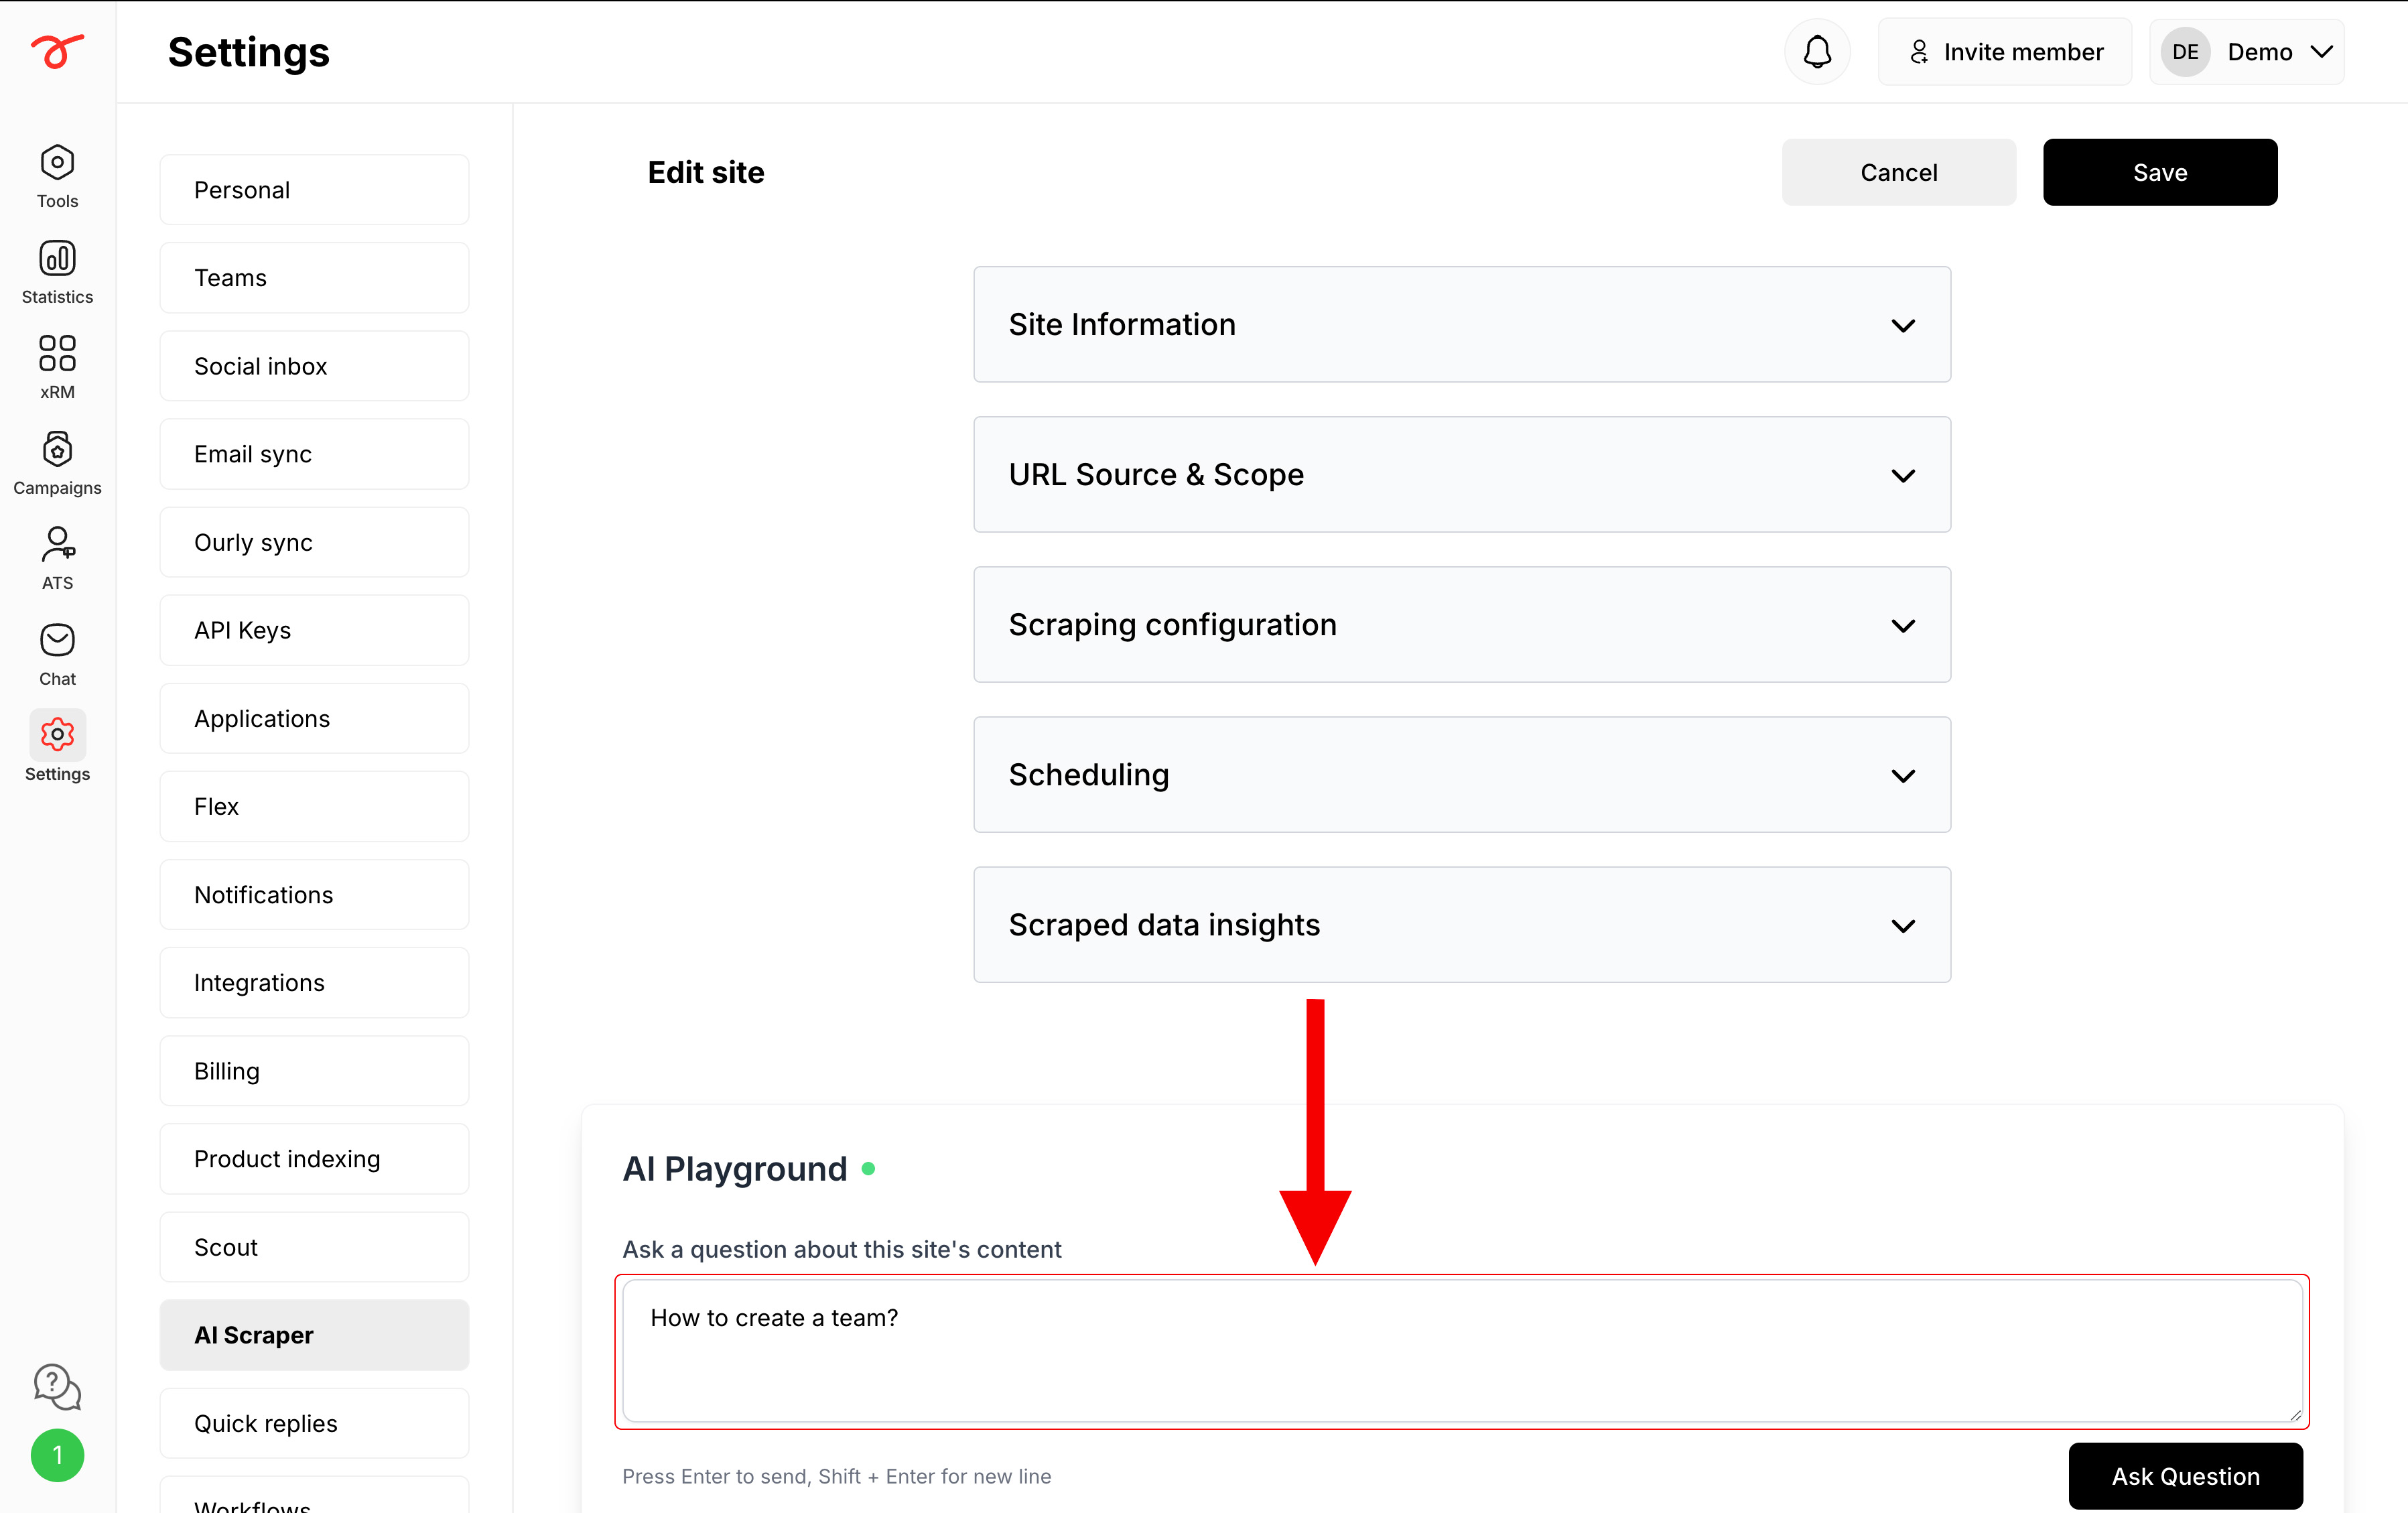
3. Press Enter or Ask Question to send (use Shift + Enter for a new line).
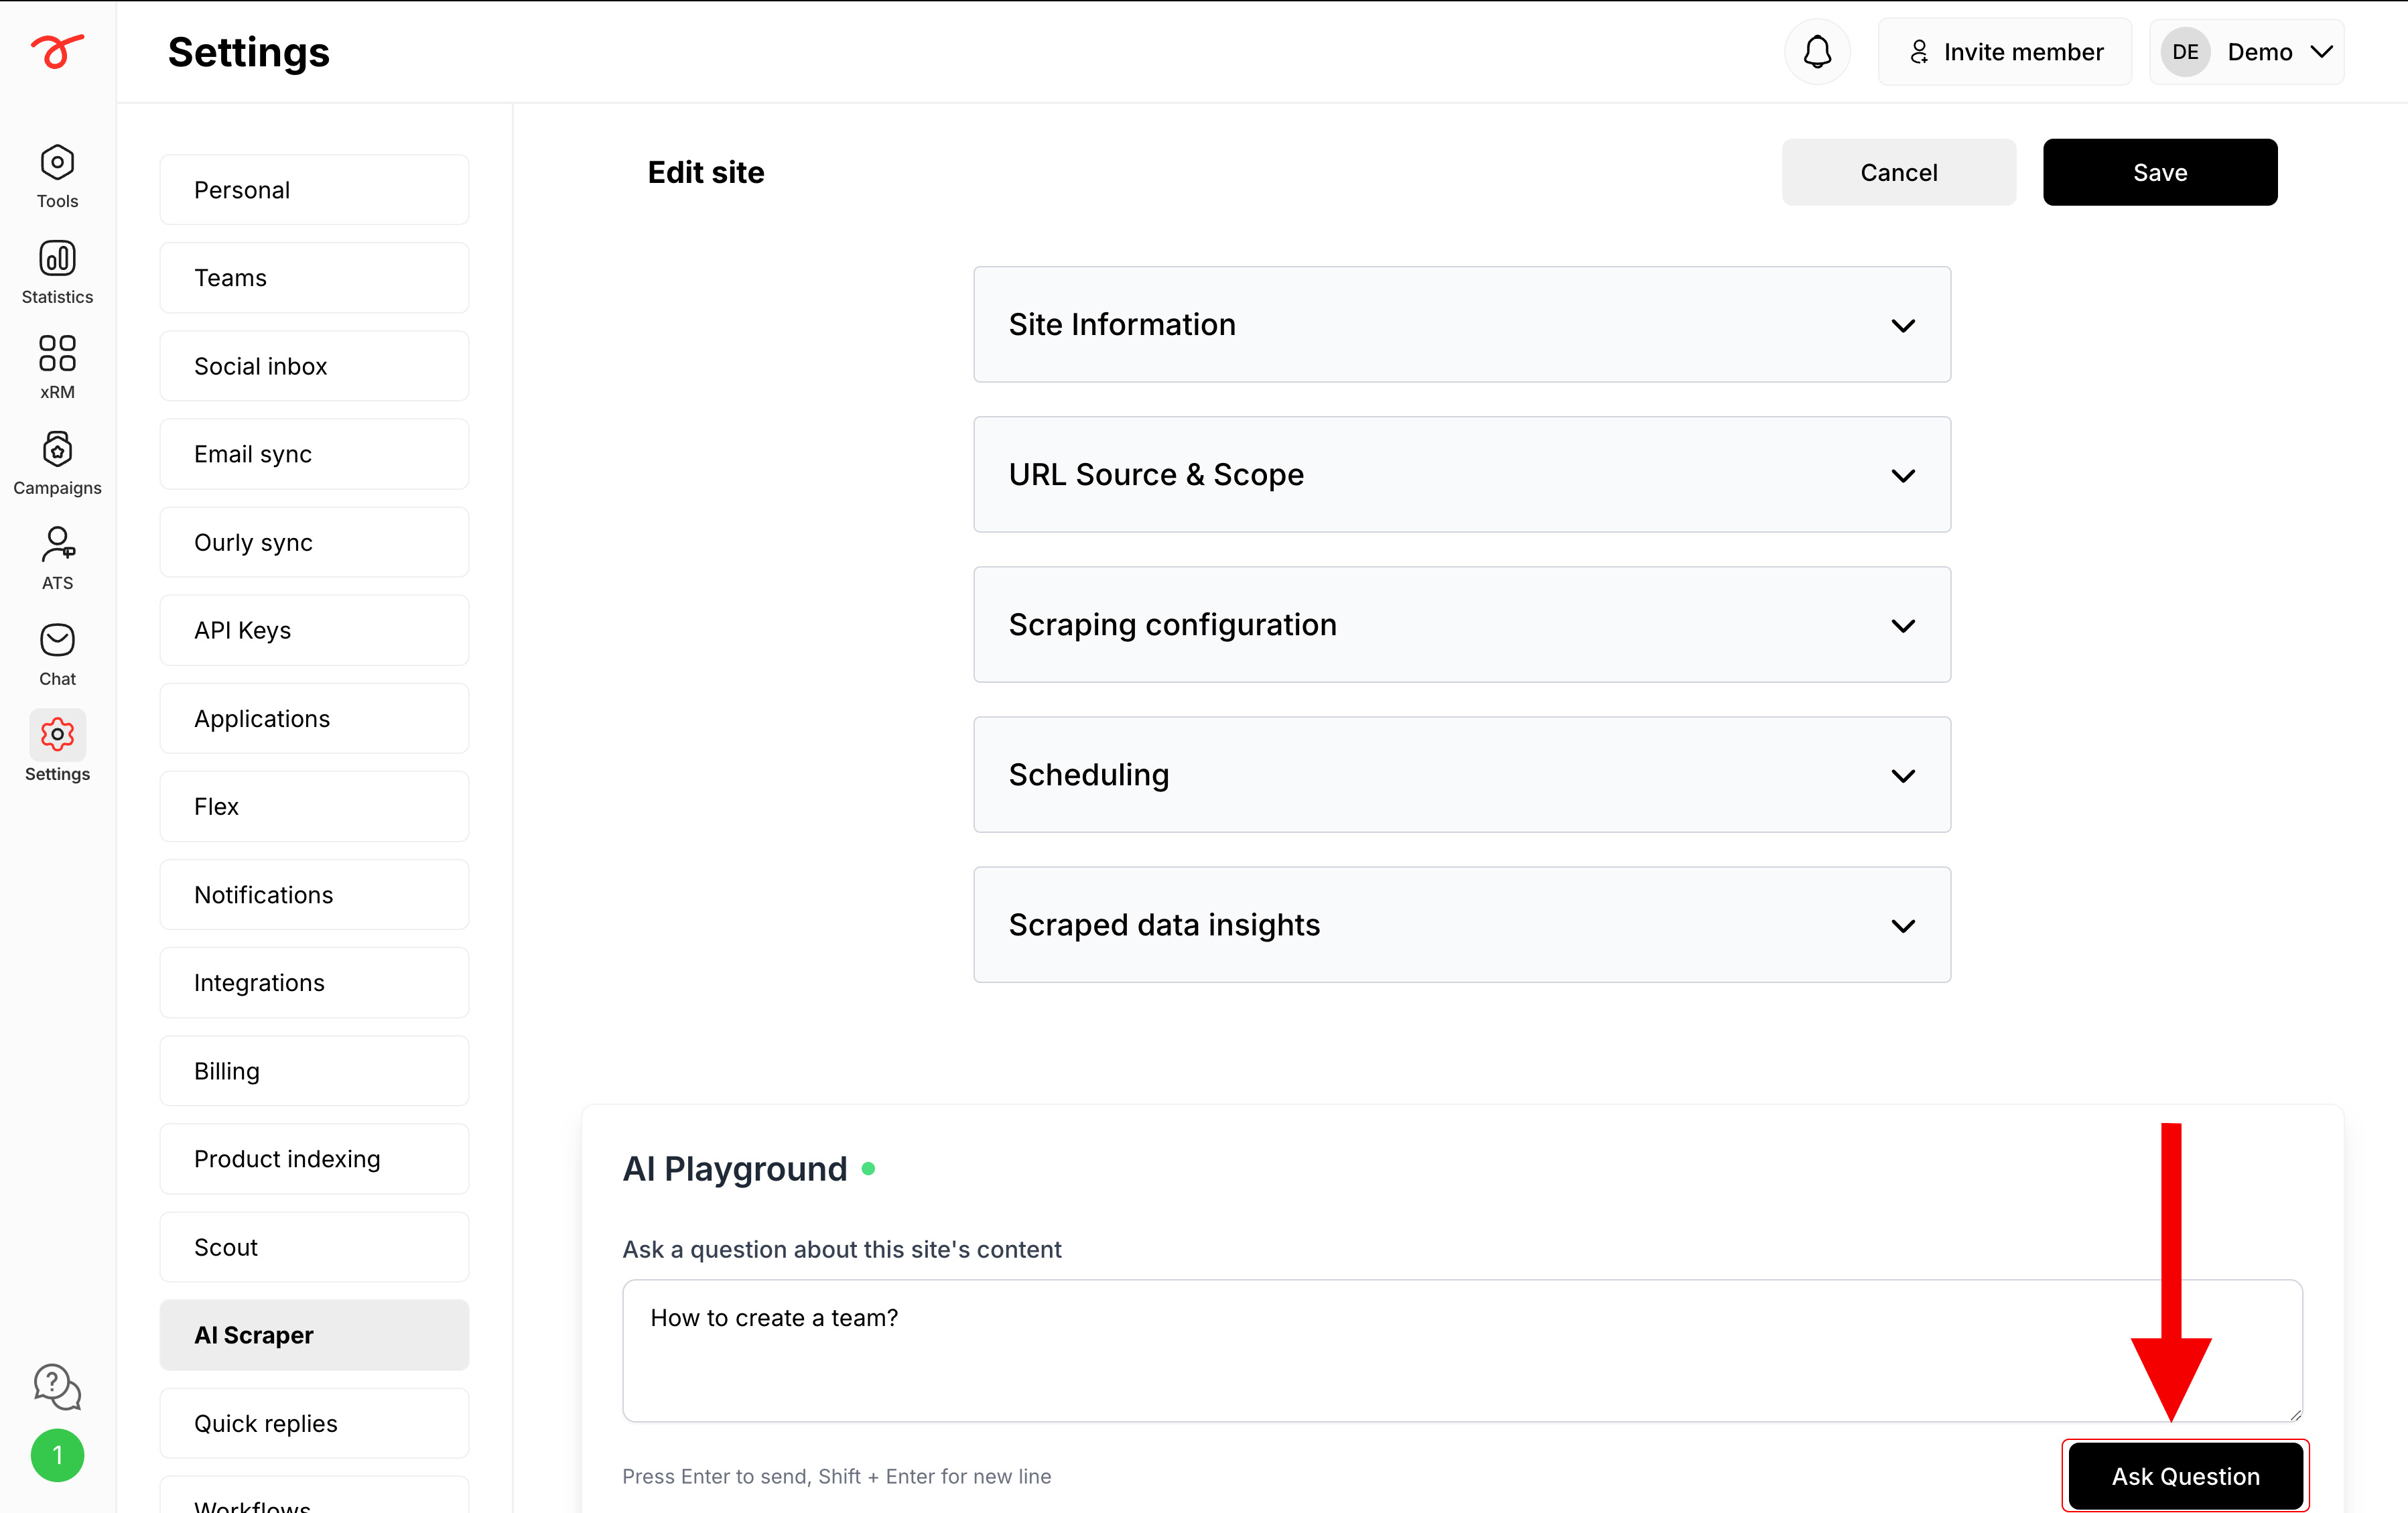
4. The AI (ChatGPT 4.1 mini) will generate an answer using the scraped data.
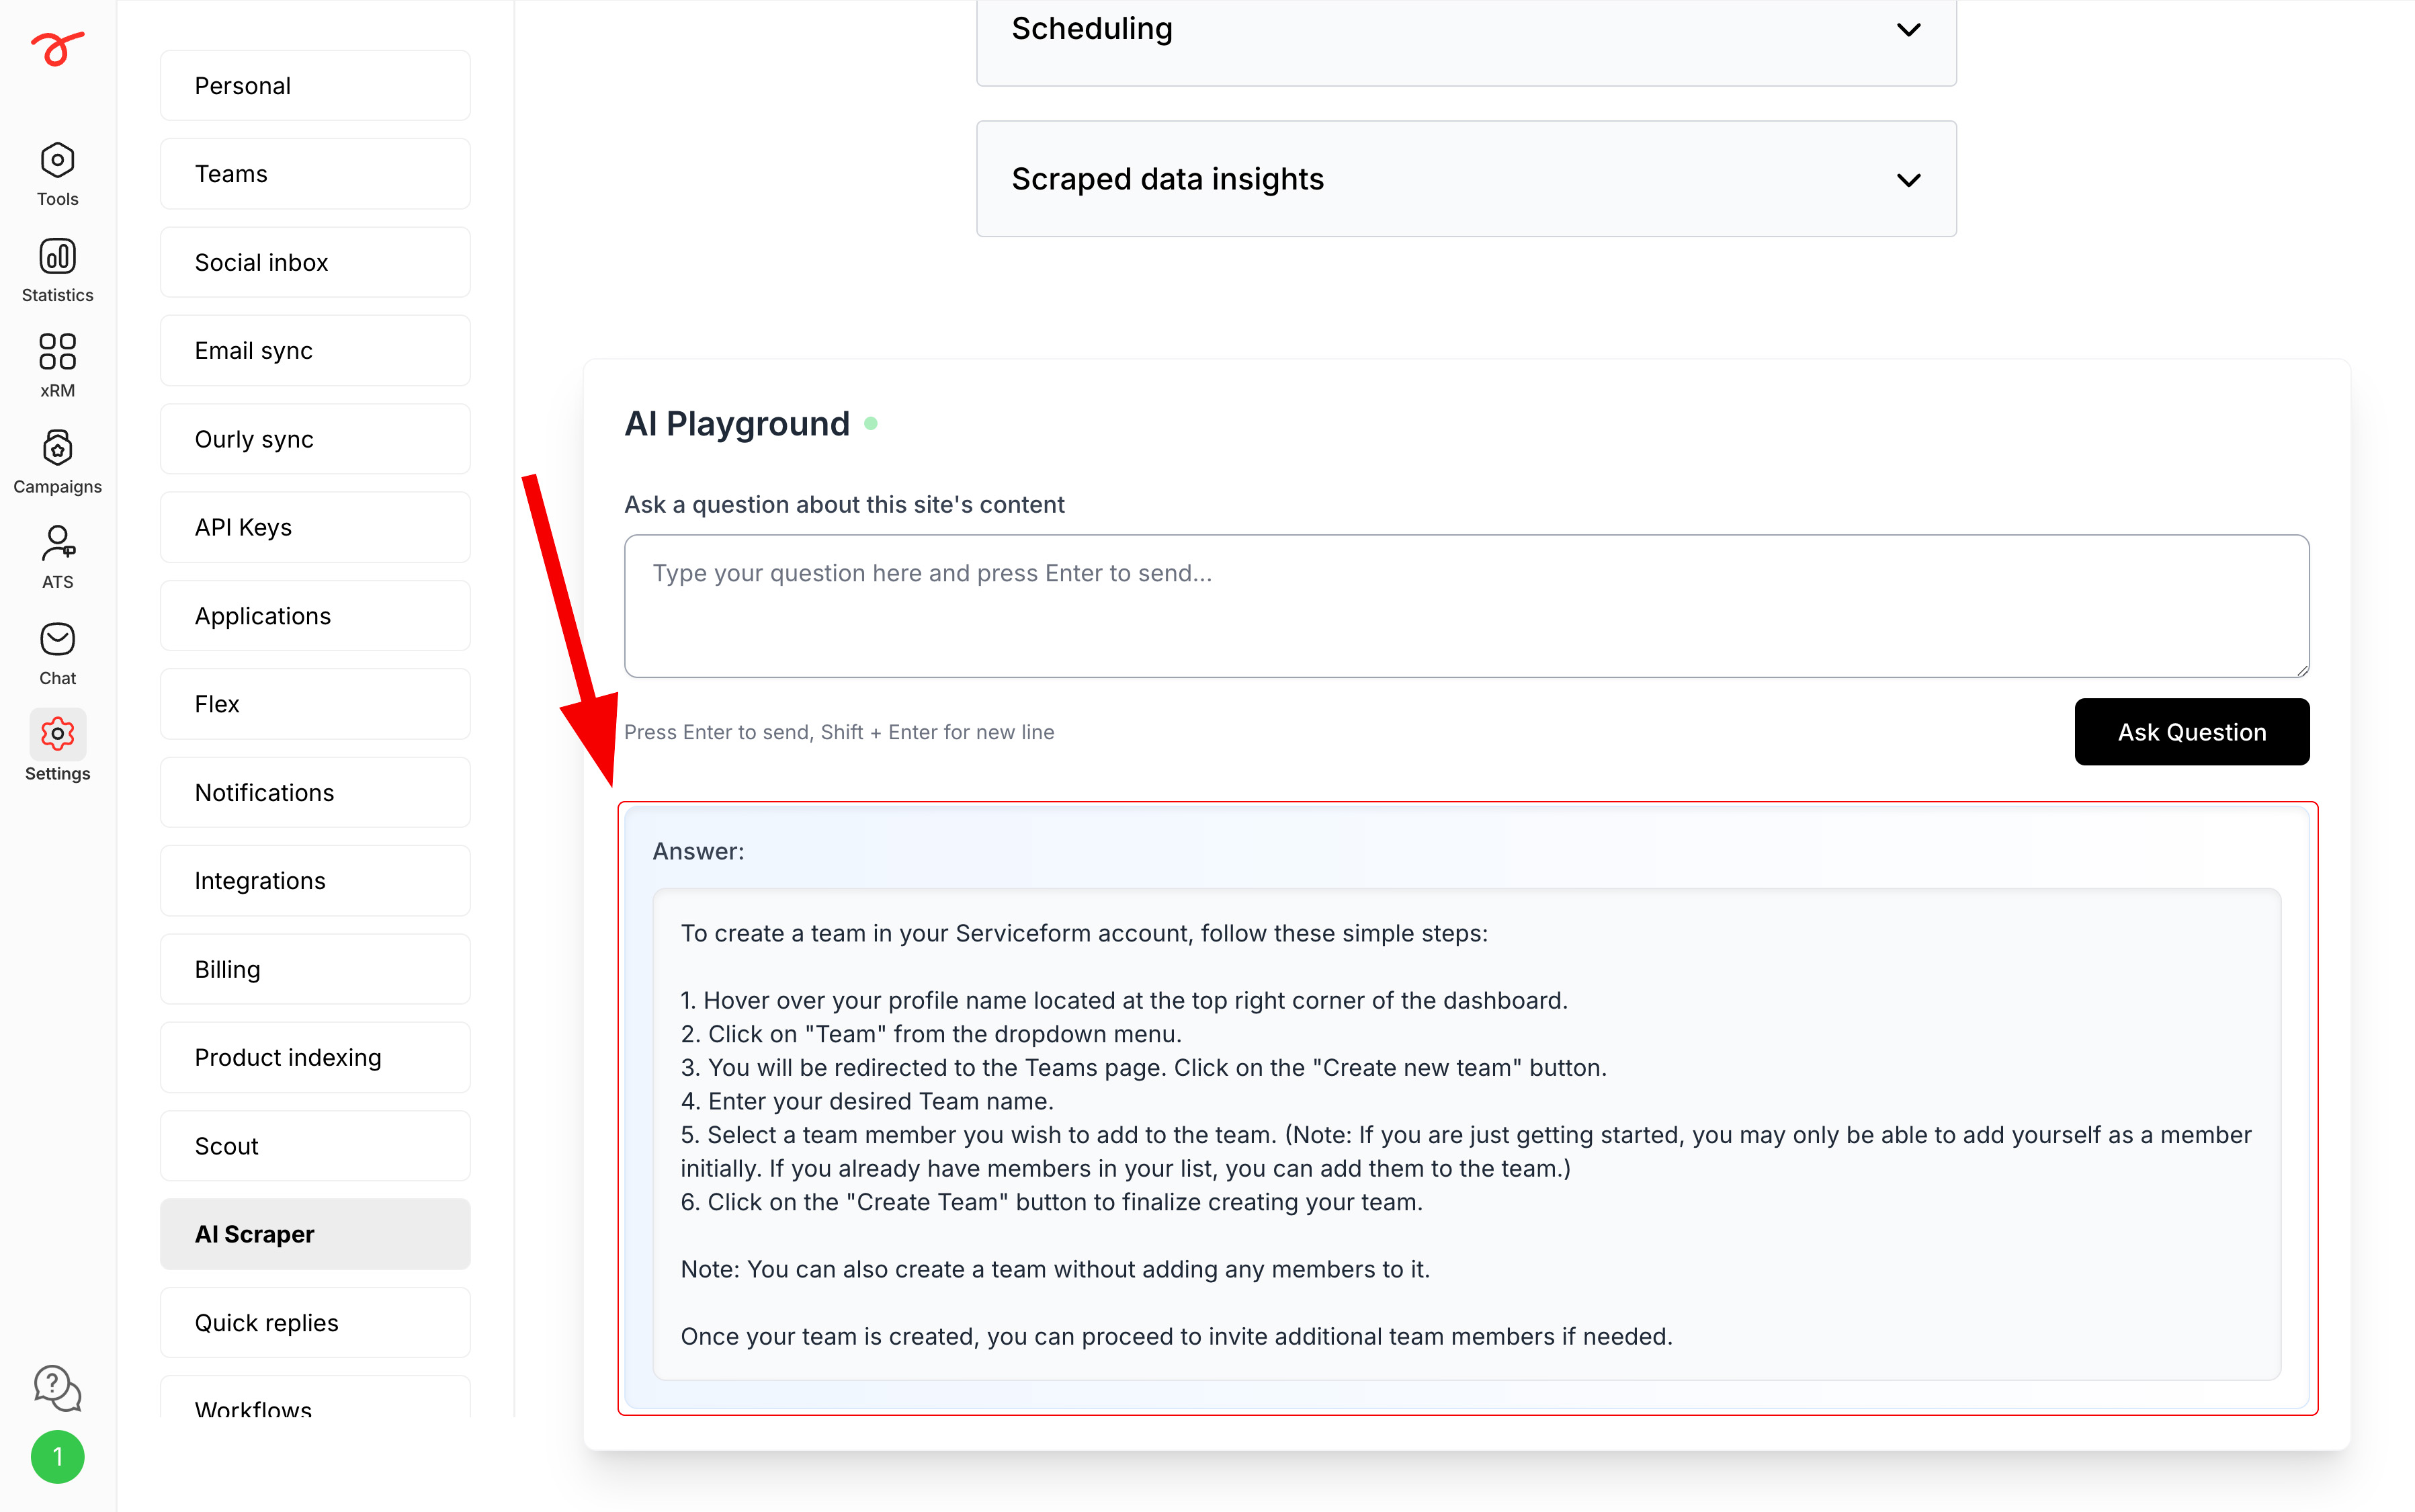
This feature helps you confirm that the right content has been scraped and understand how the AI interprets your site’s data.
Link the AI scraper
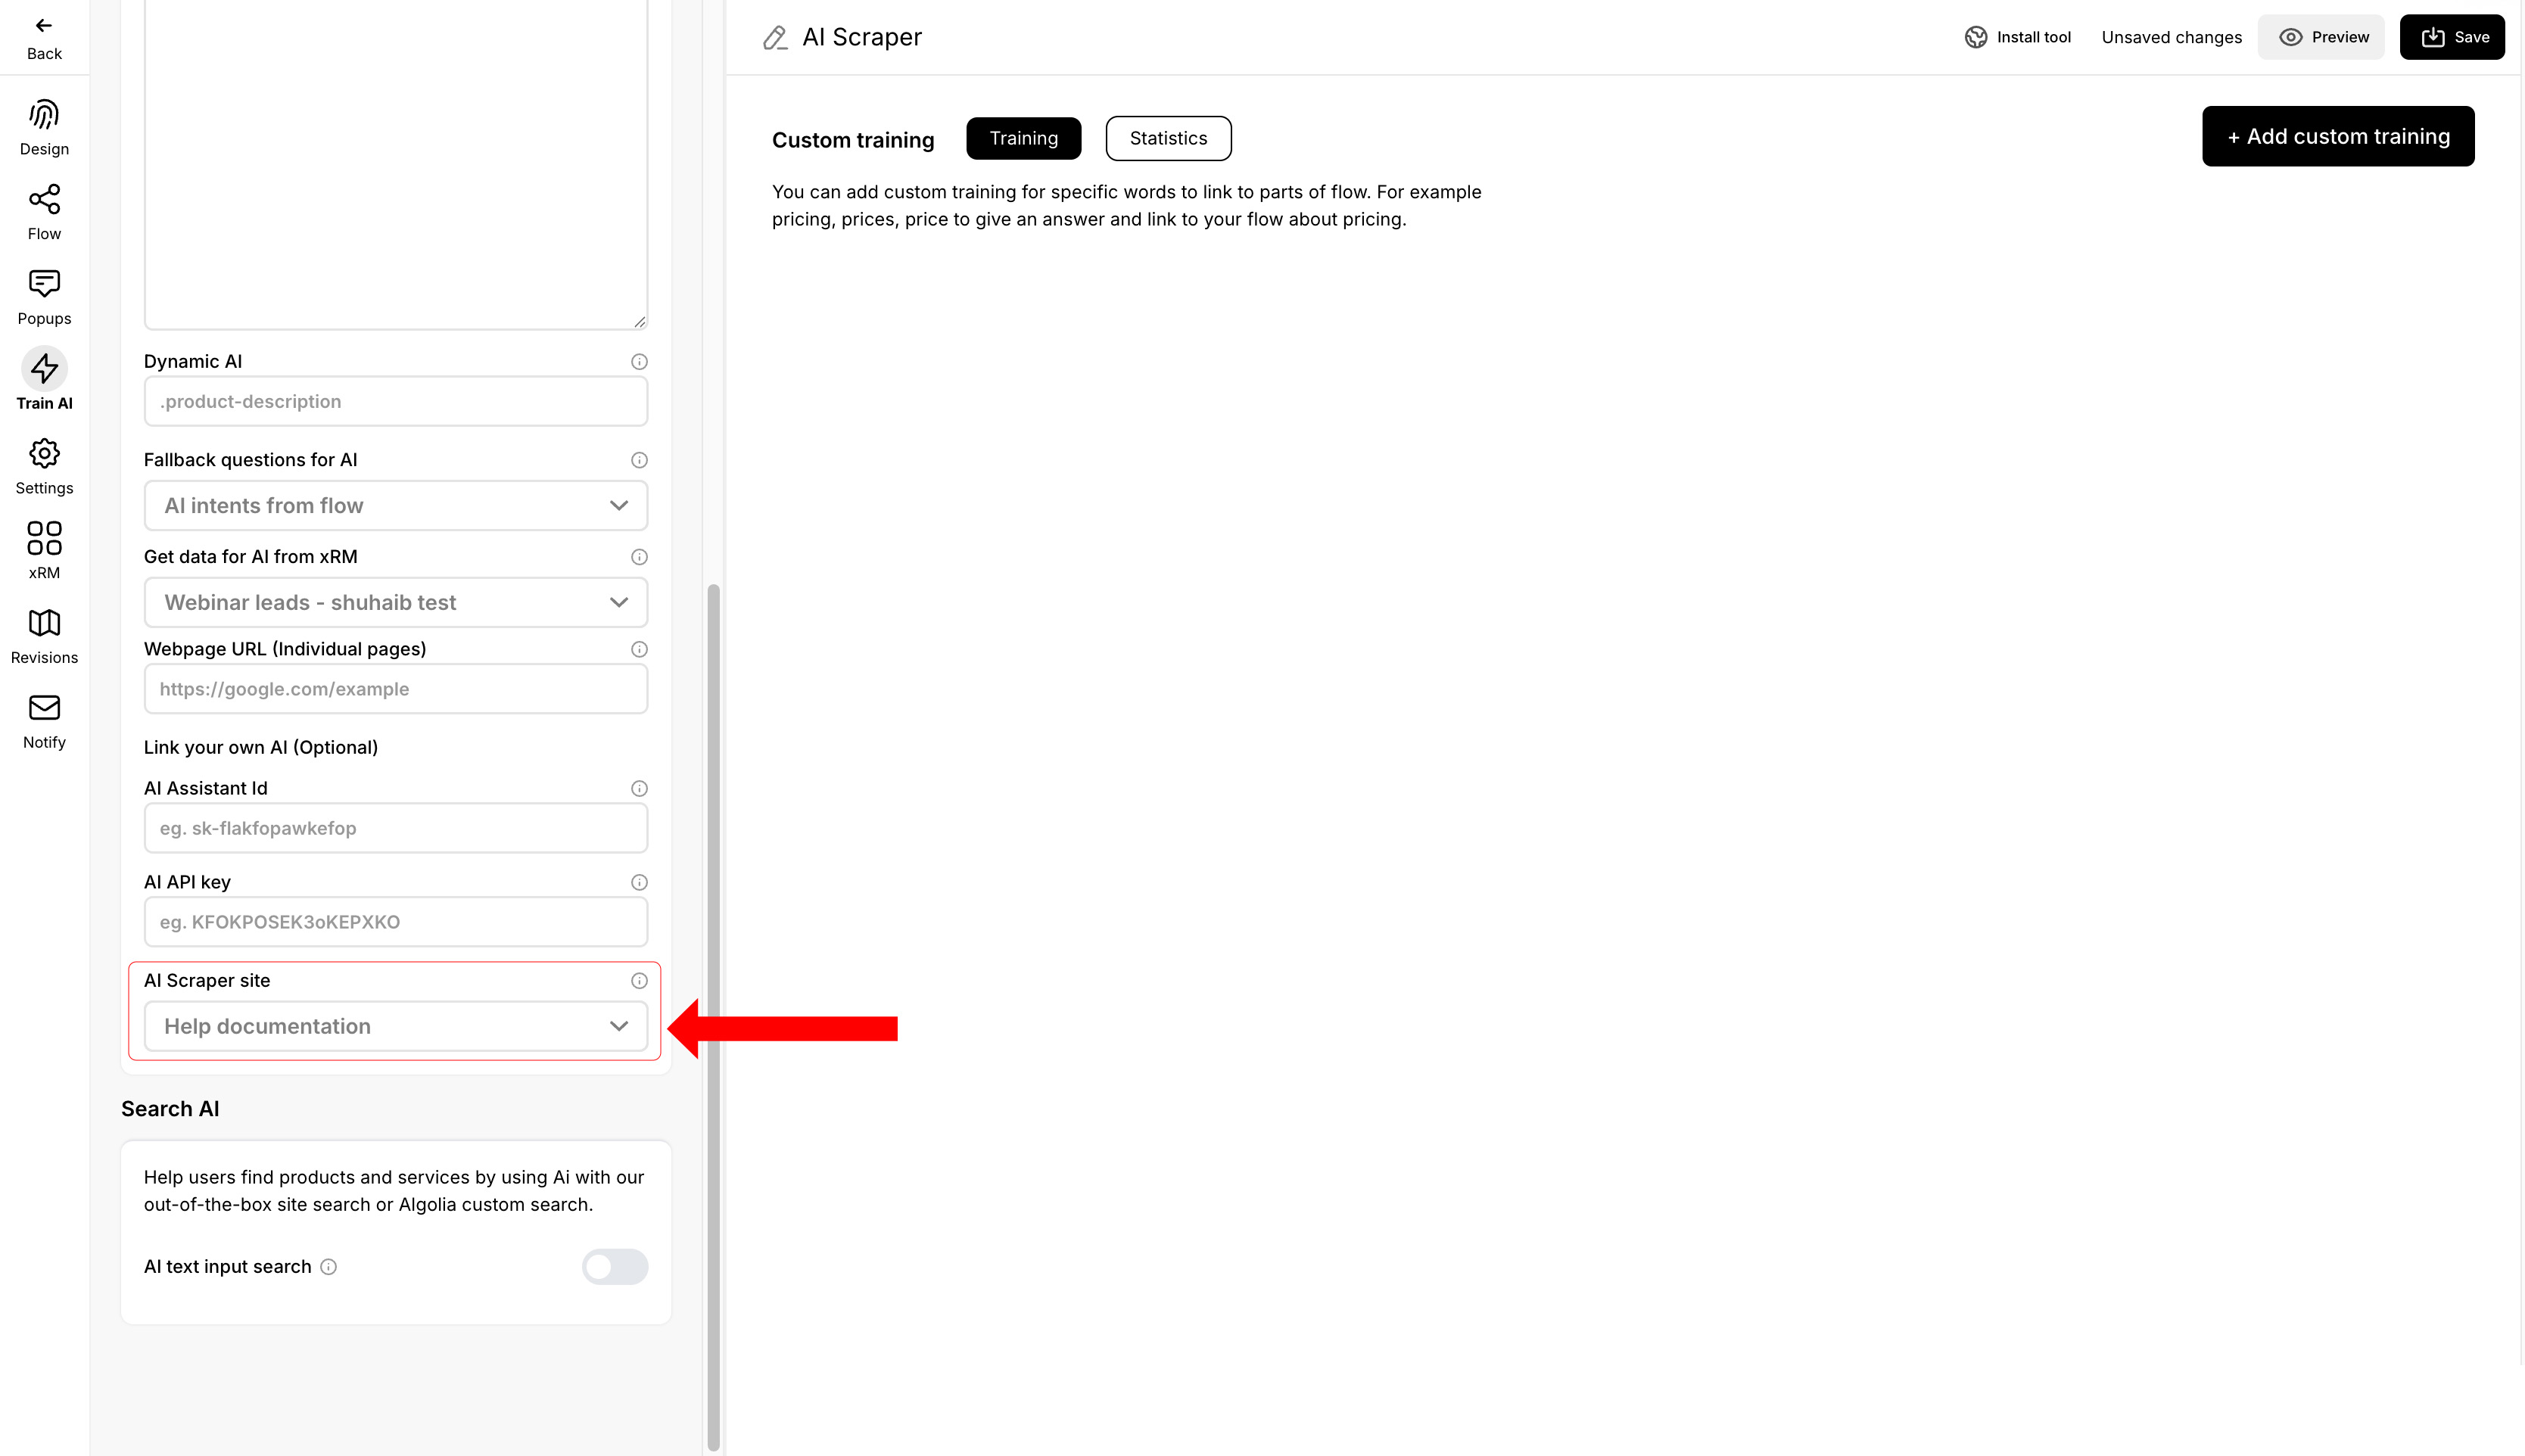
Once configured, AI Scraper can be linked to the AI Training section in the Tool Builder.
1. Navigate to the Tool builder -> Train AI. Enable the AI and select an AI model under AI Framework.
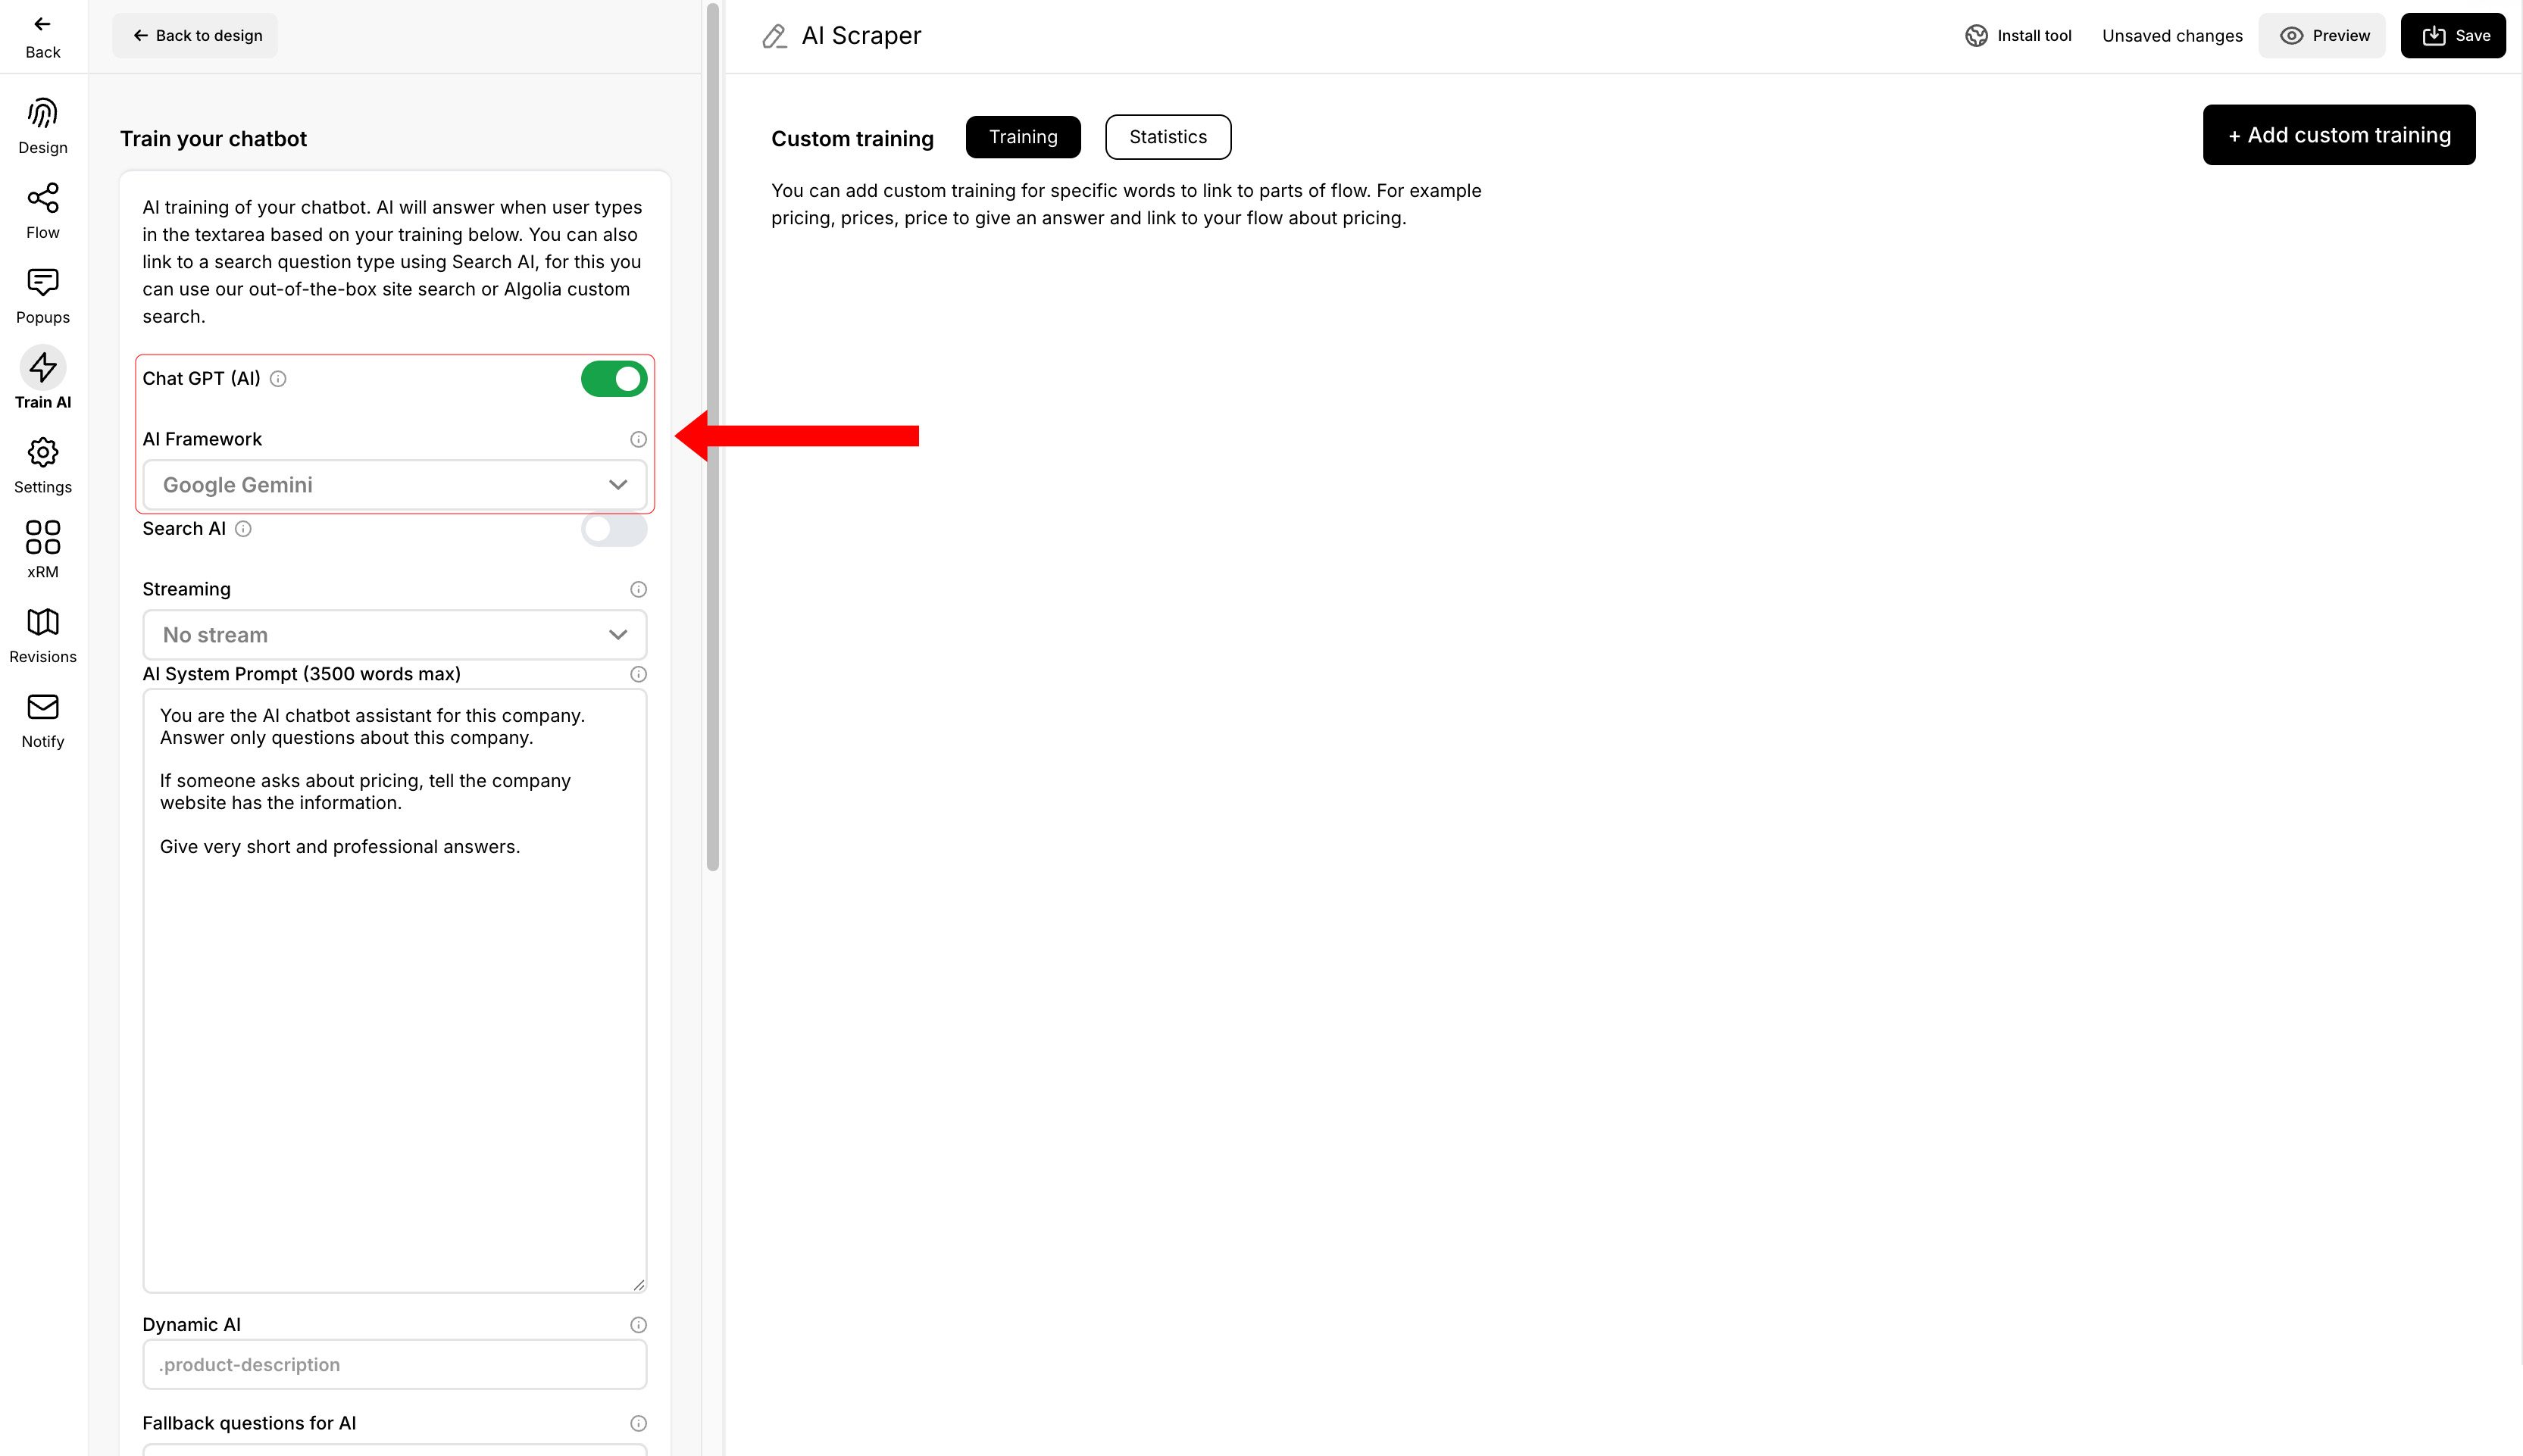
2. Select the indexed AI Scraper site.
Note: If the scraped characters exceed 300,000, the OpenAI ChatGPT model will be disabled in the AI Framework section, and Gemini will automatically be selected as the default option.
By leveraging AI Scraper, users can efficiently extract web content and train AI-powered bots to deliver dynamic and intelligent responses. Ensure to choose the right plan, manage character limits, and configure AI models for optimal results.